 Try lt Free
 Recovery success rate of up to
Among these, the recovery partition stands as a silent sentinel a hidden powerhouse tasked with system recovery in case of failure. But what happens when you’re looking to resize your disk, install a dual-boot setup, or repurpose a storage drive, only to find the recovery partition stubbornly in the way? You may need to move it a task that seems intimidating but is absolutely achievable with the right guidance.
What Is a Recovery Partition?
A recovery partition is a dedicated section of your hard drive that contains tools and files used for troubleshooting and restoring Windows in case the system becomes corrupted or unbootable. These partitions are usually created by the original equipment manufacturer (OEM) or during a clean Windows installation.
There are two main types:
OEM Recovery Partition: Provided by your PC manufacturer, often includes tools and files to restore your system to its factory state.
Windows Recovery Environment (WinRE) Partition: Contains the Windows Recovery Environment, used for advanced troubleshooting, reset, and repair.
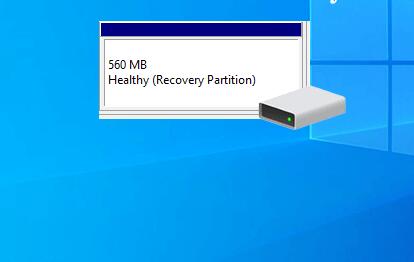
Typically, these partitions are small — between 500MB to 1GB — and marked as “Recovery” in Disk Management. They’re also hidden from File Explorer to prevent accidental deletion or modification.
Why Would You Move a Recovery Partition?
You might want to move a recovery partition for several reasons:
Resizing the main partition: If the recovery partition blocks unallocated space, you can’t extend your main partition without moving it.
Installing a dual-boot system: When setting up multiple OS installations, partitions may need to be rearranged for space or boot compatibility.
Migrating to a new drive: When cloning your disk to a new SSD or larger HDD, recovery partitions may not be optimally placed.
Creating a more logical layout: For power users or system administrators, a custom disk layout may necessitate shifting partitions.
Risks Involved
Before diving in, it’s important to understand the risks associated with moving a recovery partition:
Loss of recovery functionality: Moving or deleting the partition incorrectly could render recovery options unavailable.
System instability: If the system references an invalid recovery path, you may face issues during boot or recovery operations.
Data loss: As with any operation involving disk partitions, data loss is a possibility if things go wrong.
To mitigate these risks, we strongly recommend backing up your system before proceeding.
Step-by-Step: How to Move a Recovery Partition
Step 1: Prepare for the Move
A. Backup Your Data
Use Windows Backup and Restore, File History, or a third-party solution like Macrium Reflect or Acronis True Image to create a full image of your system. Include the recovery partition in this backup.
B. Check Your Disk Layout
Open Disk Management:
Press Windows + X and choose Disk Management.
Identify the recovery partition and take note of its location (e.g., Disk 0. Partition 3).
Check if it’s an OEM or WinRE partition by right-clicking > Properties > Volumes tab.
C. Disable BitLocker (If Applicable)
If you use BitLocker, it’s wise to suspend or disable it before manipulating partitions. Go to:
mathematica
Control Panel > System and Security > BitLocker Drive Encryption
Then click Suspend Protection for the drives involved.
Step 2: Create a Recovery Partition Backup
You’ll need to back up the recovery partition in case anything goes wrong. Here’s how to do it with DiskPart or a GUI tool:
Using Command Prompt:
Launch Command Prompt as Administrator.
Type:
pgsql
diskpart list disk select disk 0 (replace 0 with your disk number) list partition select partition # (replace # with your recovery partition number) assign letter=R (temporarily assign a letter) exit
Copy contents:
swift
xcopy R:\* X:\RecoveryBackup\ /H /K /O /X /Y /E
Replace X:\RecoveryBackup\ with your backup location.
Step 3: Delete the Old Recovery Partition
Once backed up, you can remove the recovery partition to make space for resizing or reallocation.
Open Disk Management again.
Right-click on the recovery partition and choose Delete Volume.
Confirm the deletion. It will now show as Unallocated space.
Step 4: Move or Resize Partitions (Optional)
Use a tool like MiniTool Partition Wizard, EaseUS Partition Master, or GParted (Linux-based) to rearrange your partitions.
Select the partition you want to move.
Drag and drop to the new position, or resize accordingly.
Apply the changes. The tool will often require a reboot.
Note: Windows Disk Management cannot move partitions — you need third-party software.
Step 5: Create a New Recovery Partition
After resizing and relocating other partitions, recreate the recovery partition:
In Disk Management, right-click Unallocated Space > New Simple Volume.
Assign a letter (e.g., R:).
Format as NTFS with a 500MB size (or match original size).
Label it Recovery.
Then, copy the contents back:
swift
复制编辑
xcopy X:\RecoveryBackup\* R:\ /H /K /O /X /Y /E
Step 6: Register the New Recovery Partition with Windows
If this is a WinRE partition, you need to reconfigure Windows to recognize the new location.
A. Use ReAgentC
Open Command Prompt as Administrator.
Disable current recovery setup:
bash
reagentc /disable
Set the new location:
bash
reagentc /setreimage /path R:\Recovery\WindowsRE
Adjust the path if necessary.
Enable recovery:
bash
reagentc /enable
Check status:
nginx
reagentc /info
If successful, it will show the new recovery partition path and state as enabled.
Troubleshooting Tips
Windows Recovery Not Working?
Ensure the folder structure (WindowsRE) is intact.
Verify the correct path was set with reagentc /setreimage.
Confirm that WinRE.wim exists in the path.
Partition Move Failed?
Use a bootable version of partition software if system files are locked.
Run a CHKDSK scan before and after moving partitions.
System Won’t Boot After Move?
Boot into a Windows installation media.
Choose Repair your computer > Troubleshoot > Startup Repair.
Best Practices and Pro Tips
Always backup before making changes. This can’t be emphasized enough.
Document original partition layout (screenshots or notes).
Use a bootable USB version of partition tools to avoid interference from active Windows processes.
If you don’t need OEM recovery, consider replacing it with a more flexible WinRE partition.
Store a copy of the recovery partition externally for long-term safety.
When to Seek Professional Help
If your disk contains critical business data, or if you’re uncomfortable working with partition tools, it’s best to consult a professional technician. Errors with disk partitioning can cause boot loops, data loss, or complete system failure if mishandled.
Alternatives to Moving the Recovery Partition
A. Delete and Create a Custom Recovery Drive
You can use a USB to serve as a recovery drive:
Go to Control Panel > Recovery > Create a recovery drive.
Follow the prompts and check Back up system files.
This lets you remove the internal recovery partition altogether.
B. Clean Install Windows
For older systems or OEM-heavy installs, a clean install with Windows installation media can give you more control over partitions. Be sure to save license keys and activation info.
Moving a recovery partition in Windows might sound like risky surgery on your operating system and in a way, it is. But with proper planning, the right tools, and a careful step-by-step approach, it can be done safely and effectively.
About us and this blog
Panda Assistant is built on the latest data recovery algorithms, ensuring that no file is too damaged, too lost, or too corrupted to be recovered.
Request a free quote
We believe that data recovery shouldn’t be a daunting task. That’s why we’ve designed Panda Assistant to be as easy to use as it is powerful. With a few clicks, you can initiate a scan, preview recoverable files, and restore your data all within a matter of minutes.
Subscribe to our newsletter!
More from our blog
See all posts


Recent Posts
- Retrieve deleted videos from sd card 2025-04-25
- How to retrieve damaged sd card? 2025-04-25
- Retrieve photos from sd card 2025-04-25