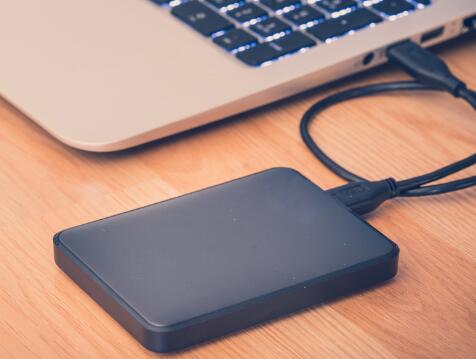
External hard drives are essential tools for data storage, backup, and transfer. However, it can be frustrating when you connect an external hard drive to your computer, and it doesn’t show up. There are several reasons for this issue, ranging from hardware problems to software or driver issues.
Common Reasons for an External Hard Drive Not Showing Up
1. Connection Issues
One of the most common reasons is a faulty connection. Check the following:
Loose or damaged cables: Inspect the USB cable for any visible damage or wear.
Faulty USB port: Try connecting the drive to a different USB port.
Insufficient power: Some drives require external power sources; ensure it’s connected properly.

2. Driver Problems
Outdated or missing drivers can prevent the drive from being recognized.
Corrupted drivers: This can happen due to software conflicts or updates.
Driver compatibility issues: The drive may not be compatible with the current OS drivers.
3. Partition Issues
If the drive is not formatted or the partition is corrupted, it may not appear in File Explorer.
Unallocated space: Drives without allocated partitions won’t show up.
Corrupted file system: This can render the drive unreadable.
4. File System Incompatibility
An external hard drive formatted with a file system incompatible with the operating system will not show up. For example, a drive formatted with HFS+ won’t be natively supported on Windows.
5. Power Management Settings
Certain power-saving settings can disable USB ports to conserve energy, making your drive invisible.
6. Hardware Failure
Physical damage or internal hardware issues, such as a failing disk, can cause the drive to be undetectable.
7. Virus or Malware
Malicious software can corrupt the drive’s file system or hide its partitions, making it seem invisible.
8. Operating System Glitches
Sometimes, the operating system may fail to detect connected devices due to temporary glitches or bugs.
Step-by-Step Solutions
Step 1: Check Hardware Connections
Inspect the USB cable for damage and replace it if necessary.
Connect the drive to a different USB port on your computer.
Try using the drive on another computer to rule out issues with the drive itself.
If the drive requires an external power source, ensure it’s plugged in securely.
Step 2: Verify Drive Detection in Disk Management
Press Win + X and select Disk Management.
Look for your external drive in the list of disks.
If it’s labeled as “Unallocated,” you’ll need to create a new partition.
If the file system is corrupted, you might need to format the drive (this will erase all data).
Step 3: Update or Reinstall Drivers
Press Win + X and select Device Manager.
Expand the Disk Drives or Universal Serial Bus controllers section.
Right-click on the external drive and choose Update driver.
If updating doesn’t work, uninstall the device and restart your computer. It will reinstall the driver automatically.
Step 4: Change Drive Letter
Open Disk Management.
Right-click on the external drive and select Change Drive Letter and Paths.
Assign a new drive letter that is not already in use.
Step 5: Disable USB Selective Suspend Setting
Open the Control Panel and go to Power Options.
Click on Change plan settings next to your active power plan.
Select Change advanced power settings.
Expand USB settings > USB selective suspend setting.
Set it to Disabled and click OK.
Step 6: Scan for Malware
Use a reputable antivirus program to scan your computer and the external drive.
Remove any detected threats and reconnect the drive.
Step 7: Reformat the Drive (As a Last Resort)
Backup important data using data recovery tools if the drive is partially accessible.
Open Disk Management.
Right-click on the drive and select Format.
Choose a compatible file system (e.g., NTFS for Windows, exFAT for compatibility).
Step 8: Check for Hardware Failure
If none of the above steps work, the drive might have a hardware issue. Contact the manufacturer or a data recovery specialist.
Preventive Measures
1. Handle Drives with Care
Avoid dropping or mishandling your external hard drives to prevent physical damage.
2. Regular Backups
Always maintain backups of critical data in multiple locations.
3. Keep Drivers Updated
Regularly update your operating system and device drivers to prevent compatibility issues.
4. Safely Eject Drives
Use the “Safely Remove Hardware” option to avoid file corruption or hardware issues.
5. Run Regular Antivirus Scans
Protect your system and external drives from malware by running regular scans.
6. Avoid Overloading USB Ports
Using multiple high-power devices on a single hub can cause power issues. Use a powered USB hub if needed.
When to Seek Professional Help
If your external hard drive still doesn’t show up after trying all the steps above, it might be time to consult a professional. Data recovery services can help retrieve valuable files if the drive has suffered physical or severe logical damage.
An external hard drive not showing up on your computer can be due to various reasons, from simple connection problems to more serious hardware failures. By systematically troubleshooting, you can often resolve the issue and regain access to your data. Regular maintenance and preventive measures can help avoid such problems in the future. Remember, if all else fails, professional data recovery services are there to help.
About us and this blog
Panda Assistant is built on the latest data recovery algorithms, ensuring that no file is too damaged, too lost, or too corrupted to be recovered.
Request a free quote
We believe that data recovery shouldn’t be a daunting task. That’s why we’ve designed Panda Assistant to be as easy to use as it is powerful. With a few clicks, you can initiate a scan, preview recoverable files, and restore your data all within a matter of minutes.

 Try lt Free
 Recovery success rate of up to


