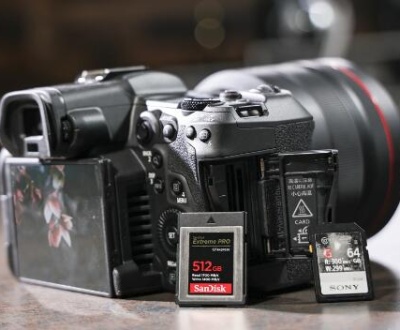
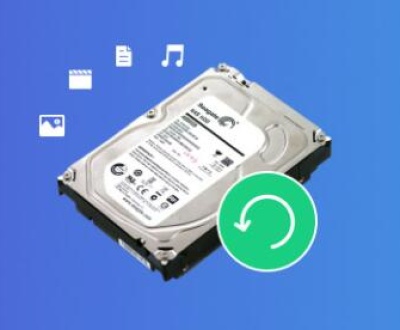
In the age of digital photography, losing photos can be a distressing experience. Whether due to accidental deletion, formatting, or device malfunction, there are various methods to recover deleted photos.
1. Photo Deletion
Before diving into recovery methods, it’s essential to understand how photo deletion works. When you delete a photo, it doesn’t disappear permanently. Instead, the system marks the space occupied by that photo as available for new data. Until new data overwrites this space, there’s a chance to recover the deleted file.
1.1 Types of Deletion
Soft Deletion: The file is moved to a temporary location (like the Recycle Bin on Windows or Trash on Mac) and can be easily restored.
Hard Deletion: The file is permanently deleted and not sent to the Recycle Bin or Trash.

2. Check Your Recycle Bin or Trash
2.1 Windows
Open Recycle Bin: Double-click the Recycle Bin icon on your desktop.
Search for Your Photos: Look through the files. If you find your deleted photos, right-click on them and select Restore.
2.2 Mac
Open Trash: Click on the Trash icon in the dock.
Search for Your Photos: Browse through the contents. Right-click on any photo you wish to restore and select Put Back.
3. Restore from Backup
3.1 Windows Backup
If you use Windows Backup, follow these steps:
Open Control Panel: Type Control Panel in the Windows search bar and open it.
Go to Backup and Restore: Click on System and Security, then select Backup and Restore.
Restore Files: Choose Restore my files and follow the prompts to recover your deleted photos.
3.2 macOS Time Machine
For Mac users, Time Machine is a built-in backup feature:
Connect the Backup Drive: If your Time Machine backups are on an external drive, connect it.
Enter Time Machine: Click the Time Machine icon in the menu bar and select Enter Time Machine.
Navigate to the Date: Use the timeline on the right to find the date before the photos were deleted.
Select and Restore: Find your deleted photos and click Restore.
4. Use Recovery Software
If the photos are not in the Recycle Bin/Trash and you don’t have a backup, recovery software can help.
4.1 For Windows
Panda Assistant is a cutting-edge data recovery software designed to help users effortlessly retrieve lost or deleted files from various storage devices. Whether you’ve accidentally deleted photos from your camera, lost important documents from your laptop, or need to recover files from a formatted SD card, Panda Assistant provides a reliable solution to regain access to your valuable data.
Key Features
User-Friendly Interface: Panda Assistant offers an intuitive interface that makes it easy for users of all skill levels to navigate the software. With a streamlined design, you can quickly start scanning for lost files without any technical knowledge.
Comprehensive File Recovery: This software supports recovery for a wide range of file types, including images, videos, documents, and more. It can retrieve files from various devices, including external hard drives, USB drives, memory cards, and internal hard drives.
Deep Scan Functionality: Panda Assistant features advanced scanning algorithms that can dig deep into your storage devices to locate lost files. This ensures a higher recovery rate, even in complex scenarios like formatted drives or drives with corrupted data.
Preview Before Recovery: One of the standout features of Panda Assistant is its ability to preview recoverable files before restoring them. This allows users to ensure they are recovering the correct files, saving time and effort.
Secure and Safe: Panda Assistant prioritizes user security. It does not overwrite existing data during the recovery process, ensuring that your original files remain intact and safe throughout the recovery.
Multi-Platform Support: Compatible with both Windows and macOS, Panda Assistant caters to a broad user base. Whether you’re a Windows enthusiast or a Mac user, you can benefit from its powerful recovery capabilities.
4.2 For macOS
PhotoRec: A free, open-source recovery tool that works well with various file systems.
Stellar Photo Recovery: A paid tool with a user-friendly interface designed for photo recovery.
4.3 Using Recovery Software: General Steps
Download and Install the Software: Make sure to install the software on a different drive to avoid overwriting the deleted files.
Launch the Program: Open the software and select the drive from which you want to recover photos.
Start the Scan: Click on the scan option (quick or deep scan).
Preview and Recover: After scanning, preview the recoverable files and select the photos you want to restore.
5. Check Cloud Storage
If you use cloud services, check if your photos were backed up automatically.
5.1 Google Photos
Open Google Photos: Sign in to your Google account and go to Google Photos.
Check Trash: Click on the Trash icon on the left panel. Photos remain here for 30 days before permanent deletion.
Restore Photos: Select the photos you want to recover and click Restore.
5.2 Apple iCloud
Visit iCloud.com: Sign in to your Apple ID.
Access Photos: Click on Photos to see if your deleted images are in the Recently Deleted folder.
Recover Photos: Select the photos and click Recover.
5.3 Dropbox or Other Cloud Services
Check your cloud storage account for any deleted files. Most services have a version history or recovery feature.
6. Check Social Media and Messaging Apps
Sometimes, photos are shared on social media or messaging apps. Check your account:
Facebook: Look in your albums or tagged photos.
WhatsApp: Check the media folder; photos sent or received are often saved in your gallery.
7. Explore File Recovery Options on Smartphones
If you deleted photos from your smartphone, there are specific methods to retrieve them.
7.1 Android Devices
Google Photos App: Open the app and go to the Trash. You can recover photos within 30 days.
File Manager: Some Android devices have a file manager with a recycle bin option.
7.2 iOS Devices
Photos App: Open the Photos app, go to Albums, and then Recently Deleted. You can recover photos within 30 days.
iCloud: Check iCloud for backups as described above.
7.3 Third-Party Recovery Apps
DiskDigger: A popular app for Android that can recover lost photos.
EaseUS MobiSaver: Allows recovery of deleted files from iOS devices.
8. Seek Professional Data Recovery Services
If you’ve exhausted all options and your photos are still missing, professional data recovery services might be your last resort.
8.1 When to Seek Help
Physical Damage: If your device is damaged (e.g., a broken hard drive or smartphone), professional help is necessary.
No Software Success: If recovery software fails to retrieve your files.
8.2 Finding a Reliable Service
Research: Look for local or online data recovery companies with good reviews.
Ask for Quotes: Get estimates to compare prices and services offered.
Check Success Rates: Choose a company with a high success rate for photo recovery.
9. Tips to Prevent Future Photo Loss
9.1 Regular Backups
External Drives: Keep regular backups of your important photos on external hard drives.
Cloud Storage: Use cloud services for automatic backups.
9.2 Be Cautious with Deletion
Double-check before Deleting: Always confirm before permanently deleting files.
Use Apps with Undo Features: Use photo management apps that offer undo options.
9.3 Avoid Overwriting Data
If you’ve deleted files, minimize the use of the device to prevent new data from overwriting the deleted photos.
About us and this blog
Panda Assistant is built on the latest data recovery algorithms, ensuring that no file is too damaged, too lost, or too corrupted to be recovered.
Request a free quote
We believe that data recovery shouldn’t be a daunting task. That’s why we’ve designed Panda Assistant to be as easy to use as it is powerful. With a few clicks, you can initiate a scan, preview recoverable files, and restore your data all within a matter of minutes.
Subscribe to our newsletter!
More from our blog
See all postsRecent Posts
- How to save tiktok videos on computer 2025-04-30
- How to watch gopro videos on computer 2025-04-30
- How to save video from blink video doorbell to computer? 2025-04-30

 Try lt Free
 Recovery success rate of up to


