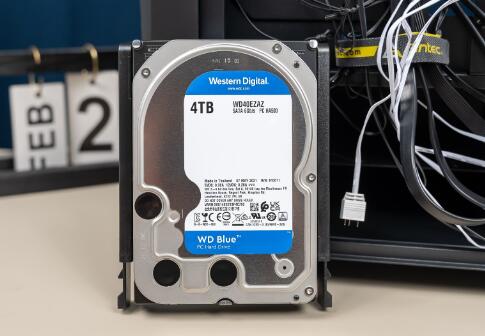
Modern digital storage is a cornerstone of today’s technological ecosystem. From personal files and family photos to massive data troves for businesses, hard drives serve as the backbone for our digital lives. Among the trusted names in this arena, Western Digital (WD) has long stood out for its reliable and high-capacity drives. However, even the most dependable hardware can experience issues that leave users puzzled and one of the more frustrating scenarios involves a 4TB WD hard drive that only shows or uses 2TB of its full capacity.
At first glance, it might seem like a manufacturing defect or a hardware failure, but the root cause of this issue is often more technical and nuanced. The discrepancy can arise from limitations in partitioning schemes, file systems, formatting errors, outdated drivers, operating system constraints, or even how BIOS or UEFI interprets the disk. This problem is especially common when users are migrating from older systems or operating systems that aren’t equipped to handle disks larger than 2TB.

Part 1: 2TB Limitation
1.1 Legacy MBR vs. GPT Partition Tables
The most common culprit is the type of partitioning scheme used:
MBR (Master Boot Record): This is an older standard that can only address up to 2.2TB of disk space. If you initialize your drive using MBR, the operating system can’t see anything beyond the 2TB boundary.
GPT (GUID Partition Table): The modern replacement for MBR, GPT supports drives larger than 2TB, and is required if you want to use the full capacity of a 4TB or larger drive.
Many users, especially those using older systems or cloning from older disks, inadvertently initialize their 4TB drives using MBR, leading to the capacity shortfall.
1.2 Operating System Limitations
Older operating systems, particularly:
Windows XP (32-bit)
Early versions of macOS (pre-10.6.5)
Linux kernels prior to 2.6.31
…may not support GPT or large capacity drives properly. Even modern systems can experience issues if critical updates or drivers are missing.
1.3 BIOS vs. UEFI
Legacy BIOS systems may not work correctly with GPT drives unless booted in UEFI mode. When trying to use a GPT-initialized drive with BIOS in legacy mode, users often encounter compatibility issues, which might include partition visibility problems.
1.4 File System Constraints
Another limitation can occur with certain file systems:
FAT32 has a file size limit of 4GB and generally doesn’t support partitions larger than 2TB.
exFAT, NTFS (Windows), APFS (macOS), and ext4 (Linux) all support large partitions, and should be used with 4TB drives.
Part 2: Diagnosing the Problem
Before rushing to format or make changes, it’s important to diagnose the problem properly:
2.1 Check Disk Management (Windows)
Press Windows + X and select Disk Management.
Find your 4TB WD drive.
Look at the partition map and capacity. Does it say 2048 GB Unallocated?
Check the partition style by right-clicking on the disk label (e.g., “Disk 1”) and selecting Properties > Volumes.
If the partition style is MBR, that’s likely the problem.
2.2 Use Command Line Tools
Windows:
Open Command Prompt as Administrator and type:
bash
复制编辑
diskpart list disk
Look for an asterisk (*) under GPT. If the asterisk is missing, the disk is MBR.
Linux:
bash
sudo fdisk -l
It will show whether the drive is using MBR or GPT and how much space is recognized.
macOS:
bash
diskutil list
This will display all mounted drives and partitions.
Part 3: Solutions for Windows Users
3.1 Backup Important Data
If there is any data on the disk, back it up now. Converting from MBR to GPT or formatting can erase data.
3.2 Convert MBR to GPT (Non-Destructive Using Windows 10+)
If you are running Windows 10 version 1703 or later, you can use the mbr2gpt tool:
bash
mbr2gpt /convert /allowFullOS
Steps:
Open Command Prompt as Administrator.
Type mbr2gpt /validate to check compatibility.
Then type mbr2gpt /convert /allowFullOS.
Reboot after the conversion.
3.3 Use Disk Management to Re-Partition with GPT
If the drive is empty or you’ve backed it up:
Open Disk Management.
Right-click the disk (not the partition, but where it says “Disk 1”).
Select Convert to GPT Disk.
Then create a new volume using all available space.
3.4 Use Third-Party Tools
If Windows tools aren’t working, try:
MiniTool Partition Wizard
AOMEI Partition Assistant
EaseUS Partition Master
These allow you to manage partitions more flexibly and even convert MBR to GPT without data loss (though always back up just in case).
Part 4: Solutions for macOS Users
4.1 Use Disk Utility
Open Disk Utility.
Select the WD drive.
Click Erase.
Choose:
Format: APFS or Mac OS Extended (Journaled)
Scheme: GUID Partition Map
Click Erase to apply the changes.
4.2 Use Terminal
You can use diskutil in Terminal:
bash
diskutil eraseDisk JHFS+ “MyWDDrive” GPT /dev/diskX
Replace diskX with the identifier for your disk.
Part 5: Solutions for Linux Users
5.1 Use GParted
Install GParted (if not already installed):
bash
sudo apt install gparted
Steps:
Launch GParted.
Select the WD drive.
Unmount any partitions.
Go to Device > Create Partition Table and choose gpt.
Create a new ext4 or exFAT partition using full space.
5.2 Use Command Line with gdisk
bash
sudo gdisk /dev/sdX
Use o to create a new GPT table, then n to add a new partition.
Part 6: What If It Still Doesn’t Work?
6.1 Update Your Drivers
In Windows:
Go to Device Manager.
Expand Disk drives.
Right-click your WD drive and choose Update driver.
Also check for motherboard/chipset driver updates from your PC/motherboard manufacturer.
6.2 Update BIOS/UEFI Firmware
Visit the manufacturer’s website for your motherboard or laptop and check for BIOS/UEFI updates that include storage compatibility improvements.
6.3 WD Utilities
Western Digital provides a tool called WD Drive Utilities. Download it from WD’s website and use it to diagnose or reformat the drive.
Part 7: Preventing the Issue in the Future
7.1 Initialize Drives Correctly
Always initialize large drives with GPT, especially those larger than 2TB.
7.2 Avoid Cloning from Older Drives
Cloning from older MBR-initialized drives to newer ones can carry over legacy partition styles. Instead, use imaging software that allows custom partitioning, or set up the new drive manually.
7.3 Use Modern Operating Systems
Ensure your OS supports large drives and GPT. For Windows, Windows 10+ is best. On macOS, anything newer than 10.6.5 works well.
7.4 Keep Your System Updated
Operating system and driver updates often fix underlying bugs or introduce better compatibility with newer hardware.
About us and this blog
Panda Assistant is built on the latest data recovery algorithms, ensuring that no file is too damaged, too lost, or too corrupted to be recovered.
Request a free quote
We believe that data recovery shouldn’t be a daunting task. That’s why we’ve designed Panda Assistant to be as easy to use as it is powerful. With a few clicks, you can initiate a scan, preview recoverable files, and restore your data all within a matter of minutes.
Subscribe to our newsletter!
More from our blog
See all postsRecent Posts
- How to recover deleted voicemail samsung? 2025-04-22
- Samsung portable ssd t5 online recovery 2025-04-22
- Fix western digital external hard drive 2025-04-22

 Try lt Free
 Recovery success rate of up to


