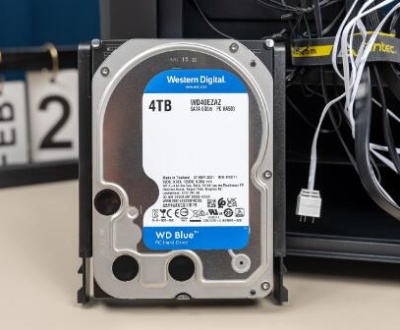
Western Digital (WD) hard drives are widely known for their durability, performance, and large storage capacities. Whether used for personal backups, gaming storage, or enterprise-level data retention, WD drives have earned a reputation for reliability. However, even the most robust hardware is not immune to occasional glitches or failures. One of the most common issues users face is when their Western Digital hard drive is not recognized by their computer. This can be a stressful experience, especially when important files or backups are at stake.
Chapter 1: Issue
1.1 What Does “Not Recognized” Mean?
When a WD hard drive is not recognized, it means your computer is not detecting it as a usable storage device. This can manifest in various ways:

The drive does not appear in File Explorer (Windows) or Finder (Mac).
The drive is missing from Disk Management (Windows) or Disk Utility (Mac).
The device powers on, but is not visible in the BIOS.
You receive error messages such as “Please insert a disk into drive” or “Drive not accessible.”
1.2 Why Does It Happen?
There are several reasons why a WD drive may not be recognized:
Connection Issues: Faulty USB cables or ports.
Driver Problems: Missing, outdated, or corrupt drivers.
Power Issues: Inadequate power supply, especially for external hard drives.
File System Errors: Corrupted file systems can prevent access.
Partition Problems: The partition table might be damaged.
Hardware Failure: Physical damage or internal component failure.
Operating System Conflicts: OS updates or errors causing recognition issues.
Chapter 2: Preliminary Checks
2.1 Verify the Basics
Check Connections: Ensure the USB or SATA cables are properly connected.
Try Different Ports: Use a different USB port or try a different computer altogether.
Listen for Sounds: Spinning or clicking sounds can help determine if the drive is receiving power.
2.2 Check Disk Management (Windows)
Press Win + X and select Disk Management.
Look for your WD drive in the list of available disks.
If visible but unallocated, it may need to be initialized or assigned a drive letter.
2.3 Check Disk Utility (Mac)
Open Applications > Utilities > Disk Utility.
Look for your drive under External drives.
Try to mount the drive manually.
Chapter 3: Fixing the Problem on Windows
3.1 Assign a Drive Letter
Right-click the unrecognized WD drive in Disk Management.
Select Change Drive Letter and Paths.
Click Add, then choose a letter and click OK.
3.2 Update or Reinstall Drivers
Open Device Manager.
Locate your WD hard drive under Disk drives or USB controllers.
Right-click and select Update Driver or Uninstall Device.
Restart your PC; Windows should reinstall the driver automatically.
3.3 Run Hardware and Devices Troubleshooter
Go to Settings > Update & Security > Troubleshoot.
Run the Hardware and Devices troubleshooter to fix detection problems.
3.4 Check BIOS Settings
Restart your computer and enter BIOS/UEFI (usually Del or F2 key).
Ensure the SATA or USB controller is enabled.
See if the hard drive is detected in BIOS.
Chapter 4: Fixing the Problem on macOS
4.1 Use Disk Utility’s First Aid
Select the WD drive in Disk Utility.
Click First Aid and follow the prompts to repair the disk.
4.2 Reset SMC and PRAM
SMC Reset:
Shut down the Mac.
Press Shift + Control + Option + Power for 10 seconds.
Release and turn on the Mac.
PRAM Reset:
Restart the Mac and hold Option + Command + P + R for about 20 seconds.
4.3 Reformat the Drive
If the data isn’t critical or has been backed up:
In Disk Utility, select the WD drive.
Click Erase, choose a format (e.g., ExFAT for cross-platform use), and rename the drive.
Click Erase to confirm.
Chapter 5: Advanced Fixes and Tools
5.1 Use WD Utilities
Western Digital offers software utilities to test and diagnose their drives:
Download WD Drive Utilities from the official website.
Run diagnostics, quick tests, and repairs directly through the software.
5.2 Use DiskPart (Windows)
Open Command Prompt as Administrator.
Type diskpart and hit Enter.
Use commands:
list disk
select disk X (where X is your WD drive)
clean
create partition primary
format fs=ntfs quick
assign
Warning: This will erase all data on the drive.
5.3 Use Third-Party Software
If the drive is recognized but inaccessible, tools like:
MiniTool Partition Wizard
EaseUS Partition Master
AOMEI Partition Assistant can help format, partition, or repair the drive.
Chapter 6: Data Recovery Options
6.1 Use Data Recovery Software
Panda Assistant: User-friendly and powerful recovery for all file types.
6.2 Professional Recovery Services
If the drive has physical damage or the data is extremely valuable:
Contact WD Support: They may offer repair or replacement if under warranty.
Send to a Certified Recovery Lab: Ensure the lab is authorized and reputable.
Chapter 7: Prevention and Maintenance
7.1 Use Safely
Always use the “Eject” option before unplugging.
Avoid physical shocks and moisture.
Use surge protectors to avoid electrical damage.
7.2 Regular Backups
Use cloud storage or another external drive to keep backups.
Use Windows Backup or macOS Time Machine.
7.3 Monitor Drive Health
Use CrystalDiskInfo (Windows) or DriveDx (Mac) to monitor drive SMART status.
Replace the drive at the first sign of failure indicators (reallocated sectors, spin-up time issues).
About us and this blog
Panda Assistant is built on the latest data recovery algorithms, ensuring that no file is too damaged, too lost, or too corrupted to be recovered.
Request a free quote
We believe that data recovery shouldn’t be a daunting task. That’s why we’ve designed Panda Assistant to be as easy to use as it is powerful. With a few clicks, you can initiate a scan, preview recoverable files, and restore your data all within a matter of minutes.
Subscribe to our newsletter!
More from our blog
See all postsRecent Posts
- How to recover deleted voicemail samsung? 2025-04-22
- Samsung portable ssd t5 online recovery 2025-04-22
- Fix western digital external hard drive 2025-04-22

 Try lt Free
 Recovery success rate of up to


