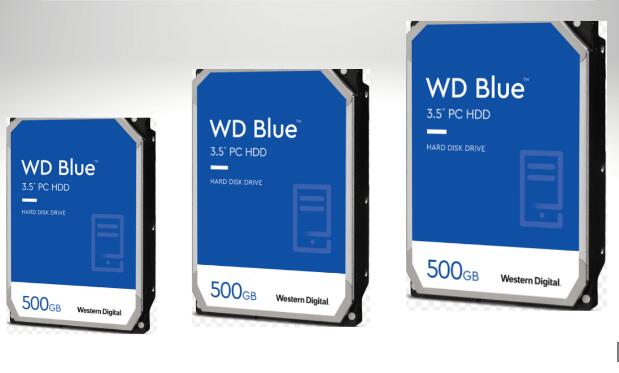
Disk cloning is the process of creating an exact copy of a computer’s hard drive or SSD. This process is crucial for various purposes, such as upgrading to a larger drive, migrating to a faster SSD, or simply creating a backup for disaster recovery. Western Digital, a leading manufacturer of storage devices, offers disk cloning tools that cater to users who need a reliable way to duplicate their drives.
Disk cloning is not the same as copying files from one drive to another. When you clone a disk, every bit of data, including the operating system, applications, and settings, is duplicated exactly as it is on the source drive. This ensures that the cloned drive is fully bootable and functional, making it a perfect solution for drive upgrades or replacements.
Why Disk Cloning is Important
Data Migration:
Upgrading to a new drive is a common reason for disk cloning. Whether you’re moving to a larger drive or a faster SSD, cloning ensures that your operating system, applications, and personal files are transferred seamlessly without the need to reinstall or reconfigure anything.

Disaster Recovery:
Cloning your drive is an excellent way to protect against data loss. In the event of a hardware failure, having a cloned backup means you can quickly switch to the backup drive with minimal downtime.
System Backup:
Cloning is also useful for creating a backup of your entire system. This is especially important for businesses and users who rely on their computers for critical tasks.
Western Digital Disk Cloning Software Overview
Western Digital provides disk cloning solutions that are designed to work seamlessly with their drives. The primary software offered is Acronis True Image for Western Digital.
Acronis True Image for Western Digital
Acronis True Image is a well-known disk cloning and backup software. Western Digital has partnered with Acronis to offer a customized version of this software specifically for WD drives. The software is available for free to all Western Digital drive owners.
Key Features:
Full Disk Cloning:
Acronis True Image for Western Digital allows users to clone their entire drive, ensuring that everything from the operating system to individual files is duplicated.
Incremental Backups:
The software supports incremental backups, meaning it only copies the changes made since the last backup. This saves time and storage space.
Active Cloning:
With active cloning, you can clone your drive without having to stop your work. The software works in the background, allowing you to continue using your computer while the cloning process is underway.
Partition Management:
Acronis True Image includes partition management tools that allow you to resize, merge, or split partitions as needed during the cloning process.
Secure Zone:
The software includes a feature called Secure Zone, which allows you to create a secure, hidden partition on your drive to store backups. This partition is protected from system failures and malware attacks.
Universal Restore:
Universal Restore is a feature that allows you to restore your cloned drive to different hardware. This is useful if you need to replace your computer but want to keep the same software and settings.
Step-by-Step Guide to Cloning a Western Digital Drive
Download and Install Acronis True Image for Western Digital:
Visit the Western Digital website and download the Acronis True Image software. Ensure that you have a Western Digital drive connected to your computer, as the software will only work if a WD drive is detected.
Install the software by following the on-screen instructions.
Prepare the Destination Drive:
Connect the new drive (the one you want to clone to) to your computer. This could be an internal SSD/HDD or an external drive connected via USB.
Ensure that the destination drive has enough storage capacity to hold all the data from the source drive.
Launch Acronis True Image:
Open the software and navigate to the “Tools” section.
Select the “Clone Disk” option.
Select the Source and Destination Drives:
Choose your current drive as the source drive.
Select the new WD drive as the destination drive.
Choose the Cloning Method:
You will be given two options: Automatic (Recommended) and Manual.
Automatic cloning will copy the entire drive, including all partitions, to the new drive.
Manual cloning allows you to customize which partitions to clone and how they should be resized on the new drive.
Review the Cloning Settings:
The software will display a summary of the cloning operation. Review these settings carefully to ensure everything is correct.
Start the Cloning Process:
Click “Proceed” to begin the cloning process. Depending on the size of the data being cloned and the speed of the drives, this process could take anywhere from a few minutes to several hours.
Verify the Cloning Operation:
Once the cloning process is complete, shut down your computer and disconnect the original drive.
Boot your computer from the new drive to ensure that the cloning operation was successful.
Troubleshooting Common Issues
Despite the user-friendly nature of Acronis True Image for Western Digital, users may encounter some issues during the cloning process. Below are some common problems and their solutions.
Drive Not Detected:
Ensure that the drive is properly connected to your computer. Try using a different SATA or USB port if the drive is not detected.
Make sure the drive is initialized and formatted. You can check this using the Disk Management tool in Windows.
Cloning Process Fails:
This could be due to bad sectors on the source drive. Use the “Check Disk” tool in Windows to scan for and repair any bad sectors before attempting to clone the drive again.
If the process fails repeatedly, try performing a sector-by-sector clone, which copies all sectors, including the empty ones.
Cloned Drive Won’t Boot:
Check the BIOS/UEFI settings to ensure that the new drive is set as the primary boot device.
If the new drive is larger than 2TB, make sure your system supports UEFI, as older BIOS systems may not boot from drives larger than 2TB.
Incomplete Cloning:
If the cloning process is interrupted or incomplete, the destination drive may be left in an unusable state. In this case, you may need to reformat the destination drive and attempt the cloning process again.
Best Practices for Disk Cloning
Backup Important Data:
Before starting the cloning process, ensure that all important data is backed up to another location. While cloning is generally safe, it’s always a good idea to have a backup in case something goes wrong.
Use Reliable Hardware:
Ensure that both the source and destination drives are in good working condition. Using faulty hardware can lead to data loss.
Keep Software Updated:
Make sure you are using the latest version of Acronis True Image for Western Digital. Software updates often include bug fixes and improvements that can help prevent issues during the cloning process.
Check for Compatibility:
Ensure that your system’s BIOS/UEFI is compatible with the new drive, especially if you’re moving to a drive with a different interface or a significantly larger capacity.
About us and this blog
Panda Assistant is built on the latest data recovery algorithms, ensuring that no file is too damaged, too lost, or too corrupted to be recovered.
Request a free quote
We believe that data recovery shouldn’t be a daunting task. That’s why we’ve designed Panda Assistant to be as easy to use as it is powerful. With a few clicks, you can initiate a scan, preview recoverable files, and restore your data all within a matter of minutes.
Subscribe to our newsletter!
More from our blog
See all postsRecent Posts
- How to save tiktok videos on computer 2025-04-30
- How to watch gopro videos on computer 2025-04-30
- How to save video from blink video doorbell to computer? 2025-04-30

 Try lt Free
 Recovery success rate of up to


