System restore is a vital tool in the Windows operating system that allows users to revert their system files, settings, and applications to a previous state without affecting personal data. When something goes wrong with your computer, such as an update causing problems, a virus infection, or an unexpected error, using a system restore disc can be a lifesaver.
1. System Restore
What is System Restore?
System Restore is a built-in feature in Microsoft Windows designed to allow users to undo system changes by reverting to a previous system state. It primarily restores system files, settings, and installed applications to an earlier point in time, known as a System Restore Point. However, it does not affect personal files, such as documents, pictures, or videos.

The purpose of System Restore is to help recover from system malfunctions or changes caused by software installations, drivers, or system updates that may have caused your computer to become unstable or unresponsive. It’s one of the easiest and most convenient ways to troubleshoot and fix issues on your PC.
When to Use System Restore?
System Restore is typically used when:
A recent software update has caused issues with the performance or stability of your computer.
You’ve installed a new program or driver that has caused compatibility issues.
Your computer has been infected with malware or a virus that you’ve been unable to remove through other means.
You are experiencing frequent system crashes, slowdowns, or error messages.
A hardware change has led to system conflicts or malfunctions.
Benefits of Using a System Restore Disc
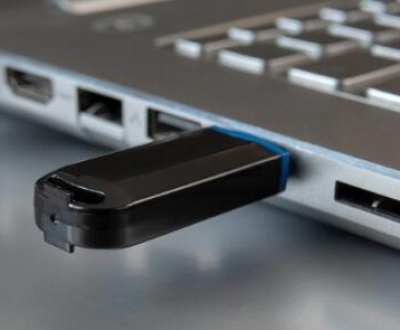
A System Restore Disc is a bootable CD, DVD, or USB that you can use to restore your system to an earlier point, even when your operating system is not booting up properly. The benefits of using a System Restore Disc include:
Recovery in Emergency Situations: It can be used when your PC fails to boot due to software issues.
Non-Destructive Recovery: It allows you to recover your system without losing personal files, which is especially useful for users who don’t have a backup.
Easy Process: Using a restore disc is a relatively simple and straightforward process, even for non-technical users.
2. Creating a System Restore Disc
Before you can use a System Restore Disc, you need to create one. Here’s how:
How to Create a System Restore Disc (Step-by-Step)
Prepare a Blank CD/DVD/USB Drive:
You’ll need a blank CD, DVD, or a USB drive (4GB or larger).
Create a System Restore Disc:
Open the Control Panel and navigate to System and Security.
Click on Backup and Restore (Windows 7).
In the left-hand menu, select Create a system repair disc.
If prompted, insert a blank CD or DVD into your computer’s optical drive or connect a USB drive to your PC.
Windows will begin creating a recovery disc that you can use to boot your system and perform the restore process.
Label and Store the Disc:
After the process is complete, label the disc (or USB) as a System Restore Disc and store it in a safe place for future use.
Precautions Before Using a Restore Disc
Check System Restore Points: Make sure you have a recent restore point that corresponds to a time when your system was working correctly.
Backup Your Data: While the restore process should not affect personal files, it’s always a good idea to back up important data before proceeding.
Ensure Compatibility: Make sure the restore disc you create is compatible with the version of Windows you are using. For example, a Windows 10 restore disc will not work on Windows 7 or vice versa.
3. Preparing Your Computer for System Restore
Backup Important Files
Before proceeding with a system restore, it is always a good idea to back up your important files, even though System Restore does not delete personal data. You can use an external hard drive, cloud storage, or other backup methods to ensure your data is safe in case anything goes wrong during the restore process.
Check for Issues with Your Computer
Sometimes, the problem with your computer might not be solved by using a restore disc. If your computer is showing other signs of malfunction (like hardware issues), you might need to address them separately. Ensure that your PC hardware is functioning correctly before starting the restore.
Understanding System Restore Points
A System Restore Point is a snapshot of your system’s settings, drivers, and programs at a particular moment in time. System Restore automatically creates restore points when:
You install new software or updates.
You make changes to system settings.
Windows performs major updates.
You can manually create restore points before making major system changes to ensure you have a backup option if anything goes wrong.
4. Using a System Restore Disc to Restore Your PC
Now that your system restore disc is ready, follow these steps to restore your system to an earlier date.
Inserting the Restore Disc
Power off your computer if it is currently on.
Insert the System Restore Disc (CD/DVD/USB) into the appropriate drive or USB port.
Booting from the System Restore Disc
Power on your computer.
As soon as the computer starts, press the boot menu key (usually F12. Esc, or F2. depending on your PC model) to access the boot options.
Select the CD/DVD or USB drive option, depending on which device you are using to boot from.
Your system will now boot into the Windows Recovery Environment (WinRE).
Navigating the Recovery Environment
Once in the Windows Recovery Environment, follow these steps:
Choose the option that says Troubleshoot.
Under Advanced options, select System Restore.
Selecting the Correct Restore Point
You will now see a list of available restore points. Choose the restore point that corresponds to the date when your computer was functioning properly. If you’re unsure, select the most recent restore point.
Confirming the Restore
After selecting the correct restore point, you will be prompted to confirm the restoration process. Review the information carefully, then click Finish or Next to proceed.
The Restoration Process
Once the process begins, Windows will restore your system to the selected restore point. This can take several minutes to an hour, depending on your system’s specifications and the amount of data that needs to be restored. Ensure that your computer remains powered on during the restoration.
5. Post-Restoration Steps
Checking for Stability
Once the restore is complete, your computer will restart. Check for the following:
Are your programs working properly?
Is the issue you were facing resolved?
Does the system perform as expected?
Troubleshooting Restoration Issues
If you encounter problems after restoring your system, try the following:
Repeat the restoration process using a different restore point.
Check for missing drivers or updates after the restore.
Perform a system scan to check for malware or corrupted files.
Updating Your System
After performing a system restore, you might need to reinstall updates or updates that were installed after your selected restore point. Make sure that Windows Update is up to date.
6. Common Issues and Solutions
System Restore Fails to Complete
Sometimes, the restore process may fail. Common causes include:
Corrupted system files
Insufficient disk space
Hardware malfunctions
If this occurs, you may need to perform a Startup Repair or try restoring in Safe Mode.
Restore Point Not Found
If no restore points are available, ensure that system protection is enabled on your computer. You may also need to manually create a restore point before proceeding.
System Restore Does Not Fix the Problem
If System Restore doesn’t resolve the issue, you might need to consider more advanced recovery options, such as:
A Factory Reset.
Reinstalling Windows using a fresh installation disc or recovery USB.
7. Alternatives to System Restore
While System Restore is useful, there are other ways to recover or repair your system if it doesn’t work for your needs.
Factory Reset
A factory reset will restore your computer to its original state, removing all files and programs you have installed. It’s a more drastic option if System Restore does not resolve the issue.
Fresh Windows Installation
If your system is beyond repair, reinstalling Windows from scratch can help you start fresh and resolve persistent issues.
Third-Party Data Recovery Tools
In some cases, third-party data recovery tools may be needed to recover files from damaged or corrupted systems.
About us and this blog
Panda Assistant is built on the latest data recovery algorithms, ensuring that no file is too damaged, too lost, or too corrupted to be recovered.
Request a free quote
We believe that data recovery shouldn’t be a daunting task. That’s why we’ve designed Panda Assistant to be as easy to use as it is powerful. With a few clicks, you can initiate a scan, preview recoverable files, and restore your data all within a matter of minutes.
Subscribe to our newsletter!
More from our blog
See all postsRecent Posts
- How to repair usb flash? 2025-05-09
- How to repair a broken usb port 2025-05-09
- How to repair my usb flash drive 2025-05-09

 Try lt Free
 Recovery success rate of up to


