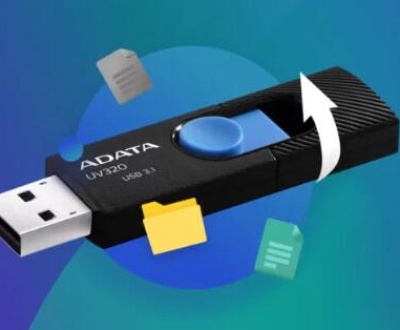
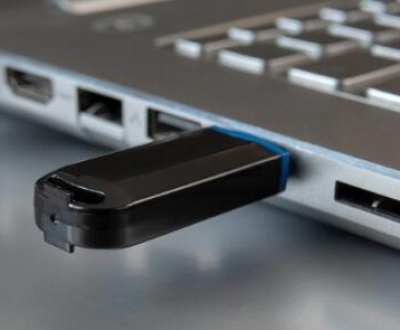
Write protection is a feature designed to protect the data on a USB stick from being altered, erased, or corrupted. This feature can be enabled manually or automatically, depending on the USB device’s settings or the operating system’s configuration. Write protection can also occur due to a variety of reasons, including hardware settings, software configurations, or even issues with the USB drive’s partition.
Common Causes of Write Protection
Physical Write Protection Switch: Some USB sticks have a physical switch on the device itself that enables or disables write protection. If this switch is in the “locked” position, it will prevent formatting or any changes to the data.

Registry Settings in Windows: Write protection can also be activated through the system’s registry settings. Certain system configurations, especially with newer operating systems, can inadvertently apply a write protection setting to USB devices.
Corrupted Files or Errors on the USB Stick: Sometimes, USB sticks with corrupted files or improper ejecting can automatically become write-protected. In such cases, the operating system may prevent any modifications to avoid further damage.
Malware or Viruses: Certain types of malware or viruses can alter system settings, including enforcing write protection to prevent you from removing or modifying infected files.
File System Errors: If there are errors in the file system, the USB stick may not allow changes to avoid further complications.
Step-by-Step Methods to Remove Write Protection from a USB Stick
1. Check for a Physical Write Protection Switch
The first step in troubleshooting is to physically inspect the USB stick. Some USB drives, especially older models or certain brands, feature a small sliding switch that can lock the drive, preventing any data changes.
How to fix: Look for a slider on the side of the USB stick. If the switch is set to “Lock,” slide it to the “Unlock” position to disable write protection.
2. Using Diskpart Command in Windows
If there’s no physical switch or the switch is not the issue, Windows provides a built-in tool called Diskpart that can help you remove write protection. This method works when the write protection is enforced via software or registry settings.
Step-by-step instructions:
Press Windows + R to open the Run dialog box, type cmd, and press Enter.
In the command prompt window, type diskpart and press Enter.
Type list disk to see all available disks on your system. Identify your USB stick by its size (e.g., Disk 1. Disk 2).
Type select disk X (replace X with your USB disk number) and press Enter.
Type attributes disk clear readonly and press Enter. This command will remove the write protection.
Type exit to close the Diskpart tool.
If the process is successful, you should be able to format your USB stick.
3. Modify the Windows Registry
In some cases, the write protection is caused by settings in the Windows registry. You can remove write protection by editing the registry. However, be cautious when editing the registry, as incorrect changes can lead to system instability.
Step-by-step instructions:
Press Windows + R to open the Run dialog box.
Type regedit and press Enter to open the registry editor.
Navigate to the following path:
mathematica
HKEY_LOCAL_MACHINE\SYSTEM\CurrentControlSet\Control\StorageDevicePolicies
If the StorageDevicePolicies key doesn’t exist, right-click on the Control folder, select New > Key, and name it StorageDevicePolicies.
In the StorageDevicePolicies folder, right-click in the empty space and choose New > DWORD (32-bit) Value. Name it WriteProtect.
Double-click on the WriteProtect entry and set its value to 0 (which disables write protection).
Click OK, close the registry editor, and restart your computer.
After rebooting, check if you can format the USB stick.
4. Use Disk Management to Format the USB Stick
Windows Disk Management tool can sometimes help when Diskpart doesn’t work. This tool can help you delete partitions, reformat, or even create new partitions on the USB stick.
Step-by-step instructions:
Press Windows + X and select Disk Management from the menu.
Locate your USB drive in the list of disks.
Right-click on the USB drive and select Format.
If the format option is grayed out, it may be due to the write protection. You can try to delete the partition first by right-clicking on the partition and selecting Delete Volume.
Once the partition is deleted, right-click on the unallocated space and select New Simple Volume to format the USB stick.
5. Check for Malware or Viruses
If the above steps don’t work, it might be worthwhile to scan your USB drive for malware or viruses. Certain types of malicious software can impose write protection on USB drives to prevent you from accessing or deleting infected files.
Step-by-step instructions:
Use your preferred antivirus software to scan the USB stick for malware.
If no antivirus is installed, you can use Windows Defender to scan the drive.
After the scan, follow any recommendations from the antivirus software, including removing infected files or quarantining malicious programs.
6. Use Third-Party Software
Panda Assistant is a powerful data recovery tool designed to help users retrieve lost or deleted files from a variety of storage devices. Whether it’s a hard drive, USB flash drive, SD card, or other media, Panda Assistant provides an intuitive and efficient way to recover your data. The software is engineered with advanced algorithms that can scan deeply into the storage media, identify recoverable files, and restore them with ease.
What sets Panda Assistant apart is its user-friendly interface, which ensures that both novice and experienced users can recover files without technical expertise. It supports a wide range of file formats, from documents and photos to videos and emails, making it a versatile solution for various data loss scenarios. Panda Assistant also supports both Windows and macOS operating systems, allowing for broader compatibility across different devices.
The tool is designed with speed and efficiency in mind. It performs quick scans to locate recoverable files and offers a preview feature, enabling users to see which files can be restored before completing the recovery process. It also includes features for deep scanning, which is useful when data loss is caused by formatting, partition damage, or system crashes.
About us and this blog
Panda Assistant is built on the latest data recovery algorithms, ensuring that no file is too damaged, too lost, or too corrupted to be recovered.
Request a free quote
We believe that data recovery shouldn’t be a daunting task. That’s why we’ve designed Panda Assistant to be as easy to use as it is powerful. With a few clicks, you can initiate a scan, preview recoverable files, and restore your data all within a matter of minutes.
Subscribe to our newsletter!
More from our blog
See all postsRecent Posts
- How to repair usb flash? 2025-05-09
- How to repair a broken usb port 2025-05-09
- How to repair my usb flash drive 2025-05-09

 Try lt Free
 Recovery success rate of up to


