Transferring music from a PC to an iPhone can seem like a daunting task, especially if you’re unfamiliar with the process. Fortunately, there are several methods to achieve this, many of which are free.
1. Using iTunes
iTunes is Apple’s official media player and management tool, and it’s one of the most common methods for transferring music from a PC to an iPhone. Here’s how to do it:
Step-by-Step Guide:
Download and Install iTunes:
Go to the Apple iTunes website and download the latest version of iTunes.
Install the software on your PC by following the on-screen instructions.
Connect Your iPhone:
Use a USB cable to connect your iPhone to your PC.
If this is your first time connecting your iPhone, you might need to trust the device by following the prompts on both your PC and iPhone.
Open iTunes:
Launch iTunes on your PC. Your iPhone should appear as a device icon in the upper-left corner of the iTunes window.
Add Music to iTunes Library:
In iTunes, go to the “Music” section by selecting it from the drop-down menu on the left.
Click on “File” in the top menu and select “Add File to Library” or “Add Folder to Library” to import your music files from your PC.
Sync Music to Your iPhone:
Click on your iPhone icon in iTunes.
Go to the “Music” tab under “Settings.”
Check the “Sync Music” box and select whether you want to sync your entire music library or specific playlists, artists, albums, or genres.
Click “Apply” or “Sync” to start transferring the music.
Eject Your iPhone:
Once the sync is complete, make sure to eject your iPhone properly by clicking on the eject icon next to your device in iTunes.
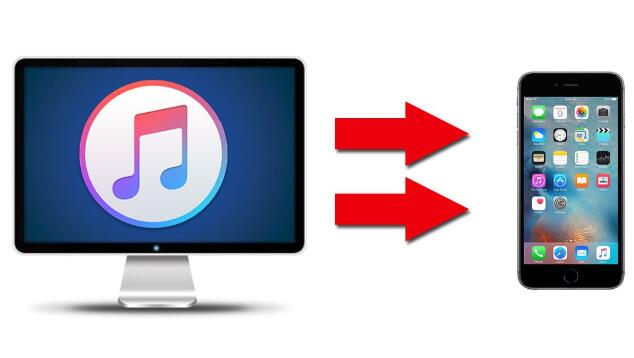
2. Using Windows File Explorer
For a more straightforward approach, especially if you want to avoid using iTunes, you can use Windows File Explorer. However, this method requires a workaround because iOS devices do not allow direct access to their internal music storage.
Step-by-Step Guide:
Connect Your iPhone:
Connect your iPhone to your PC using a USB cable.
Access iPhone Storage:
Open Windows File Explorer and locate your iPhone under “Devices and drives.”
Use iTunes Alternative:
Since direct music transfer isn’t supported through File Explorer, consider using an alternative method or third-party tool that can facilitate this transfer.
3. Using Third-Party Software
Several third-party applications can help you transfer music from your PC to your iPhone without using iTunes. Some popular free options include:
iMazing: Offers a free trial with limited features for transferring music.
WALTR: Allows you to drag and drop music files directly onto your iPhone.
Syncios: Provides a free version that supports music transfer and other features.
Step-by-Step Guide for iMazing:
Download and Install iMazing:
Go to the iMazing website and download the free version.
Install the application on your PC.
Connect Your iPhone:
Use a USB cable to connect your iPhone to your PC.
Open iMazing and select your iPhone from the list of devices.
Transfer Music:
Click on “Music” in the sidebar.
Drag and drop music files from your PC into the iMazing window or use the “Import” button.
Follow the prompts to complete the transfer.
4. Using Cloud Services
If you prefer a wireless method, you can use cloud storage services like Google Drive, Dropbox, or OneDrive to transfer music files.
Step-by-Step Guide:
Upload Music to Cloud Service:
Sign in to your chosen cloud service on your PC.
Upload the music files you want to transfer.
Install Cloud App on iPhone:
Download and install the corresponding cloud service app on your iPhone from the App Store.
Access Music on iPhone:
Open the cloud service app on your iPhone.
Navigate to the music files you uploaded and download them to your device or stream them directly.
5. Using Apple Music
If you’re an Apple Music subscriber, you can upload your music library to iCloud and sync it across your devices.
Step-by-Step Guide:
Subscribe to Apple Music:
Ensure you have an active Apple Music subscription.
Enable Sync Library:
On your PC, open iTunes and go to “Edit” > “Preferences.”
Under the “General” tab, check the “Sync Library” box and click “OK.”
On your iPhone, go to “Settings” > “Music” and toggle “Sync Library” on.
Upload Music to iCloud:
Add your music files to your iTunes library.
iTunes will automatically upload these files to iCloud and sync them with your iPhone.
6. Troubleshooting Common Issues
iTunes Not Recognizing iPhone:
Ensure your iPhone is unlocked and connected properly.
Try using a different USB cable or port.
Restart both your PC and iPhone.
Music Not Syncing:
Check that you have sufficient storage on your iPhone.
Verify that the correct music options are selected in iTunes or the third-party software.
No Music Found in Cloud Service:
Confirm that you have uploaded the files correctly and have an active internet connection.
About us and this blog
Panda Assistant is built on the latest data recovery algorithms, ensuring that no file is too damaged, too lost, or too corrupted to be recovered.
Request a free quote
We believe that data recovery shouldn’t be a daunting task. That’s why we’ve designed Panda Assistant to be as easy to use as it is powerful. With a few clicks, you can initiate a scan, preview recoverable files, and restore your data all within a matter of minutes.
Subscribe to our newsletter!
More from our blog
See all postsRecent Posts
- How to save tiktok videos on computer 2025-04-30
- How to watch gopro videos on computer 2025-04-30
- How to save video from blink video doorbell to computer? 2025-04-30

 Try lt Free
 Recovery success rate of up to

