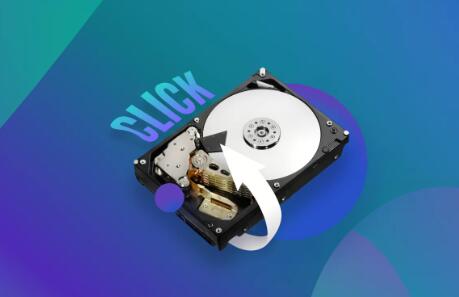
In the digital age, hard drives are essential for storing important data, from cherished memories to crucial business documents. However, hard drives can fail due to various reasons, leading to data loss. Understanding the hard drive recovery process is vital for anyone who has experienced data loss or wants to be prepared for such an eventuality.
Types of Hard Drive Failures
Before diving into recovery methods, it’s important to understand the types of failures that can occur:
1. Logical Failures
These occur when the hard drive is functioning properly, but the data is inaccessible due to issues like corrupted files, accidental deletion, or formatting. Logical failures often allow for easier recovery using software tools.
2. Physical Failures
These involve hardware malfunctions, such as a damaged read/write head, motor failure, or platter issues. Physical failures require professional intervention, as they involve intricate repairs that cannot be performed at home.

3. Firmware Failures
Firmware is the software that runs the hard drive. If the firmware becomes corrupted, the drive may become unresponsive. This type of failure can be challenging to diagnose and may require specialized tools or services for recovery.
Preliminary Steps Before Recovery
Before attempting any recovery process, follow these preliminary steps:
1. Stop Using the Drive
If you suspect data loss, immediately stop using the hard drive. Continued use can overwrite lost data, making recovery more difficult or impossible.
2. Assess the Situation
Determine whether the failure is logical or physical. If the drive makes unusual noises (clicking, grinding), it’s likely a physical issue requiring professional help.
3. Check Connections
For external hard drives, ensure that all connections are secure. Try different USB ports or cables to rule out connectivity issues.
Data Recovery Process
Step 1: Data Recovery Software for Logical Failures
For logical failures, data recovery software can often restore lost files. Here’s a step-by-step guide:
1. Choose the Right Software
Select a reputable data recovery software compatible with your operating system. Popular options include:
Recuva (Windows)
EaseUS Data Recovery Wizard (Windows/Mac)
Disk Drill (Windows/Mac)
TestDisk (Windows/Mac/Linux)
2. Install the Software
Install the chosen software on a different drive to avoid overwriting any data on the affected drive.
3. Run the Software
Launch the software and select the drive you want to recover data from.
Choose the type of scan (quick or deep scan). A deep scan takes longer but is more thorough.
4. Preview and Recover Files
After the scan completes, the software will display recoverable files. Preview the files to confirm their integrity, then select and recover them to a safe location (preferably another drive).
Step 2: Physical Recovery for Physical Failures
If you suspect a physical failure, professional data recovery services are often necessary. Here’s what to expect:
1. Choose a Recovery Service
Research and select a reputable data recovery service. Look for reviews, success rates, and service guarantees.
2. Initial Assessment
Once you send your drive, the service will perform an initial assessment. They will inform you of the issue and provide a quote.
3. Recovery Process
If you approve the quote, the service will proceed with the recovery process, which may involve:
Opening the drive in a clean room environment to prevent dust contamination.
Replacing damaged parts.
Using specialized tools to recover data directly from the platters.
4. Data Retrieval
Once data is recovered, the service will provide you with the recovered files on a new storage medium or an external drive.
Step 3: Post-Recovery Steps
Once you’ve successfully recovered your data, take the following steps:
1. Verify Data Integrity
Check the recovered files to ensure they are intact and usable.
2. Backup Your Data
Implement a regular backup routine to prevent future data loss. Consider using:
External Hard Drives: Keep a secondary copy of your important files.
Cloud Storage: Services like Google Drive, Dropbox, and OneDrive offer convenient options for data storage.
3. Replace the Hard Drive
If the hard drive had physical issues, consider replacing it. Continuing to use a failing drive increases the risk of further data loss.
Preventative Measures
To minimize the risk of future data loss, consider the following preventative measures:
1. Regular Backups
Establish a backup routine to ensure that your data is always secure. Use a combination of local and cloud-based solutions for redundancy.
2. Monitor Hard Drive Health
Utilize tools that monitor the health of your hard drive. Software like CrystalDiskInfo can provide SMART (Self-Monitoring, Analysis, and Reporting Technology) data, indicating potential issues.
3. Use Surge Protectors
Electrical surges can damage hard drives. Use surge protectors or uninterruptible power supplies (UPS) to safeguard your devices.
4. Handle Drives with Care
For external hard drives, avoid physical shocks and keep them in protective cases. Treat all drives gently to prevent physical damage.
5. Keep Software Updated
Regularly update your operating system and data recovery software to benefit from the latest security patches and features.
About us and this blog
Panda Assistant is built on the latest data recovery algorithms, ensuring that no file is too damaged, too lost, or too corrupted to be recovered.
Request a free quote
We believe that data recovery shouldn’t be a daunting task. That’s why we’ve designed Panda Assistant to be as easy to use as it is powerful. With a few clicks, you can initiate a scan, preview recoverable files, and restore your data all within a matter of minutes.
Subscribe to our newsletter!
More from our blog
See all postsRecent Posts
- Dell backup and recovery windows 11 2025-04-21
- Dell os recovery tool keeps crashing 2025-04-21
- Raw hdd data recovery 2025-04-21

 Try lt Free
 Recovery success rate of up to


