 Try lt Free
 Recovery success rate of up to
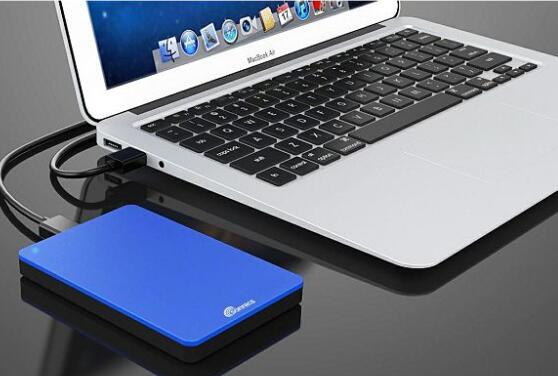
When your Seagate external hard drive suddenly becomes invisible to your Windows 10 system, it can be frustrating. However, there are several methods to diagnose and fix this issue.
Before diving into the solutions, it’s important to understand why your external hard drive might not be recognized. Common causes include:
Connection Issues: Faulty cables or ports can prevent the drive from being detected.
Power Supply: Some external hard drives require more power than what the USB port provides, particularly larger drives.
Driver Problems: Missing or outdated drivers can hinder recognition.
File System Errors: Corrupt file systems may render the drive unrecognizable.
Drive Not Initialized: New or formatted drives might need to be initialized before use.
Step 1: Check Hardware Connections
Start with the basics by examining the hardware:
Inspect the USB Cable: Look for any visible damage. If you have another compatible cable, try using it.
Change Ports: Connect the hard drive to a different USB port on your computer. If possible, test it on another computer to rule out port issues.
Power Supply: Ensure that the hard drive has adequate power, especially for larger models that may have an external power adapter.
Step 2: Check Disk Management
If the hardware seems fine, check if the drive appears in Disk Management:
Open Disk Management:
Right-click the Start menu and select Disk Management.
Alternatively, press Windows + X and choose Disk Management.
Look for Your Drive:
Check if the Seagate drive appears in the list. It may not have a drive letter assigned or may be unallocated.
If it appears as unallocated, you can create a new partition. Right-click the unallocated space and choose New Simple Volume, then follow the prompts.
Assign a Drive Letter:
If the drive is visible but doesn’t have a letter, right-click it and select Change Drive Letter and Paths. Choose Add and assign a new letter.
Step 3: Update Drivers
Outdated or corrupted drivers can lead to recognition issues:
Open Device Manager:
Right-click the Start button and select Device Manager.
Locate Disk Drives: Expand the Disk drives section. Find your Seagate external hard drive.
Update Driver:
Right-click on the drive and select Update Driver. Choose Search automatically for updated driver software.
Uninstall and Reinstall:
If updating doesn’t work, right-click the drive, select Uninstall device, then restart your computer. Windows should automatically reinstall the drivers upon reboot.
Step 4: Check for File System Errors
Corrupted file systems can prevent the drive from being recognized:
Run CHKDSK:
Open Command Prompt as an administrator (right-click Start > Command Prompt (Admin)).
Type the command: chkdsk E: /f (replace E: with your Seagate drive letter).
Press Enter and wait for the scan to complete.
Step 5: Use the Windows Troubleshooter
Windows has built-in troubleshooters that can identify and fix common issues:
Open Settings:
Go to Settings > Update & Security > Troubleshoot.
Additional Troubleshooters:
Click on Additional troubleshooters, then select Hardware and Devices and follow the prompts.
Step 6: Check for Conflicting Software
Sometimes, third-party software can interfere with drive recognition:
Boot in Safe Mode:
Restart your computer and press F8 or Shift + F8 during startup.
Select Safe Mode from the options. Check if the drive is recognized.
Disable Third-Party Security Software:
Temporarily disable any antivirus or security software to see if it affects recognition.
Step 7: Format the Drive (Last Resort)
If the drive is still not recognized and you have backed up all data or it contains no important data, formatting may be necessary:
Warning: Formatting will erase all data on the drive. Ensure you have backups.
Format through Disk Management:
Right-click the drive in Disk Management and select Format. Follow the prompts to complete the process.
Using Command Prompt:
Open Command Prompt as an administrator and type: format E: /fs:NTFS (replace E: with your drive letter).
Preventative Measures
Safely Eject the Drive: Always eject the drive using the “Safely Remove Hardware” option to prevent file system corruption.
Regular Backups: Maintain regular backups of your data to avoid loss during unexpected failures.
Keep Drivers Updated: Regularly check for and install driver updates for your external hard drive.
About us and this blog
Panda Assistant is built on the latest data recovery algorithms, ensuring that no file is too damaged, too lost, or too corrupted to be recovered.
Request a free quote
We believe that data recovery shouldn’t be a daunting task. That’s why we’ve designed Panda Assistant to be as easy to use as it is powerful. With a few clicks, you can initiate a scan, preview recoverable files, and restore your data all within a matter of minutes.
Subscribe to our newsletter!
More from our blog
See all posts


Recent Posts
- Data recovery salt lake city utah 2025-04-18
- Data recovery sacramento 2025-04-18
- Data recovery miami 2025-04-18