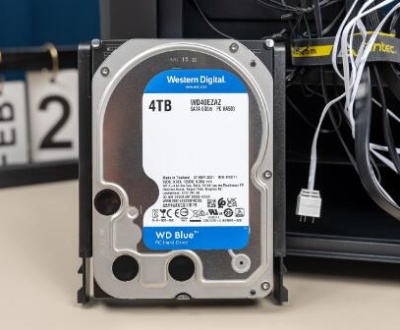
Reformatting a Seagate external hard drive is a powerful solution for resolving persistent errors, preparing the device for a new operating system, or simply wiping it clean for a fresh start. Whether you’re transitioning from Windows to macOS, fixing corrupted data, or repurposing your drive for new tasks, knowing how to properly reformat the device is essential.
Part 1: Formatting Basics
What Does It Mean to Format a Hard Drive?
Formatting a hard drive involves setting up a file system that your computer uses to read and write data. It essentially wipes the drive clean and prepares it for storage use. This process can also help correct logical errors or corruption.

File System Types
NTFS (New Technology File System): Preferred for Windows. Not natively writable on macOS.
exFAT: Compatible with both Windows and macOS. Ideal for drives shared across platforms.
FAT32: Widely compatible, but limited to 4GB maximum file size.
HFS+ (Mac OS Extended): Optimized for macOS. Not readable by Windows without third-party tools.
APFS (Apple File System): Default for newer versions of macOS.
Choosing the correct file system depends on how you intend to use the drive.
Part 2: Preparation Steps
Step 1: Backup Your Data
Formatting erases everything, so:
Transfer important files to your computer or another storage device.
Use backup software like Time Machine (macOS) or File History (Windows).
Step 2: Identify Your Seagate Drive
Plug in the drive.
On Windows: Open File Explorer and check the drive letter.
On macOS: Use Finder or Disk Utility to view the drive.
Step 3: Download Useful Tools (Optional)
Seagate Dashboard (Windows)
Seagate Toolkit (macOS)
Partition management tools like EaseUS Partition Master, MiniTool Partition Wizard, or AOMEI
Part 3: Reformatting on Windows
Method 1: Using File Explorer
Plug in your Seagate external hard drive.
Open File Explorer > Right-click the Seagate drive.
Select Format.
In the dialog box:
Choose File System (NTFS, exFAT, FAT32).
Enter a Volume Label (e.g., “Seagate External”).
Leave “Quick Format” checked for a fast format.
Click Start and confirm.
Method 2: Using Disk Management
Press Win + X > Choose Disk Management.
Locate your Seagate drive.
Right-click > Format.
Choose desired file system and perform the format.
Method 3: Using Command Prompt
Open Command Prompt as Administrator.
Type:
diskpart
list disk
select disk X (Replace X with your Seagate disk number)
clean
create partition primary
format fs=exFAT quick (or NTFS/FAT32)
assign
exit
Part 4: Reformatting on macOS
Method 1: Using Disk Utility
Connect the drive.
Open Disk Utility (Applications > Utilities).
Select your Seagate drive in the sidebar.
Click Erase.
Choose a format:
APFS or Mac OS Extended (Journaled) for Mac-only use.
exFAT for cross-platform compatibility.
Name the drive and click Erase.
Method 2: Using Terminal (Advanced Users)
Open Terminal.
Type:
diskutil list
diskutil eraseDisk exFAT Seagate /dev/diskX (replace X with your disk number)
Press Enter to execute.
Part 5: What to Do After Formatting
Step 1: Confirm the Format
Reopen File Explorer or Disk Utility to check the drive’s new format.
Make sure it is writable and readable.
Step 2: Restore Data (If Backed Up)
Copy files back to the drive as needed.
Step 3: Install Seagate Tools (Optional)
Useful for drive monitoring, backups, and firmware updates.
Part 6: Troubleshooting Format Errors
Windows
Drive not showing: Try a different USB port or computer.
Format failed: Use Disk Management or Diskpart.
Write-protected: Use Command Prompt to remove attributes.
macOS
Disk grayed out: Use First Aid in Disk Utility.
Can’t erase drive: Try formatting via Terminal.
Read-only drive: Ensure the format is supported by macOS.
Part 7: Alternatives to Formatting
If you want to fix errors without losing data:
Run CHKDSK on Windows: chkdsk X: /f /r
Use Disk Utility’s First Aid on macOS
Use third-party tools for partition repair
Part 8: Maintaining Your Reformatted Drive
Eject Safely: Always eject before unplugging.
Scan Regularly: Use antivirus and diagnostic tools.
Keep Backups: Don’t rely on a single copy.
Update Firmware: Via Seagate tools.
Avoid Shocks: Physical protection extends drive life.
About us and this blog
Panda Assistant is built on the latest data recovery algorithms, ensuring that no file is too damaged, too lost, or too corrupted to be recovered.
Request a free quote
We believe that data recovery shouldn’t be a daunting task. That’s why we’ve designed Panda Assistant to be as easy to use as it is powerful. With a few clicks, you can initiate a scan, preview recoverable files, and restore your data all within a matter of minutes.

 Try lt Free
 Recovery success rate of up to


