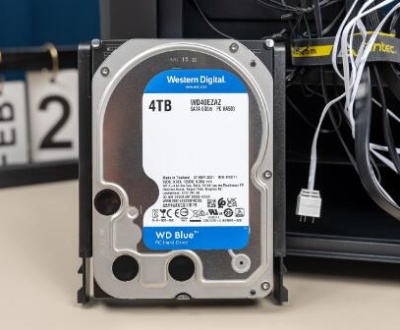
Emptying the Recycle Bin is a common action performed by computer users to free up space and remove unwanted files. However, many have experienced the sinking feeling that comes after realizing important files were accidentally deleted in the process.
1. Recycle Bin
The Recycle Bin serves as a temporary storage area for files and folders deleted from your computer. When you delete an item, it’s not immediately removed from your hard drive; instead, it is moved to the Recycle Bin. This allows users a chance to recover deleted items before they are permanently lost.
How It Works: Files remain in the Recycle Bin until it is emptied or until the files exceed the maximum storage limit set by the operating system. Once emptied, the space they occupied is marked as available for new data, but the actual data may still reside on the disk until overwritten.

2. First Steps After Emptying the Recycle Bin
If you realize that you’ve emptied the Recycle Bin and need to recover files, don’t panic. Follow these steps:
Stop Using the Affected Drive: To maximize recovery chances, immediately stop using the drive where the files were located. This prevents new data from overwriting the deleted files.
Check for Backups: If you regularly back up your data, check your backup solutions (cloud storage, external drives, or system backups) to see if your files can be restored from there.
3. Using Windows File History
Windows File History is a built-in backup feature that can help you recover files if it was enabled before the deletion.
Accessing File History:
Go to Settings > Update & Security > Backup.
Click on More options under Back up using File History.
Recovering Files:
Navigate to the folder where the deleted file was stored.
Click on the History button to view previous versions of the folder.
Locate the file you want to restore, select it, and click Restore.
4. Utilizing System Restore
If your system has been set up to create restore points, you may be able to recover deleted files through System Restore. However, this method generally recovers system files and settings rather than personal files.
Accessing System Restore:
Right-click on This PC or My Computer and select Properties.
Click on System Protection on the left pane.
In the System Properties window, click the System Restore button.
Choosing a Restore Point:
Follow the prompts to select a restore point before the files were deleted.
Confirm and start the restore process. Your computer will restart.
5. Third-Party Data Recovery Software
If the above methods do not yield results, third-party data recovery software can be a viable option. Many programs can scan your hard drive for recoverable files that have been deleted.
Popular Data Recovery Tools:
Panda Assistant is a powerful data recovery software designed to help users effortlessly restore lost or deleted files from various storage devices, including SD cards, USB drives, and external hard drives. With its user-friendly interface, Panda Assistant makes the recovery process accessible for both novices and experienced users.
This software employs advanced scanning algorithms that quickly identify recoverable files, even from formatted or corrupted drives. It supports a wide array of file types, including documents, photos, videos, and audio files, ensuring a comprehensive recovery solution. Additionally, the preview feature allows users to view files before restoring them, helping to confirm they are retrieving the correct items.
Compatible with both Windows and Mac operating systems, Panda Assistant provides versatility for users across different platforms. Regular updates and dedicated customer support enhance the overall experience, ensuring assistance is available when needed.
Using Data Recovery Software:
Download and install the software on a different drive than the one you wish to recover from.
Launch the software and select the drive to scan.
Wait for the scan to complete and browse through the recoverable files.
Select the files you want to recover and follow the prompts to restore them.
6. Preventive Measures
To avoid the distress of losing important files in the future, consider implementing these preventive measures:
Regular Backups:
Use cloud services (e.g., Google Drive, OneDrive) for automatic backups of your important files.
Create periodic backups on external drives or dedicated backup software.
Adjust Recycle Bin Settings:
Right-click on the Recycle Bin and select Properties.
Adjust the maximum size of the Recycle Bin to retain more deleted files.
Enable the option to store deleted files on a different drive if possible.
Enable File History:
As mentioned earlier, enabling File History can help keep backups of your files in case of accidental deletions.
Use Version Control:
For documents, consider using version control systems or features available in certain applications (like Microsoft Office) that automatically save versions of your documents.
About us and this blog
Panda Assistant is built on the latest data recovery algorithms, ensuring that no file is too damaged, too lost, or too corrupted to be recovered.
Request a free quote
We believe that data recovery shouldn’t be a daunting task. That’s why we’ve designed Panda Assistant to be as easy to use as it is powerful. With a few clicks, you can initiate a scan, preview recoverable files, and restore your data all within a matter of minutes.
Subscribe to our newsletter!
More from our blog
See all postsRecent Posts
- How to recover deleted voicemail samsung? 2025-04-22
- Samsung portable ssd t5 online recovery 2025-04-22
- Fix western digital external hard drive 2025-04-22

 Try lt Free
 Recovery success rate of up to


