Transferring computer files to an external hard drive involves several methods and considerations.
I. Preparation
Check Compatibility
Make sure your computer has the appropriate ports to connect to the external hard drive. Common ports include USB – A, USB – C, Thunderbolt (for Macs and some high – end PCs). For example, if your external hard drive has a USB – C connector and your computer only has USB – A ports, you may need an adapter.
Also, ensure that your computer’s operating system supports the file system of the external hard drive. For Windows computers, NTFS is a common file system, while Macs support HFS+ and APFS. Some external hard drives come pre – formatted in a way that may not be natively compatible with your operating system. For instance, an external hard drive formatted as NTFS may need additional software to be fully writable on a Mac.

Connect the External Hard Drive
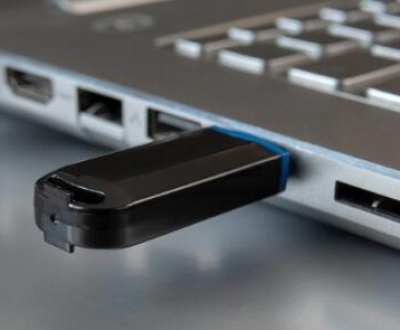
Plug in the external hard drive to an available port on your computer. Once connected, your computer should detect the drive. In Windows, you may hear a sound indicating a new device has been connected, and a notification may pop up in the system tray. On a Mac, the external hard drive icon will usually appear on the desktop.
Format the External Hard Drive (if necessary)
If the external hard drive is not formatted in a way that is compatible with your computer’s operating system, you may need to format it.
On Windows:
Open the Disk Management tool. You can do this by right – clicking on the Start button and selecting “Disk Management.”
Locate the external hard drive in the list of disks. Right – click on the partition of the external hard drive you want to format and select “Format.”
Choose the file system you want (such as NTFS) and other formatting options like allocation unit size and volume label. Be aware that formatting will erase all data on the drive, so make sure to back up any important data if the drive already has content.
On Mac:
Open “Disk Utility.” You can find it in the Utilities folder within the Applications folder.
Select the external hard drive in the sidebar of Disk Utility.
Click on the “Erase” button. Choose the file system (such as Mac OS Extended (Journaled) or APFS depending on your needs) and give the drive a name. As with Windows, formatting erases all data on the drive.
II. Transferring Files
Manual File Transfer (Drag and Drop)
On Windows:
Open File Explorer. You can do this by pressing the Windows key + E.
Locate the files or folders you want to transfer. You can navigate through your computer’s internal drives (usually C: drive) to find the relevant data.
Once you’ve found the files, simply drag and drop them onto the icon of the external hard drive in File Explorer. You can also right – click on the files and select “Send To” and then choose the external hard drive from the list. For example, if you want to transfer a folder of photos from your “Pictures” folder on the C: drive to the external hard drive, you would navigate to the “Pictures” folder, select the photo folder, and drag it to the external hard drive icon.
On Mac:
Open the Finder. The Finder icon is usually in the Dock.
Locate the files you want to transfer. You might have to search through your Mac’s internal storage (usually the “Macintosh HD”) to find the relevant files.
Drag and drop the files or folders onto the icon of the external hard drive that appears on the desktop. Similar to Windows, you can also use the “Copy” and “Paste” commands. For example, if you want to transfer a music playlist from your “Music” folder to the external hard drive, you would find the playlist in the “Music” folder, select it, and drag it to the external hard drive icon.
Using Backup Software
Windows Backup and Restore (Windows 7 and later):
Open the Control Panel. You can search for it in the Start menu.
In the Control Panel, look for “Backup and Restore” (the name may vary slightly depending on the Windows version).
Click on “Set up backup” and select the external hard drive as the backup destination.
You can choose which files and folders you want to back up, such as your documents, pictures, and music. The software will then create a backup of the selected data on the external hard drive according to a schedule you set (if you choose to). For example, you could set it to back up your important work documents every Sunday night.
Time – Machine (Mac):
Connect the external hard drive to your Mac.
Open System Preferences and click on “Time – Machine.”
Click on “Select Backup Disk” and choose the external hard drive. Time – Machine will then automatically back up your entire Mac, including system files, applications, and user data, at regular intervals. It creates a history of your files, so you can restore previous versions of files if needed. For example, if you accidentally deleted a file last week, you could use Time – Machine to restore it from the backup.
Using File Transfer Utilities (for Specific Situations)
Robocopy (Windows):
Robocopy is a powerful command – line tool for copying files and directories. It’s useful for more complex copying tasks, such as mirroring the contents of a folder structure.
Open the Command Prompt. You can do this by searching for “Command Prompt” in the Start menu.
The basic syntax for using Robocopy is “robocopy [source] [destination] [options]”. For example, if you want to copy all the files from a folder named “Data” on your C: drive to an external hard drive with the drive letter E:, you would type “robocopy C:\Data E:\Data /E” in the Command Prompt. The “/E” option copies all subdirectories, including empty ones.
Rsync (Mac and Linux):
Rsync is a utility for efficiently synchronizing files and directories between different locations. It’s often used in server environments and for advanced file management.
On a Mac, you can access Rsync through the Terminal. Open the Terminal application (found in the Utilities folder within the Applications folder).
The basic syntax for Rsync is “rsync – a [source] [destination]”. For example, if you want to copy a folder of documents from your home directory on a Mac to an external hard drive mounted at /Volumes/ExternalDrive, you would type “rsync – a ~/Documents /Volumes/ExternalDrive/Documents” in the Terminal. The “- a” option stands for “archive” and copies files and directories recursively while preserving file permissions and other attributes.
III. Verifying the Transfer
Check File Sizes and Counts
After the transfer is complete, you can compare the number of files and their sizes on the source location (your computer’s internal drive) and the destination (the external hard drive).
On Windows:
In File Explorer, right – click on the folder you transferred from and select “Properties.” Note the number of files and the size of the folder. Then, do the same for the corresponding folder on the external hard drive. The numbers should match (allowing for a small difference due to file system overhead).
On Mac:
In the Finder, select the folder you transferred from and choose “Get Info” from the File menu. Record the number of files and the size. Then, do the same for the transferred folder on the external hard drive.
Test File Accessibility
Open some of the files you transferred from the external hard drive to make sure they can be accessed and opened properly. For example, if you transferred a video file, try playing it using a media player on your computer. If you transferred a document, open it in the appropriate software (such as Microsoft Word for a.docx file). If you encounter any errors, such as a file not opening or being corrupted, you may need to re – transfer the file or check for issues with the external hard drive’s connection or file system.
About us and this blog
Panda Assistant is built on the latest data recovery algorithms, ensuring that no file is too damaged, too lost, or too corrupted to be recovered.
Request a free quote
We believe that data recovery shouldn’t be a daunting task. That’s why we’ve designed Panda Assistant to be as easy to use as it is powerful. With a few clicks, you can initiate a scan, preview recoverable files, and restore your data all within a matter of minutes.
Subscribe to our newsletter!
More from our blog
See all postsRecent Posts
- How to repair usb flash? 2025-05-09
- How to repair a broken usb port 2025-05-09
- How to repair my usb flash drive 2025-05-09

 Try lt Free
 Recovery success rate of up to


