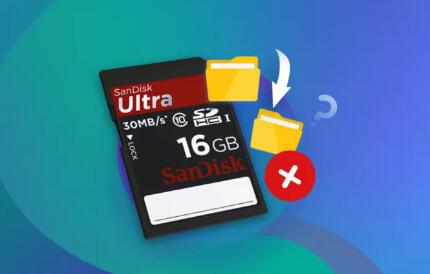
Retrieving deleted images from a memory card can be a daunting task, especially when you’re uncertain about the right steps to take.
Memory Cards and Data Deletion
1. Understanding Memory Cards and Data Deletion
1.1 How Memory Cards Store Data
Memory cards, such as SD (Secure Digital) cards and microSD cards, use flash memory technology to store data. When you save a file, it is written to a specific location on the card. This data can be read and retrieved as long as the memory card is functional.
1.2 What Happens When You Delete Files
When you delete an image from a memory card, the file system marks the space occupied by that file as available for new data. However, the actual data remains on the card until it is overwritten by new files. This means that recovery is often possible if no new data has been written to the card since the deletion.

2. Preparation for Recovery
2.1 Stop Using the Memory Card
As soon as you realize that images have been deleted, stop using the memory card immediately. This will help prevent any new data from overwriting the deleted files, increasing your chances of recovery.
2.2 Assess the Situation
Evaluate the type of deletion. Was it a simple accidental deletion, or did the card become corrupted? Understanding the issue can help you choose the right recovery method.
2.3 Gather Necessary Tools
You may need the following tools:
A computer (Windows or Mac)
A memory card reader
Data recovery software (e.g., Recuva, PhotoRec, EaseUS Data Recovery Wizard)
A backup of the card’s data, if available
3. Recovery Methods
3.1 Using Recovery Software
Step-by-Step Guide
Choose Recovery Software: Select a reliable data recovery program. Popular options include Recuva, PhotoRec, and EaseUS Data Recovery Wizard.
Download and Install: Download the chosen software on your computer and install it. Ensure that it is not installed on the memory card to avoid overwriting deleted files.
Connect the Memory Card: Use a card reader to connect the memory card to your computer.
Run the Software: Open the recovery software. Most programs will prompt you to select the drive (memory card) you want to scan.
Select the Scan Type: Choose a quick scan for a fast search, or a deep scan for a more thorough search, which may take longer but has a higher chance of recovery.
Start the Scan: Begin the scanning process. The software will look for recoverable files.
Preview Found Files: Once the scan is complete, you’ll see a list of recoverable files. Use the preview feature to check the images you want to recover.
Recover Selected Files: Select the images you wish to recover and specify a location on your computer to save them (do not save them back to the memory card).
Check Recovered Files: After recovery, check the images to ensure they are intact and usable.
3.2 Using Professional Recovery Services
If software recovery fails or the memory card is physically damaged, consider professional data recovery services.
When to Seek Professional Help
Severe physical damage (e.g., water or fire damage).
Extensive corruption or failure of the card.
Critical data that cannot be recovered through software.
What to Expect from Professional Services
Assessment: A technician will evaluate the memory card to determine the extent of damage and recovery possibilities.
Quote: You will receive a quote based on the complexity of the recovery.
Recovery Process: Professionals use specialized equipment and software to recover data that is typically inaccessible to consumers.
Data Return: Recovered data is provided to you on a new storage device or via digital transfer.
3.3 Manual Recovery Techniques
In some cases, you may attempt to recover deleted images manually, especially if the issue is file system corruption.
Steps for Manual Recovery
Accessing Card via Command Prompt (Windows):
Connect the memory card to your computer.
Open Command Prompt and type chkdsk X: /f (replace X with the drive letter of your card).
This will scan and attempt to fix any file system errors.
Using Disk Utility (Mac):
Connect the memory card to your Mac.
Open Disk Utility and select the card.
Click on “First Aid” to check for and repair file system errors.
Check for Hidden Files: Sometimes, deleted files can appear hidden. Enable the option to view hidden files in your operating system’s file explorer settings.
4. Preventing Future Data Loss
4.1 Best Practices for Data Management
Regularly Backup Data: Create backups of important images to multiple locations (external drives, cloud storage).
Use Proper Eject Procedures: Always eject the memory card safely before removing it from the device.
Avoid Filling the Card to Capacity: Leaving some free space can help reduce the risk of overwriting deleted files.
4.2 Regular Backups
Implement a routine backup schedule for all important data stored on memory cards. Use automated backup solutions where possible to ensure consistency.
About us and this blog
Panda Assistant is built on the latest data recovery algorithms, ensuring that no file is too damaged, too lost, or too corrupted to be recovered.
Request a free quote
We believe that data recovery shouldn’t be a daunting task. That’s why we’ve designed Panda Assistant to be as easy to use as it is powerful. With a few clicks, you can initiate a scan, preview recoverable files, and restore your data all within a matter of minutes.
Subscribe to our newsletter!
More from our blog
See all postsRecent Posts
- Data recovery usb memory stick 2025-04-21
- SD card data recovery services 2025-04-21
- On track data recovery 2025-04-21

 Try lt Free
 Recovery success rate of up to


