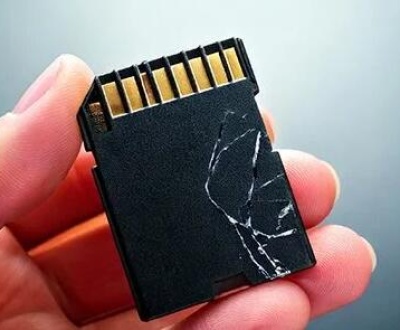
Restoring images from an SD card can seem like a daunting task, especially if the files were accidentally deleted, or the SD card was formatted. However, with the right tools and knowledge, you can recover your lost images with a reasonable chance of success.
SD cards are commonly used in digital cameras, smartphones, drones, and other portable devices to store images and other media files. They are compact, easy to use, and offer a convenient way to expand storage. However, like all storage devices, SD cards can experience issues such as accidental file deletion, corruption, or physical damage, which can lead to the loss of valuable data.
Fortunately, when data is deleted or lost from an SD card, it’s not always gone for good. In many cases, the data remains on the card until it is overwritten by new information. This opens up the possibility of using data recovery tools to retrieve lost files.

Before we dive into the recovery process, it’s important to understand the different scenarios that might lead to image loss. Knowing the cause of data loss can help you decide which recovery method to use.
Accidental Deletion: The most common reason for losing images on an SD card is accidental deletion. Whether it’s due to an unintentional press of the “delete” button or mistakenly formatting the SD card, deleting files on an SD card doesn’t always erase them permanently. Instead, the space occupied by those files is marked as free for new data, allowing the possibility for recovery.
Corruption or Damage: File corruption can occur when the SD card is improperly removed from the device, when it’s exposed to a virus, or when the device has a malfunction. Corruption can result in images becoming inaccessible or unreadable. In some cases, the SD card itself may become physically damaged, such as from dropping the camera or from exposure to water, making data recovery more complicated.
Formatting: Sometimes, users mistakenly format their SD cards. This action erases all files, including images. However, even after formatting, the data is often not completely erased, so there’s a good chance that recovery is still possible if the card is not overwritten with new data.
File System Errors: The file system on the SD card (e.g., FAT32. exFAT, NTFS) might become damaged, causing the images to be unreadable. This can happen due to improper shutdowns, or issues during file transfer between the SD card and a computer or other device.
Physical Damage or Wear: While digital recovery tools can handle logical data loss (e.g., accidental deletion or corruption), physical damage to the SD card (e.g., broken pins, damaged contacts, or wear from prolonged use) may prevent the card from being read, making recovery more difficult or even impossible without professional help.
Preparation for Image Recovery
Before you start recovering images from your SD card, there are a few steps you should take to improve your chances of success:
1. Stop Using the SD Card Immediately
The first rule of thumb in data recovery is to stop using the SD card as soon as you notice image loss. This is because any new data written to the card can overwrite the deleted images, making recovery impossible. If the SD card is still in use, it’s important to stop taking new photos, adding files, or transferring data.
2. Ensure the SD Card is Not Physically Damaged
If the SD card appears to be physically damaged (cracked, bent, or showing signs of wear), you may need to consider seeking professional help. Sometimes, data recovery specialists can retrieve data from physically damaged cards by extracting the chips and reading them using specialized equipment.
3. Use a Reliable Card Reader
To recover images from your SD card, you’ll need to connect the card to your computer. The most common way to do this is with a USB card reader. Avoid connecting the SD card directly to your camera or other devices, as it could complicate the recovery process. A reliable card reader will ensure that the connection between your SD card and computer is stable.
4. Check for File System Compatibility
Make sure your computer can read the file system of the SD card. Most SD cards use the FAT32 or exFAT file systems, which are compatible with most computers. However, if the card is using a different format, such as NTFS or EXT4. you may need to install specific software or drivers to access the files.
Step-by-Step Guide to Recover Images from an SD Card
Once you’re prepared, the next step is to choose the right recovery method. There are a variety of data recovery tools available that can help you retrieve lost images from your SD card. Some methods require software tools, while others may require the help of professionals. Here’s a breakdown of the options:
1. Use Data Recovery Software
Panda Assistant is a powerful data recovery software designed to help users recover lost or deleted files, photos, videos, and other important documents from various storage devices. Whether you’ve accidentally deleted files, lost data due to formatting, or experienced corruption issues, Panda Assistant aims to offer an easy-to-use and efficient solution to restore your lost data. This software is ideal for users who need to recover files from computers, SD cards, USB drives, and other storage media.
Key Features of Panda Assistant
Versatile Recovery Options: Panda Assistant supports the recovery of a wide range of file types, including photos, videos, documents, music files, and more. It can recover files from hard drives, USB drives, memory cards (including SD and microSD), and external drives. Whether the data loss is due to accidental deletion, formatting, or corruption, the software can scan and retrieve your files.
User-Friendly Interface: One of the main features of Panda Assistant is its simple and intuitive interface. Even for users with little technical experience, the program offers a straightforward recovery process. The step-by-step wizard guides you through scanning and recovery, making it accessible to anyone facing data loss.
Deep Scan and Quick Scan: Panda Assistant offers both a quick scan and a deep scan option. The quick scan is ideal for recovering recently deleted files, while the deep scan is designed to search for more complex file loss scenarios, such as formatted drives or file system corruption. This flexibility allows users to choose the most efficient method for their needs.
Preview and Select Files: Before recovering any files, Panda Assistant allows you to preview the recoverable data. This feature ensures that you can check the contents of your files, allowing you to select the specific files you want to restore. This is particularly useful when recovering large amounts of data and helps save time by only restoring the files you actually need.
Safe Recovery Process: Panda Assistant ensures that the recovery process is safe and non-destructive. It never overwrites any existing data on the source drive, which means your chances of recovery remain intact throughout the process. The software recovers files to a different drive or location, preventing further loss of data.
Support for Multiple File Systems: Panda Assistant supports multiple file systems, including FAT32. exFAT, NTFS, HFS+, and more. This versatility makes it suitable for use with various devices, whether they are running Windows, macOS, or Linux.
Free and Paid Versions: Panda Assistant offers a free version with limited features, which is suitable for basic recovery tasks. For more advanced functionality, such as deep scanning, file preview, and unlimited file recovery, users can opt for the paid version. The paid version unlocks additional features and provides ongoing support.
How Panda Assistant Works
The process of recovering files with Panda Assistant is simple and effective:
Install the Software: First, download and install Panda Assistant on your computer. It’s recommended to install the software on a separate drive from the one you want to recover files from to avoid overwriting lost data.
Scan Your Device: Once installed, launch the software and select the drive or device where you lost your files. You can choose to perform a quick scan or a deep scan, depending on the severity of your data loss.
Preview Files: After the scan is completed, Panda Assistant will display a list of recoverable files. You can preview these files to ensure they are intact and meet your needs.
Recover Your Files: Select the files you want to recover, and then choose a safe destination folder to save them. It’s best to recover the files to a different drive or device to avoid overwriting any remaining recoverable data.
2. Use a Professional Data Recovery Service
If the above methods don’t work, or if your SD card is physically damaged, you may need to consult a professional data recovery service. These services have specialized tools and expertise to recover data from damaged or corrupted SD cards. However, they can be costly, and success is not always guaranteed, especially in cases of severe physical damage.
Tips for Preventing Image Loss on SD Cards
While data recovery can help you retrieve lost images, it’s always better to prevent data loss from occurring in the first place. Here are some tips to help you safeguard your images:
Back Up Your Files: Regularly back up your images to a computer, cloud storage, or external hard drive. This will help ensure that you don’t lose precious memories in the event of SD card failure.
Eject Properly: Always eject your SD card properly from your device before removing it. Improper removal can lead to corruption or data loss.
Use Quality SD Cards: Invest in high-quality, reliable SD cards from reputable brands. Cheap, low-quality cards are more prone to failure.
Avoid Overwriting: If you need to recover files from an SD card, avoid taking new photos or adding data until the recovery is complete.
About us and this blog
Panda Assistant is built on the latest data recovery algorithms, ensuring that no file is too damaged, too lost, or too corrupted to be recovered.
Request a free quote
We believe that data recovery shouldn’t be a daunting task. That’s why we’ve designed Panda Assistant to be as easy to use as it is powerful. With a few clicks, you can initiate a scan, preview recoverable files, and restore your data all within a matter of minutes.
Subscribe to our newsletter!
More from our blog
See all postsRecent Posts
- How to search folder in file explorer 2025-05-09
- How to search for duplicates in file explorer 2025-05-09
- Finder search not finding files 2025-05-09

 Try lt Free
 Recovery success rate of up to


