 Try lt Free
 Recovery success rate of up to
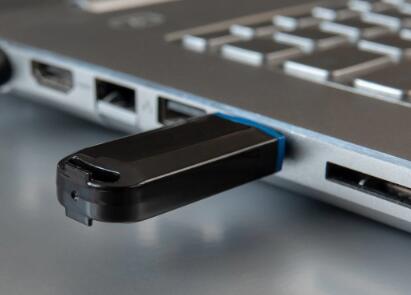
I. Repair a broken usb port
The USB port is one of the most commonly used interfaces on electronic devices, allowing us to connect various peripherals such as keyboards, mice, printers, external hard drives, and smartphones. However, due to frequent use or accidental damage, USB ports can become faulty.
II. Tools and Materials Needed
Before starting the repair process, it’s essential to gather the necessary tools and materials. Here’s a list of what you’ll need:
Screwdriver set: A set of small screwdrivers is required to open the device casing. Different devices may use different types of screws, so a set that includes Phillips – head and flat – head screwdrivers is recommended.
Multimeter: This tool is used to test the electrical conductivity and voltage of the USB port. It helps in determining if the port has a wiring problem or a power issue.
Soldering iron and solder: If the USB port needs to be re – soldered or has a damaged solder joint, a soldering iron and solder will be necessary. Make sure to choose a soldering iron with a suitable tip size for delicate electronic work.
Anti – static wrist strap: To prevent electrostatic discharge from damaging the electronic components inside the device, it’s crucial to wear an anti – static wrist strap while working on the USB port.
Replacement USB port: If the original USB port is beyond repair, you’ll need to purchase a replacement. Make sure to get the correct type and size of the USB port that is compatible with your device. You can usually find replacement USB ports online or at an electronics store.
Magnifying glass or microscope: A magnifying glass or microscope can be helpful for examining the USB port and solder joints more closely, especially when looking for small cracks or damaged areas.
Cleaning supplies: You’ll need isopropyl alcohol and cotton swabs to clean the USB port and remove any dirt, debris, or oxidation that may be affecting its performance.
III. Diagnosing the Problem
The first step in repairing a broken USB port is to accurately diagnose the problem. Here are some common issues and the methods to identify them:
Physical damage: Examine the USB port carefully for any visible signs of damage, such as bent pins, cracked plastic, or loose connections. If the port has been physically damaged, it may need to be replaced or have the damaged parts repaired.
Power supply problem: Use a multimeter to test the voltage at the USB port. Connect the multimeter’s probes to the power and ground pins of the USB port (usually the red and black wires or pins). If the multimeter shows no voltage or an incorrect voltage, there may be a problem with the power supply circuit leading to the USB port. This could be due to a faulty power cable, a blown fuse, or a damaged motherboard component.
Connectivity issues: Try connecting different USB devices to the port to see if the problem is specific to one device or if it affects all devices. If only one device doesn’t work, the issue may be with that particular device’s USB connector. If no devices work, the problem is likely with the USB port itself. Additionally, check if the device recognizes the USB port when it’s plugged in. Sometimes, the port may be working fine, but the device’s drivers or software may be causing a problem. Try updating the device drivers and checking the device manager for any error messages.
Solder joint problems: If the USB port appears to be loose or if you suspect a poor electrical connection, examine the solder joints on the back of the motherboard where the USB port is attached. Look for any signs of cracked, dry, or missing solder. A faulty solder joint can cause intermittent connectivity issues or a complete loss of functionality of the USB port.
IV. Repairing Physical Damage
If the USB port has physical damage, such as bent pins or a cracked plastic housing, here’s how to repair it:
Straightening bent pins: If the pins inside the USB port are bent, use a pair of fine – tipped tweezers or a small flat – head screwdriver to carefully straighten them. Be very gentle to avoid breaking the pins. Place the device under a magnifying glass or use a microscope to get a better view of the pins while straightening them. Once the pins are straightened, test the USB port again to see if it works.
Replacing the USB port: If the plastic housing of the USB port is cracked or if the port is severely damaged and cannot be repaired by straightening the pins, you’ll need to replace the USB port. First, disconnect the device from the power source and remove any batteries if applicable. Then, use a screwdriver to open the device casing and locate the USB port on the motherboard. Unsolder the old USB port from the motherboard using a soldering iron. Be careful not to damage the surrounding components or the motherboard traces. Once the old port is removed, clean the solder pads on the motherboard using a solder wick or a desoldering pump to remove any remaining solder. Then, attach the new USB port to the motherboard by soldering it in place. Make sure to align the port correctly and solder each pin securely. After soldering, check the solder joints for any shorts or loose connections. Finally, reassemble the device and test the new USB port.
V. Fixing Power Supply Issues
If the problem is related to the power supply of the USB port, follow these steps to fix it:
Checking the power cable and adapter: If the device is powered by an external power adapter, check if the adapter is working properly. Plug it into a different electrical outlet and use a multimeter to test the output voltage of the adapter. If the adapter is not providing the correct voltage, it may be faulty and needs to be replaced. Also, check the power cable for any signs of damage, such as frayed wires or a loose connector. If the cable is damaged, replace it with a new one.
Inspecting the motherboard for blown fuses or damaged components: If the power adapter and cable are working fine, the problem may be with the motherboard. Look for any blown fuses on the motherboard near the USB port or the power supply circuit. A blown fuse will usually have a visible break in the filament. If you find a blown fuse, replace it with a new one of the same rating. Additionally, check for any damaged capacitors, resistors, or other components in the power supply circuit. Damaged components may appear swollen, discolored, or have a burnt smell. If you suspect a component is damaged, it’s best to take the device to a professional electronics repair shop, as replacing these components requires specialized knowledge and tools.
Testing and repairing the USB port power lines: Use a multimeter to trace the power lines from the power supply to the USB port. Check for any breaks or shorts in the lines. If you find a break in the line, you may be able to repair it by soldering a new wire in place. If there is a short, you’ll need to identify the cause of the short, which could be due to a damaged component or a solder bridge between two wires. Carefully examine the motherboard and the USB port for any signs of a short and repair it accordingly.
VI. Resolving Connectivity Issues
If the problem is related to connectivity, here are some solutions:
Cleaning the USB port and device connector: Over time, dirt, debris, and oxidation can build up on the USB port and the connector of the device, causing poor contact and connectivity issues. Use a cotton swab dipped in isopropyl alcohol to clean the inside of the USB port and the connector of the device. Gently wipe away any dirt or debris. Let the port and connector dry completely before reconnecting the device. This simple cleaning process can often solve connectivity problems.
Updating device drivers and software: Out – of – date or corrupted device drivers can cause issues with USB connectivity. Visit the manufacturer’s website of the device and download the latest drivers for the USB port or the connected device. Install the drivers and restart the device. Also, make sure the operating system of the device is up to date, as software updates can sometimes fix bugs and improve USB compatibility.
Checking for software conflicts: Some applications or programs may interfere with the normal operation of the USB port. Try disabling or uninstalling any recently installed software that may be related to the USB device or the port. Then, test the USB port again to see if the connectivity issue is resolved. If the problem persists, you can use the system’s diagnostic tools or event viewer to look for any error messages or conflicts related to the USB port.
VII. Repairing Solder Joint Problems
If the USB port has faulty solder joints, follow these steps to repair them:
Inspecting the solder joints: Use a magnifying glass or microscope to closely examine the solder joints on the back of the motherboard where the USB port is attached. Look for any signs of cracks, dryness, or missing solder. Pay attention to each pin of the USB port and make sure the solder joints are secure and shiny.
Resoldering the joints: If you find any faulty solder joints, use a soldering iron to resolder them. First, heat up the soldering iron and tin the tip with a small amount of solder. Then, touch the tip of the soldering iron to the faulty solder joint for a few seconds to melt the existing solder. Add a small amount of new solder to the joint to make it smooth and secure. Make sure not to over – heat the joint or use too much solder, as this can cause shorts or damage to the motherboard. After resoldering each joint, check again for any signs of poor connections or shorts.
Cleaning the solder joints: After resoldering, use a cotton swab dipped in isopropyl alcohol to clean the solder joints. This will remove any flux residue or dirt that may have accumulated during the soldering process. The cleaned joints will have better electrical conductivity and are less likely to corrode over time.
VIII. Precautions and Tips
Here are some important precautions and tips to keep in mind during the repair process:
Safety first: Always disconnect the device from the power source and remove the batteries before working on the USB port. This will prevent electric shock and damage to the device. Also, wear an anti – static wrist strap to protect the electronic components from electrostatic discharge.
Take your time: Repairing a USB port requires patience and careful work. Rushing through the process can lead to mistakes and further damage to the device. Take your time to diagnose the problem accurately and perform the repairs carefully.
Keep track of screws and parts: When opening the device casing, make sure to keep track of all the screws and small parts. It’s easy to lose them, and misplacing a screw or a part can make it difficult to reassemble the device properly. You can use a small container or a magnetic mat to hold the screws and parts.
Test before and after repair: Before starting the repair, test the USB port to confirm the problem. After completing the repair, test the port again to make sure it’s working properly. This will help you determine if the repair was successful and if there are any other issues that need to be addressed.
Seek professional help if needed: If you’re unsure about any step of the repair process or if the problem seems too complex, don’t hesitate to seek professional help. A professional electronics repair technician has the experience and expertise to handle more complicated issues and can ensure the device is repaired correctly.
About us and this blog
Panda Assistant is built on the latest data recovery algorithms, ensuring that no file is too damaged, too lost, or too corrupted to be recovered.
Request a free quote
We believe that data recovery shouldn’t be a daunting task. That’s why we’ve designed Panda Assistant to be as easy to use as it is powerful. With a few clicks, you can initiate a scan, preview recoverable files, and restore your data all within a matter of minutes.
Subscribe to our newsletter!
More from our blog
See all posts


Recent Posts
- Dell backup and recovery windows 11 2025-04-21
- Dell os recovery tool keeps crashing 2025-04-21
- Raw hdd data recovery 2025-04-21