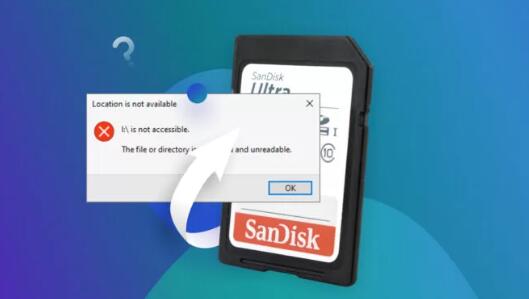
I. Micro SD cards
Micro SD cards are widely used for storing data in various devices such as smartphones, cameras, and tablets. Sometimes, you may encounter a situation where the micro SD card is write protected, which means you can’t modify, delete, or add new data to it. This can be quite frustrating, especially when you need to update or manage the files on the card. In this comprehensive guide, we will explore different methods to remove write protection from a micro SD card, covering both software – based and hardware based solutions.
II. Reasons for Write Protection
Physical Lock Switch: Many micro SD cards come with a small physical switch on the side of the card. This switch is used to set the write – protection status. If the switch is in the “lock” position, the card will be write protected. This is a simple and intentional way to prevent accidental data deletion or modification.

Software or Device – related Issues: In some cases, the write protection can be set by the device’s software or operating system. For example, if there is a firmware bug in the device that reads the micro SD card, it might incorrectly set the write – protection flag. Also, some security software or settings on the host device can restrict write access to the SD card to protect data integrity or prevent malware from writing to the card.
Corrupted File System: A corrupted file system on the micro SD card can also lead to write – protection – like symptoms. When the file system is damaged, the device may not allow write operations to avoid further data loss or corruption.
III. Software – based Solutions
Using Diskpart in Windows
What is Diskpart? Diskpart is a command – line utility in Windows that allows you to manage disks, partitions, and volumes. It can be used to change the attributes of a disk, including removing write protection.
Steps to Use Diskpart:
Press the Windows key + R, type “diskpart” in the Run dialog box, and press Enter. This will open the Diskpart console.
In the Diskpart console, type “list disk” and press Enter. This will display a list of all the disks connected to your computer.
Identify the disk number that corresponds to your micro SD card. You can usually tell by the size and other characteristics.
Type “select disk [disk number]” (replace [disk number] with the actual disk number of your micro SD card) and press Enter.
Then type “attributes disk clear readonly” and press Enter. This command will clear the read – only (write – protected) attribute of the disk.
Precautions: Make sure you have selected the correct disk number. Incorrectly selecting a disk and changing its attributes can lead to data loss or other problems on your other storage devices.
Using Terminal in macOS and Linux
For macOS:
Open the “Terminal” application. You can find it in the “Utilities” folder within the “Applications” folder.
Type “diskutil list” and press Enter. This will display a list of all the disks and volumes attached to your Mac.
Identify the disk identifier (usually something like “/dev/disk[number]”) of your micro SD card.
Then type “diskutil unmountDisk [disk identifier]” (replace [disk identifier] with the actual identifier of your micro SD card) to unmount the disk.
After unmounting, type “diskutil eraseDisk [format] [disk identifier]” (for example, “diskutil eraseDisk FAT32 /dev/disk[number]”) to erase the disk and remove any write – protection settings. The [format] parameter can be set according to your needs, such as FAT32 or exFAT.
For Linux:
Open a terminal window.
Use the command “fdisk -l” to list all the disks and partitions. Identify the device name of your micro SD card (usually something like “/dev/sd[letter]”).
You can try to remount the device with write permissions. First, unmount the device using the command “umount /dev/sd[letter]”. Then remount it with write permissions using a command like “mount – o remount,rw /dev/sd[letter]”. However, this method may not work if the write – protection is due to a more severe hardware or file system issue.
Using Third – Party Software
Panda Assistant is a robust data recovery tool that helps users restore lost, deleted, or corrupted files from various devices such as hard drives, SSDs, USB drives, and memory cards. With an intuitive interface, it allows for quick and easy recovery of documents, photos, videos, and more. The software uses advanced scanning algorithms to retrieve data efficiently and offers a preview feature to ensure accurate recovery. Panda Assistant also provides disk repair tools for fixing damaged partitions. Regular updates ensure it remains effective in recovering data from new storage technologies, making it a reliable solution for file recovery needs.
IV. Hardware – based Solutions
Check and Adjust the Physical Lock Switch
As mentioned earlier, many micro SD cards have a physical lock switch. Locate this switch on the side of the card. If it’s in the locked position (usually indicated by a small arrow or icon), slide it to the unlocked position. Sometimes, due to dirt or debris, the switch may not move smoothly. You can use a small, clean tool like a toothpick to carefully clean around the switch area and then try to move it again.
Inspect and Repair the Card Reader
Clean the Card Reader: If the micro SD card works fine in some devices but not in others, the problem may lie with the card reader. Dust, lint, or other debris can accumulate in the card reader and cause connection problems or incorrect write – protection settings. Use a can of compressed air to blow out any debris from the card reader. You can also try using a small, clean brush (like a paintbrush) to gently sweep out any particles that the compressed air may not have removed.
Check for Damaged Pins: The card reader has pins that make contact with the micro SD card. If these pins are bent or damaged, it can lead to improper communication with the card and potentially write – protection issues. Inspect the pins carefully. If you find any bent pins, you may need to carefully straighten them using a small, non – conductive tool like a plastic tweezers. However, this should be done with extreme caution, as further damage to the pins can render the card reader unusable.
V. Data Backup Considerations
Before attempting any of the above methods to remove write protection, especially those that involve formatting or using potentially risky commands, it’s crucial to back up your data. You can use the built – in backup features of your operating system (such as Time Machine in macOS or File History in Windows) or third – party backup software to create a copy of the data on the micro SD card. If you are unable to back up the data through normal means due to the write – protection, you may consider using data recovery software to extract the data first and then proceed with the steps to remove write protection.
About us and this blog
Panda Assistant is built on the latest data recovery algorithms, ensuring that no file is too damaged, too lost, or too corrupted to be recovered.
Request a free quote
We believe that data recovery shouldn’t be a daunting task. That’s why we’ve designed Panda Assistant to be as easy to use as it is powerful. With a few clicks, you can initiate a scan, preview recoverable files, and restore your data all within a matter of minutes.
Subscribe to our newsletter!
More from our blog
See all postsRecent Posts
- How to repair usb flash? 2025-05-09
- How to repair a broken usb port 2025-05-09
- How to repair my usb flash drive 2025-05-09

 Try lt Free
 Recovery success rate of up to


