Write protection on a hard disk is a security feature that prevents any modification, deletion, or addition of data on the disk. While this can be useful for safeguarding important data, it can become a hindrance when you need to make changes to the disk.
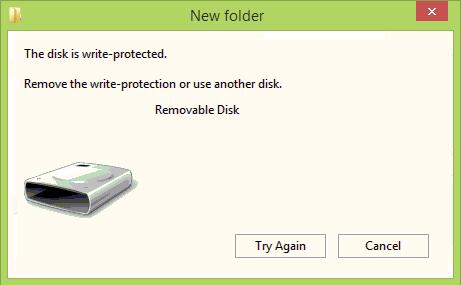
Write Protection
Before diving into the methods to remove write protection, it’s important to understand what write protection is and why it might be enabled on your hard disk.
Write protection can be applied to a hard disk in several ways:
Physical Switch: Some external hard drives come with a physical switch that can toggle write protection on and off.
Registry Settings: On Windows systems, write protection can be enabled through the Windows Registry.
File System Corruption: In some cases, file system errors or corruption can cause the system to mark the disk as write-protected.
Group Policy: System administrators can enforce write protection through Group Policy settings.
Malware or Virus: Malicious software can sometimes alter system settings, including enabling write protection on your disk.
Method 1: Check for Physical Write Protection Switch
If your hard disk or USB drive has a physical write protection switch, this is the first thing you should check. The switch is usually located on the side of the device and is labeled with icons representing the locked and unlocked positions.
Steps:
Eject the hard disk safely from your computer.
Locate the physical switch on the drive.
Toggle the switch to the “unlocked” position.
Reconnect the hard disk to your computer.
Attempt to copy, delete, or modify a file on the disk to check if the write protection has been removed.
Method 2: Using the Diskpart Command Line Utility
Diskpart is a powerful command-line utility in Windows that can be used to manage disks, partitions, and volumes. It can also be used to remove write protection from a hard disk.
Steps:
Press Win + R, type cmd, and press Enter to open the Command Prompt.
Type diskpart and press Enter to launch the Diskpart utility.
Type list disk and press Enter to display all the disks connected to your system.
Identify the disk that is write-protected (e.g., Disk 1) and type select disk 1 (replace “1” with the number corresponding to your disk) and press Enter.
Type attributes disk clear readonly and press Enter. This command will remove the read-only attribute from the selected disk.
Type exit to close Diskpart.
Restart your computer and check if the write protection has been removed.
Method 3: Editing the Windows Registry
If the write protection is enforced through the Windows Registry, you can remove it by editing the registry settings. However, modifying the registry can be risky, so it’s important to follow the steps carefully.
Steps:
Press Win + R, type regedit, and press Enter to open the Registry Editor.
Navigate to the following key: HKEY_LOCAL_MACHINE\SYSTEM\CurrentControlSet\Control\StorageDevicePolicies.
If you see a value named WriteProtect in the right pane, double-click it.
Change the Value data from 1 to 0 and click OK.
Close the Registry Editor and restart your computer.
After restarting, check if the write protection has been removed.
Note: If the StorageDevicePolicies key does not exist, you can create it:
Right-click on Control, select New > Key, and name it StorageDevicePolicies.
Inside StorageDevicePolicies, right-click on the right pane, select New > DWORD (32-bit) Value, name it WriteProtect, and set its value to 0.
Method 4: Using Group Policy Editor (Windows Pro Editions)
For users running Windows Pro, Enterprise, or Education editions, the Group Policy Editor can be used to remove write protection.
Steps:
Press Win + R, type gpedit.msc, and press Enter to open the Group Policy Editor.
Navigate to Computer Configuration > Administrative Templates > System > Removable Storage Access.
In the right pane, locate and double-click on Removable Disks: Deny write access.
Set it to Disabled and click OK.
Close the Group Policy Editor and restart your computer.
Check if the write protection has been removed.
Method 5: Check and Repair File System Errors
Sometimes, file system errors can cause a disk to become write-protected. Running a disk check utility can help repair these errors.
Steps:
Press Win + X and select Command Prompt (Admin) or Windows PowerShell (Admin).
Type chkdsk X: /f and press Enter (replace “X” with the drive letter of your hard disk).
Allow the utility to run, which may take some time depending on the size and state of the disk.
Once the check is complete, restart your computer and check if the issue is resolved.
Method 6: Using Third-Party Software
If the above methods don’t work, you can use third-party software to manage disk attributes and remove write protection. Many of these tools are specifically designed for advanced disk management and offer a user-friendly interface.
Recommended Software:
EaseUS Partition Master: This software allows you to manage partitions, including removing write protection.
AOMEI Partition Assistant: Another powerful tool that can help remove write protection and fix related disk errors.
MiniTool Partition Wizard: Offers various disk management features, including the ability to clear read-only attributes.
Steps:
Download and install the software of your choice.
Launch the software and locate the write-protected disk.
Use the provided options to clear the read-only attribute or repair disk errors.
Apply the changes and restart your computer.
Method 7: Checking for Malware
In rare cases, malware or viruses can cause your hard disk to become write-protected. Running a full system scan with a reputable antivirus program can help identify and remove any malicious software.
Steps:
Update your antivirus software to ensure it has the latest virus definitions.
Run a full system scan, paying particular attention to the affected disk.
If any threats are detected, follow the prompts to remove them.
Restart your computer and check if the write protection has been removed.
Method 8: Reformatting the Disk
If none of the above methods work, and you don’t mind losing the data on the disk, reformatting the disk is a last resort. This process will remove all data from the disk, including any write protection settings.
Steps:
Backup any important data from the disk, if possible.
Open This PC or My Computer, right-click on the write-protected disk, and select Format.
Choose the file system (e.g., NTFS, FAT32) and ensure the Quick Format option is checked.
Click Start to begin the formatting process.
Once the format is complete, the write protection should be removed.
Removing write protection from a hard disk can be a straightforward process if you understand the underlying cause. Whether it’s a physical switch, system settings, or malware, the methods outlined above cover a wide range of scenarios. By following these steps carefully, you can regain full access to your hard disk and resume using it as needed.
About us and this blog
Panda Assistant is built on the latest data recovery algorithms, ensuring that no file is too damaged, too lost, or too corrupted to be recovered.
Request a free quote
We believe that data recovery shouldn’t be a daunting task. That’s why we’ve designed Panda Assistant to be as easy to use as it is powerful. With a few clicks, you can initiate a scan, preview recoverable files, and restore your data all within a matter of minutes.
Subscribe to our newsletter!
More from our blog
See all posts


Recent Posts
- How to recover a deleted file from sharepoint? 2025-02-21
- How to recover a autocad file? 2025-02-21
- How to recover overwritten files? 2025-02-21