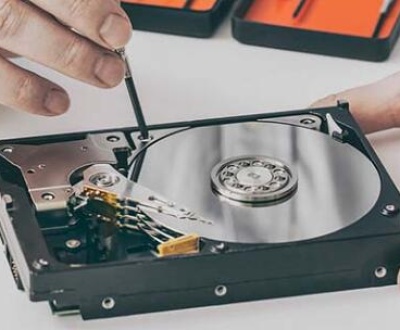
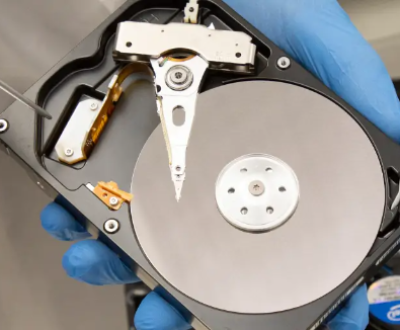
Removing a hard disk from a Dell laptop can be a straightforward task if done carefully. Whether you’re upgrading, replacing, or salvaging data from an old hard drive, it’s important to follow the right procedures to ensure the safety of both the hardware and your data.
1. Hard Drive Removal
Why You Might Need to Remove Your Hard Drive
There are several reasons why you may want to remove the hard drive from your Dell laptop:
Upgrading Storage: If you need more storage space or want to upgrade to a faster drive (e.g., from an HDD to an SSD).
Replacing a Faulty Hard Drive: If your current drive is malfunctioning or has failed, removing it is the first step in either replacing it with a new one or trying to recover data.
Transferring Data: You might want to transfer data from an old laptop to another system or back up important files before wiping the laptop.
Data Recovery: If the operating system is corrupted and you need to recover files, removing the drive and connecting it to another machine can help retrieve the data.
Common Dell Laptop Models for Hard Drive Removal
Dell laptops come in a wide variety of models, and while the general procedure for removing the hard drive is similar, there may be slight differences depending on the specific model. Common Dell laptop series where users frequently remove hard drives include:
Dell Inspiron Series: The Inspiron series is known for its affordability and ease of access, making it a common choice for users who perform hardware upgrades or replacements.
Dell XPS Series: Known for premium performance, the XPS series is slightly more complex but still relatively straightforward for DIYers to work on.
Dell Latitude Series: This series is targeted more towards business use and tends to have easy-to-remove hard drives, though some models may be more difficult to access due to design differences.
Dell Alienware Series: As gaming laptops, Alienware systems are typically designed for performance but might require a bit more effort to access the hard drive.
2. Preparation for Hard Drive Removal
What You’ll Need: Tools and Equipment
Before you begin, make sure you have the right tools to complete the task safely:
Small Phillips-head screwdriver: This will help you remove screws without damaging the laptop.
Plastic pry tools (optional): These tools are useful if you need to carefully separate parts of the laptop casing.
Anti-static wrist strap: This will prevent electrostatic discharge, which can damage sensitive components inside your laptop.
Small container or magnetic tray: This will help you keep track of small screws to avoid losing them.
A replacement hard drive (if upgrading or replacing): Make sure the new drive is compatible with your laptop.
External storage device (optional): You can back up data to an external drive before removing the hard drive.
Backing Up Your Data
If you are removing the hard drive to perform an upgrade or because your current drive is malfunctioning, it’s critical to back up your data before proceeding. You can use cloud storage services like Google Drive, OneDrive, or Dropbox, or back up your data to an external hard drive or USB drive.
Ensuring Safety: Precautions to Take
Before you start, take the following precautions:
Power Off the Laptop: Ensure the laptop is completely powered down. Disconnect it from any power sources, including the charging cable.
Remove the Battery: If your Dell laptop has a removable battery, take it out. This helps prevent any accidental electrical shorts while working inside the system.
Use an Anti-Static Strap: Static electricity can damage the delicate components inside your laptop. By wearing an anti-static wrist strap, you’ll protect the internal parts from potential harm.
3. Step-by-Step Guide to Removing the Hard Drive from a Dell Laptop
Step 1: Power Off and Disconnect the Laptop
To start, power off your laptop completely. Disconnect any peripheral devices (such as a mouse, keyboard, or external hard drive) from the laptop. If your Dell laptop has a removable battery, you should also remove it to prevent any electrical issues.
Step 2: Locate and Access the Hard Drive
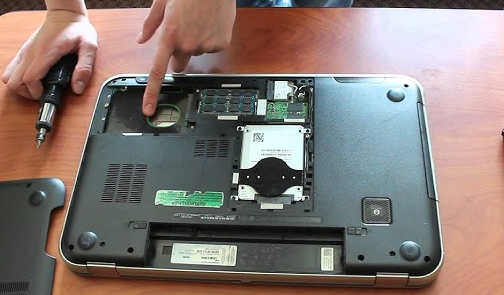
In most Dell laptops, the hard drive is typically located under the bottom panel of the laptop. Some laptops have a dedicated hard drive compartment, while others may require you to remove the entire bottom panel.
Flip the laptop over to access the underside.
Locate the screws securing the back panel. These screws are usually small and require a Phillips-head screwdriver.
Remove the screws carefully, placing them in a small tray to avoid losing them.
Remove the back panel. Some models may have a single compartment for the hard drive, while others will require you to remove the whole bottom panel to gain access to the internal components.
Look for the hard drive. It will likely be housed in a metal bracket or attached to a mounting system with a couple of screws.
Step 3: Removing the Hard Drive from the Laptop
Once you have access to the hard drive, follow these steps:
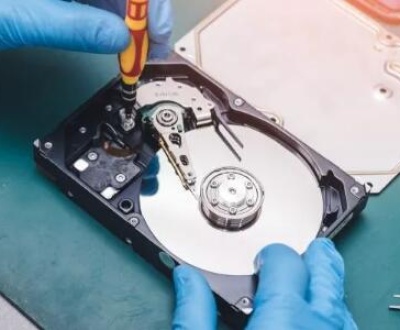
Unscrew the hard drive bracket (if applicable). Most laptops will have screws holding the hard drive in place. Use your screwdriver to remove them.
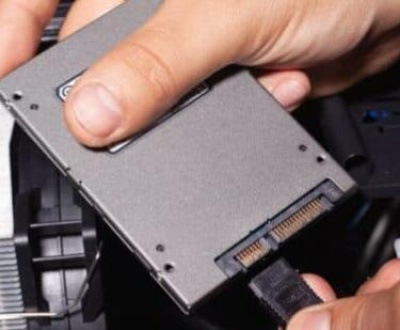
Disconnect the hard drive from the laptop’s motherboard. Depending on your Dell model, the hard drive may be connected via a SATA connector. Gently pull the drive out of the connector, making sure not to apply excessive force.
Remove the hard drive. Once disconnected, gently slide the hard drive out of its compartment or bracket. Be mindful of any cables or connectors attached to it.
Handle the drive carefully. Hard drives are sensitive devices, so avoid dropping or jarring the disk.
Step 4: Installing a New Hard Drive (Optional)
If you’re replacing the old hard drive with a new one, follow these steps to install the new drive:
Slide the new hard drive into the mounting bracket (if applicable).
Connect the hard drive to the motherboard. Align the SATA connector and carefully insert it into the laptop’s connection port.
Secure the new hard drive with screws. Tighten any screws that hold the hard drive in place to ensure it’s properly mounted.
Reattach the back panel. Once the new hard drive is secured, place the back panel back onto the laptop and screw it into place.
4. Troubleshooting and Tips
Dealing with Stubborn Screws
Sometimes, screws can be particularly stubborn or stripped, making it difficult to remove them. Here are some ways to deal with this issue:
Use a rubber band: If the screw head is stripped, place a rubber band over it, then try unscrewing it with a screwdriver.
Try a different screwdriver: If the current screwdriver isn’t gripping the screw well, try a different size or type of Phillips-head screwdriver.
Use pliers: If the screw is particularly tight, you can use needle-nose pliers to grip the sides of the screw and turn it.
What to Do if the Hard Drive is Not Easily Accessible
In some models, the hard drive might be hidden beneath other internal components or require more effort to access. If you encounter such a situation, consult your laptop’s manual or look up a model-specific guide online.
Common Mistakes to Avoid
Forcing the drive out: If the hard drive isn’t coming out easily, don’t force it. Check for any screws you might have missed or any cables still attached.
Losing screws: Be sure to keep track of all screws and small parts as you work. Losing screws can make reassembly difficult.
Static electricity damage: Always ground yourself or use an anti-static wrist strap before handling any internal laptop components.
5. Post-Removal Considerations
How to Dispose of Your Old Hard Drive
If you’re disposing of an old hard drive, be sure to wipe it thoroughly to protect your data. You can use data destruction software to securely erase the contents or physically destroy the hard drive.
Reinstalling Your Hard Drive
If you need to reinstall the hard drive, simply reverse the removal process. Slide the hard drive back into its mounting bracket, reconnect it to the motherboard, and screw everything back into place.
About us and this blog
Panda Assistant is built on the latest data recovery algorithms, ensuring that no file is too damaged, too lost, or too corrupted to be recovered.
Request a free quote
We believe that data recovery shouldn’t be a daunting task. That’s why we’ve designed Panda Assistant to be as easy to use as it is powerful. With a few clicks, you can initiate a scan, preview recoverable files, and restore your data all within a matter of minutes.
Subscribe to our newsletter!
More from our blog
See all postsRecent Posts
- Data recovery san francisco service 2025-05-23
- Data recovery san jose cost 2025-05-23
- Data recovery in san diego 2025-05-23

 Try lt Free
 Recovery success rate of up to

