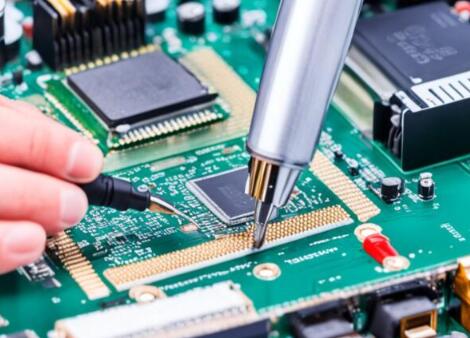
Recovering data from a damaged motherboard is a complex process that requires a methodical approach and sometimes specialized tools.
Before diving into data recovery methods, it’s crucial to understand the nature of the damage to the motherboard. A motherboard can be damaged in several ways:
Physical Damage: This includes broken or cracked circuits, damaged connectors, or burnt components due to electrical surges.
Electrical Damage: Short circuits or power surges can damage the motherboard’s internal circuitry.
Firmware Corruption: Corruption in the motherboard’s firmware can lead to boot issues and data inaccessibility.

Preliminary Steps
Assess the Damage:
Visual Inspection: Look for any obvious signs of damage such as burnt components, broken solder joints, or loose connections.
Check Power Supply: Ensure that the power supply is working correctly and providing stable power to the motherboard.
Backup Essential Data:
If the motherboard is still partially functional, attempt to back up any essential data immediately. This is crucial if the system is intermittently working.
Remove Components:
Disconnect all peripheral devices, including hard drives, RAM, and expansion cards. This helps in isolating the problem and ensuring that further damage does not occur.
Data Recovery Methods
Method 1: Using Another Compatible Motherboard
Identify Compatibility:
Find a motherboard that is compatible with your existing CPU, RAM, and other components. Ideally, it should be the same model as the damaged motherboard.
Transfer Components:
Carefully transfer the CPU, RAM, and other essential components from the damaged motherboard to the replacement motherboard.
Power Up and Access Data:
Power up the system and check if the new motherboard recognizes the hard drive. If successful, you should be able to access and back up your data.
Method 2: Direct Hard Drive Connection
Remove the Hard Drive:
If the motherboard is not functional at all, carefully remove the hard drive from the damaged system.
Use a Hard Drive Docking Station or USB Adapter:
Connect the hard drive to another working computer using a hard drive docking station or a USB-to-SATA/IDE adapter.
Access and Backup Data:
Once connected, the drive should be recognized as an external drive. Copy the necessary data to another storage device.
Method 3: Data Recovery Software
Connect the Drive:
As mentioned above, use an adapter or docking station to connect the hard drive to a functioning computer.
Install Data Recovery Software:
Use data recovery software to scan the drive for lost or corrupted files. Some popular data recovery software options include:
Recuva: A user-friendly option with a free version.
EaseUS Data Recovery Wizard: Offers advanced recovery features.
Disk Drill: Known for its extensive recovery options.
Perform a Scan:
Run a deep scan to find and recover as much data as possible. Follow the software’s instructions for recovering files.
Save Recovered Data:
Save the recovered data to a separate storage device to prevent any overwriting or loss of recovered files.
Method 4: Professional Data Recovery Services
Identify Reliable Services:
If the above methods do not work or if you’re dealing with severe damage, consider professional data recovery services. Look for services with good reviews and certifications.
Consult and Ship the Drive:
Contact the data recovery service provider to discuss the issue. You may need to ship the hard drive to their facility.
Recovery Process:
Professionals use specialized tools and techniques to recover data from damaged hardware. They can often recover data even from severely damaged drives.
Receive and Verify Data:
Once the recovery is complete, the service provider will return the data. Verify the integrity of the recovered files before finalizing the process.
Preventive Measures for Future
Regular Backups:
Implement a regular backup routine to avoid data loss in case of hardware failure. Use external hard drives or cloud storage solutions.
Surge Protectors:
Use surge protectors to prevent electrical damage due to power surges.
Maintenance:
Keep your system clean and well-maintained to avoid physical damage and overheating.
About us and this blog
Panda Assistant is built on the latest data recovery algorithms, ensuring that no file is too damaged, too lost, or too corrupted to be recovered.
Request a free quote
We believe that data recovery shouldn’t be a daunting task. That’s why we’ve designed Panda Assistant to be as easy to use as it is powerful. With a few clicks, you can initiate a scan, preview recoverable files, and restore your data all within a matter of minutes.


