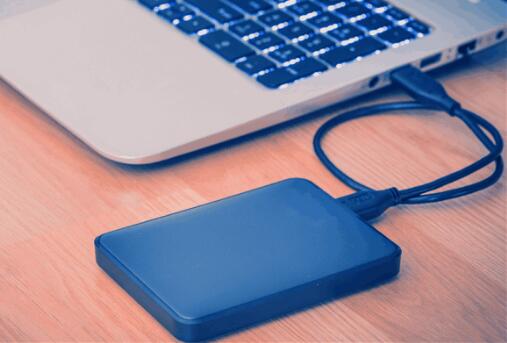
Partitioning an external hard drive is a valuable skill for anyone looking to manage their data effectively. This guide will walk you through the process, detailing everything you need to know, including what partitioning is, its benefits, and step-by-step instructions for different operating systems.
1. Partitioning
What is Partitioning?
Partitioning is the process of dividing a single physical hard drive into multiple logical drives, each of which can be formatted and managed independently. This allows users to organize data, optimize performance, and separate different types of files or operating systems.

Why Partition an External Hard Drive?
Partitioning can help you:
Organize files by type or project.
Improve performance by reducing fragmentation.
Create separate areas for different operating systems.
Enhance data security by isolating sensitive information.
Benefits of Partitioning
Data Organization: Helps you keep files categorized, making it easier to locate and manage them.
Improved Performance: Certain applications run faster on dedicated partitions.
Enhanced Security: Isolating sensitive files reduces the risk of accidental deletion or corruption.
Easier Backups: Backing up specific partitions can be more efficient than backing up the entire drive.
2. Preparation Steps
Before you begin partitioning your external hard drive, it’s crucial to prepare properly.
Backup Your Data
Always back up any important data on the external hard drive. Partitioning can lead to data loss if not done correctly.
Choose the Right File System
Different operating systems use different file systems. Common options include:
NTFS: Best for Windows.
exFAT: Ideal for both Windows and macOS.
HFS+: Suitable for macOS.
Tools Required
Windows: Disk Management or Command Prompt.
macOS: Disk Utility or Terminal.
Linux: GParted or terminal commands.
3. Partitioning on Windows
Using Disk Management
Connect the External Hard Drive: Plug in your external hard drive.
Open Disk Management: Right-click on the Start menu and select “Disk Management.”
Locate the Drive: Find your external hard drive in the list. Ensure you identify it correctly to avoid data loss.
Shrink Volume: Right-click on the drive and select “Shrink Volume.” Enter the amount of space to shrink.
Create New Partition: Right-click on the unallocated space and select “New Simple Volume.” Follow the wizard to set up the new partition.
Format the Partition: Choose the file system and format the new partition.
Using Command Prompt
Open Command Prompt: Search for “cmd” and run as Administrator.
Type diskpart: This opens the DiskPart tool.
List Disks: Type list disk to see all connected drives.
Select Disk: Type select disk X (replace X with your drive number).
Create Partition: Type create partition primary size=XXXXX (replace XXXXX with the size in MB).
Format the Partition: Type format fs=ntfs quick (or your desired file system).
Assign a Drive Letter: Type assign letter=X (replace X with your preferred letter).
Third-Party Software
If you prefer a graphical interface, software like EaseUS Partition Master or AOMEI Partition Assistant can simplify the process.
4. Partitioning on macOS
Using Disk Utility
Connect the External Hard Drive: Plug in your drive.
Open Disk Utility: Go to Applications > Utilities > Disk Utility.
Select the Drive: Click on your external hard drive.
Partition the Drive: Click the “Partition” button.
Add Partition: Click the plus sign to add a partition, adjust the size, and choose the file system.
Apply Changes: Click “Apply” to create the partition.
Using Terminal
Open Terminal: Find it in Applications > Utilities.
List Disks: Type diskutil list to see your drives.
Select Disk: Identify your external drive and note its identifier (e.g., disk2).
Partition Command: Use the command diskutil partitionDisk disk2 2 GPT JHFS+ “Partition1” 50G JHFS+ “Partition2” 50G (adjust sizes as necessary).
Verify Partitions: Type diskutil list again to confirm.
5. Partitioning on Linux
Using GParted
Install GParted: If not already installed, you can find it in your package manager.
Open GParted: Launch the application.
Select Your Drive: Choose the external hard drive from the dropdown.
Resize Existing Partition: Right-click on the partition you want to shrink and select “Resize/Move.”
Create New Partition: Right-click on the unallocated space and select “New.” Specify the file system.
Apply Changes: Click the green checkmark to apply all operations.
Using Command Line Tools
Open Terminal: Find it in your applications.
List Partitions: Type sudo fdisk -l to view drives.
Use parted: Type sudo parted /dev/sdX (replace X with your drive letter).
Create Partition: Use commands like mkpart to create new partitions.
Format Partition: After creating, format with mkfs.ext4 /dev/sdX1 (replace with your partition).
6. Post-Partitioning Steps
After partitioning your external hard drive, you’ll need to format the new partitions.
Formatting the New Partitions
Each partition must be formatted to a file system that your operating system recognizes. This can usually be done during the partitioning process, but you can also do it afterward using:
Windows: Right-click on the partition in File Explorer and select “Format.”
macOS: Open Disk Utility, select the partition, and click “Erase.”
Linux: Use mkfs.ext4 /dev/sdX1 in the terminal.
Verifying the Partitions
To ensure everything is set up correctly:
Check in File Explorer (Windows), Finder (macOS), or using the lsblk command (Linux) to view your partitions.
Tips for Managing Partitions
Keep Backups: Regularly back up important files from each partition.
Monitor Space Usage: Use disk usage tools to avoid running out of space on any partition.
Avoid Overloading: Keep each partition less than 80% full for optimal performance.
About us and this blog
Panda Assistant is built on the latest data recovery algorithms, ensuring that no file is too damaged, too lost, or too corrupted to be recovered.
Request a free quote
We believe that data recovery shouldn’t be a daunting task. That’s why we’ve designed Panda Assistant to be as easy to use as it is powerful. With a few clicks, you can initiate a scan, preview recoverable files, and restore your data all within a matter of minutes.

 Try lt Free
 Recovery success rate of up to


