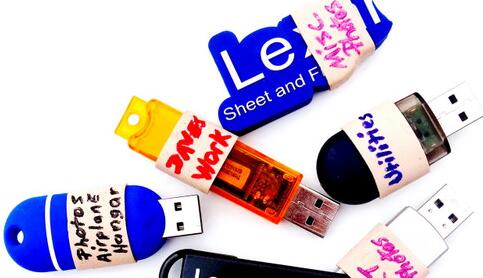
Labeling a USB flash drive effectively involves a few key steps and considerations to ensure that your label is both informative and visually clear.
1. Determine the Purpose of the Label
Before you start labeling, consider what the main purpose of the label is. Labels can serve different functions:
Identification: To easily identify the drive’s content.
Security: To include information such as ownership or encryption status.
Organization: To categorize drives for specific tasks or projects.
2. Choose the Right Labeling Method
There are several ways to label a USB flash drive, depending on your needs and the resources available:
Physical Labels: Stickers or adhesive labels that you write on or print.
Digital Labels: Using software to assign a label that appears when the drive is connected to a computer.
Manual Labels: Handwritten or printed labels that are affixed to the drive.

3. Design the Label
If you’re creating a label for a USB flash drive, whether physically or digitally, the design should be clear and functional. Here’s how to approach the design:
a. Include Essential Information
Drive Name: A clear and descriptive name that reflects the drive’s content or purpose. For example, “Project_X_Backups” or “Personal_Photos.”
Owner’s Name: If the drive is shared or used by multiple people, including the owner’s name can prevent mix-ups.
Date or Version: If the drive is used for ongoing projects or contains multiple versions of files, include the date or version number.
b. Use Readable Fonts and Sizes
Font Choice: Use a clean and readable font like Arial or Helvetica. Avoid overly decorative fonts that can be hard to read.
Font Size: Ensure the text is large enough to be readable but fits comfortably on the label. For physical labels, this might be 8-12 points.
c. Incorporate Colors and Icons
Colors: Use colors that contrast well with the label’s background to make the text stand out. For example, dark text on a light background or vice versa.
Icons: Adding small icons can help visually represent the drive’s content or purpose (e.g., a calendar icon for a drive with schedules).
4. Physical Labeling
If you’re labeling the USB flash drive physically:
a. Use Quality Labels
Choose high-quality adhesive labels that won’t peel off easily. They should be durable and able to withstand handling.
b. Placement
Place the label on a flat, clean surface of the drive where it’s visible but won’t interfere with the USB connection or port.
c. Write Clearly
If you’re handwriting the label, use a fine-tip permanent marker to ensure the writing doesn’t smudge.
5. Digital Labeling
For digital labeling, you can assign a name to the USB drive within your operating system:
a. On Windows:
Insert the USB flash drive.
Open ‘File Explorer’ and find the drive under ‘This PC.’
Right-click the drive and select ‘Properties.’
In the ‘General’ tab, you can change the drive’s label in the ‘Volume label’ field.
b. On macOS:
Insert the USB flash drive.
Open ‘Finder’ and locate the drive under ‘Devices.’
Right-click (or control-click) the drive and select ‘Rename.’
Enter the new name and press ‘Return.’
6. Consider Security and Encryption
If the USB drive contains sensitive information, include a note on the label indicating its encryption status or security level. For instance, “Encrypted” or “Confidential.”
7. Maintain and Update Labels
Regularly review and update the labels as the content or usage of the USB drive changes. This ensures the labels remain accurate and useful.
8. Back Up Important Information
Always back up the data on the USB drive in multiple locations if it’s crucial. Labeling helps manage your drives, but it’s essential to have redundancy in case of data loss.
Labeling a USB flash drive effectively involves deciding on the purpose of the label, choosing the right labeling method, designing a clear and informative label, and maintaining it properly. By following these steps, you can ensure your USB drives are well-organized and their contents easily identifiable.
About us and this blog
Panda Assistant is built on the latest data recovery algorithms, ensuring that no file is too damaged, too lost, or too corrupted to be recovered.
Request a free quote
We believe that data recovery shouldn’t be a daunting task. That’s why we’ve designed Panda Assistant to be as easy to use as it is powerful. With a few clicks, you can initiate a scan, preview recoverable files, and restore your data all within a matter of minutes.
Subscribe to our newsletter!
More from our blog
See all postsRecent Posts
- Can not open jgp files learnosity 2025-02-24
- Klipper unable to open file 2025-02-24
- File format or file extension is not valid 2025-02-24


