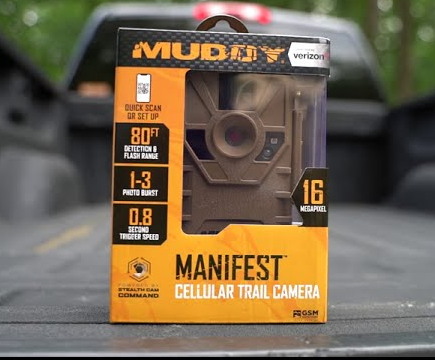
Trail cameras, such as the ones manufactured by Muddy, are essential tools for hunters, wildlife enthusiasts, and researchers. These devices capture crucial photos and videos of animal movements, making SD cards a vital component. However, for your Muddy Trail Camera to function correctly, it’s important to format the SD card properly. Whether you’re troubleshooting storage issues, preparing a new SD card, or reusing an old one, formatting ensures compatibility and eliminates potential problems like file corruption.
Step-by-Step Guide to Formatting an SD Card for a Muddy Trail Camera
1. Why Formatting Is Necessary
Formatting clears the SD card of any existing data, resets its file system, and ensures it’s compatible with the camera. Here are some reasons to format your card:

Prevents file system errors.
Maximizes the performance of your trail camera.
Avoids issues like corrupted files or unrecorded footage.
2. Check Your SD Card Requirements
Before formatting, confirm that your SD card meets Muddy Trail Camera specifications:
Storage Capacity: Most Muddy cameras support SD cards up to 32GB (FAT32 format). Some advanced models may handle cards up to 64GB or 128GB.
Speed Class: Use Class 10 or higher for smoother video recording.
Card Type: Ensure it’s a standard SD or SDHC card (not microSD unless used with an adapter).
3. Prepare for Formatting
Before proceeding, back up any important data on the SD card. Formatting will erase all files.
Option 1: Format the SD Card Using the Muddy Trail Camera
Many Muddy Trail Cameras come with a built-in formatting feature. Follow these steps:
Insert the SD Card
Turn off the camera.
Insert the SD card into the designated slot.
Access the Menu
Power on the camera.
Use the navigation buttons to open the settings menu.
Select the Format Option
Look for the option labeled “Format SD Card” or “Erase Card”.
Highlight and select it.
Confirm Formatting
Follow the on-screen prompts to confirm the action.
Wait for the camera to complete the process.
Test the SD Card
Take a few test photos or videos to ensure the card is functioning correctly.
Option 2: Format the SD Card on a Computer
If your camera doesn’t have a built-in formatting feature or you encounter issues, you can format the SD card using a computer. Here’s how:
For Windows Users:
Insert the SD Card
Use an SD card reader to connect the card to your computer.
Open File Explorer
Press Win + E to open File Explorer.
Locate the SD card under This PC or My Computer.
Right-Click and Select Format
Right-click on the SD card drive.
Choose Format from the dropdown menu.
Set Formatting Options
File System: Select FAT32 (for cards up to 32GB) or exFAT (for larger cards, if supported by the camera).
Allocation Unit Size: Choose the default option.
Quick Format: Check this box for faster formatting.
Start Formatting
Click Start and wait for the process to finish.
Eject the SD card safely before removing it.
For Mac Users:
Insert the SD Card
Use an SD card reader to connect the card to your Mac.
Open Disk Utility
Go to Applications > Utilities > Disk Utility.
Select the SD Card
Click on the SD card from the list of drives.
Erase the Card
Click the Erase button.
Format: Choose MS-DOS (FAT) for FAT32 or ExFAT for larger cards.
Scheme: Select Master Boot Record (MBR).
Confirm and Format
Click Erase to format the card.
Eject the card safely once done.
Option 3: Format the SD Card Using a Smartphone
If you don’t have access to a computer, some Android phones allow SD card formatting. Note that this method works only if your phone supports SD cards and the camera’s file system.
Insert the SD Card
Insert the card into your phone’s SD card slot.
Go to Settings
Navigate to Settings > Storage.
Select the SD Card
Tap on the SD card and choose Format or Format as Portable Storage.
Complete Formatting
Wait for the process to complete before removing the card.
Tips for Maintaining Your SD Card and Camera Performance
Format Regularly
Format the card after transferring files to avoid fragmentation.
Use the Right Card
Stick to the recommended size and speed class to prevent errors.
Avoid Interruptions
Never remove the SD card while the camera is powered on or recording.
Protect the Card
Store the SD card in a protective case when not in use to prevent damage.
Update Camera Firmware
Check for firmware updates from Muddy to ensure compatibility with newer SD cards.
Troubleshooting Common Issues
Camera Doesn’t Recognize the SD Card
Ensure the card is properly inserted.
Check if the card is compatible with the camera.
Reformat the card using a computer.
SD Card Is Full
Transfer files to a computer and format the card to free up space.
Corrupted Files
Use data recovery software to retrieve important files before reformatting.
Slow Performance
Replace the SD card with a faster, higher-quality card if recording lags occur.
About us and this blog
Panda Assistant is built on the latest data recovery algorithms, ensuring that no file is too damaged, too lost, or too corrupted to be recovered.
Request a free quote
We believe that data recovery shouldn’t be a daunting task. That’s why we’ve designed Panda Assistant to be as easy to use as it is powerful. With a few clicks, you can initiate a scan, preview recoverable files, and restore your data all within a matter of minutes.
Subscribe to our newsletter!
More from our blog
See all postsRecent Posts
- How to recover a deleted slide in powerpoint? 2025-02-27
- How to recover deleted capcut videos? 2025-02-27
- How to recover a file deleted from a shared drive? 2025-02-27


