 Try lt Free
 Recovery success rate of up to
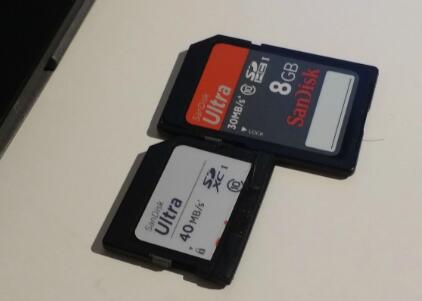
Formatting an SD card on a computer is a simple process, but it’s essential to follow the correct steps to ensure that the card is properly prepared for use.
1. What is Formatting and Why is It Necessary?
Formatting an SD card is the process of preparing it for use with a specific file system. When you format an SD card, all existing data is erased, and the card is set up with a new file system that allows your devices to read and write data to the card. Formatting is necessary for various reasons, such as:
Fresh Setup: When an SD card is new, it may come with no file system or an unsupported one.
Fix Corruption: If the SD card is not functioning correctly or has become corrupted, formatting it can fix the problem.
Change File System: If you need to switch between different file systems for compatibility reasons, formatting is required.
Clearing Data: If you want to clear all the data on the card to start fresh, formatting is the best option.
2. Choosing the Right File System
Before diving into the actual steps of formatting, it’s important to understand which file system to choose. The file system determines how the data is organized on the card and which devices can read and write to it. The most commonly used file systems are:
FAT32: This file system is the most compatible with all types of devices, including digital cameras, smartphones, and computers. However, it has a file size limit of 4GB and is not suitable for high-capacity storage (larger than 32GB).
exFAT: exFAT is an extended version of FAT32 and is suitable for larger SD cards (over 32GB) and files larger than 4GB. It’s compatible with both Windows and macOS, making it ideal for cross-platform use.
NTFS: This file system is primarily used on Windows and supports features like file permissions and encryption. However, it is not widely compatible with devices like cameras or smartphones, so it’s typically not recommended for SD cards used in non-computer devices.
HFS+ (Mac OS Extended): This is the default file system for macOS. If you’re using an SD card only with macOS devices, this might be a good option. However, it’s not compatible with Windows or other operating systems.
For most users, exFAT is the most versatile choice, particularly if you plan to use the SD card on both Windows and macOS, or if it’s larger than 32GB.
3. How to Format an SD Card on Windows
Let’s go through the steps of formatting an SD card on a Windows computer.
Step 1: Insert the SD Card
Insert the SD card into your computer’s card reader or a USB SD card adapter. Make sure the card is properly connected and recognized by your system.
Step 2: Open ‘This PC’ or ‘File Explorer’
Navigate to the “This PC” or “File Explorer” section of your computer. In Windows 10. you can access this by pressing Windows + E or by clicking on the folder icon in the taskbar. The SD card should appear under “Devices and Drives” with a specific drive letter, such as “E:”, “F:”, etc.
Step 3: Right-click the SD Card
Right-click on the SD card drive letter and select the “Format” option from the context menu. A new window will open with formatting options.
Step 4: Choose File System
In the format window, you’ll see a dropdown for the file system. Choose one of the following based on your needs:
FAT32 (for cards up to 32GB).
exFAT (for cards larger than 32GB or if you want to store large files).
Step 5: Allocation Unit Size
The “Allocation Unit Size” can typically be left as “Default.” This setting is related to how data is stored in blocks on the card, but it generally doesn’t need to be changed unless you have specific needs.
Step 6: Quick Format
Check the box that says “Quick Format.” This option will erase the data more quickly by not thoroughly scanning the card for errors. If you want to perform a full format, uncheck this box, but keep in mind it will take longer.
Step 7: Start the Formatting Process
Once all options are set, click “Start” to begin the formatting process. A warning message will appear, confirming that all data will be erased. Click “OK” to proceed.
Step 8: Wait for the Process to Complete
The formatting process may take a few seconds to a few minutes, depending on the size of the SD card. Once it’s complete, you’ll see a message saying the format is finished, and your SD card will be ready to use.
4. How to Format an SD Card on macOS
Now, let’s walk through the steps for formatting an SD card on a Mac.
Step 1: Insert the SD Card
Insert your SD card into the SD card slot on your Mac or use an external card reader.
Step 2: Open Disk Utility
Open “Disk Utility,” which can be found in the “Applications” folder under “Utilities,” or by searching for it using Spotlight (press Cmd + Space and type “Disk Utility”).
Step 3: Select the SD Card
In Disk Utility, locate your SD card in the left-hand panel under “External.” It will be listed by its name or model number.
Step 4: Click ‘Erase’
Click on the “Erase” button at the top of the window. This will open a dialog box with formatting options.
Step 5: Choose File System
Under “Format,” choose one of the following:
exFAT (for larger cards or files over 4GB).
MS-DOS (FAT) (for cards 32GB or less).
Mac OS Extended (Journaled) (for Mac-only use).
Step 6: Name the SD Card
Enter a name for your SD card. This is optional but can help you identify it later.
Step 7: Erase the Card
Once all the options are set, click the “Erase” button to begin formatting. A warning will appear, confirming that all data will be erased. Click “Erase” again to proceed.
Step 8: Wait for the Process to Complete
The process should take a few moments. Once it’s complete, click “Done” to finish. Your SD card is now formatted and ready for use.
5. How to Format an SD Card on Linux
On Linux, the process for formatting an SD card is typically done through the command line or a graphical tool like GNOME Disks.
Using GNOME Disks (Graphical Tool)
Insert the SD Card into your computer and open the GNOME Disks application.
Select the SD Card from the list of available drives on the left.
Click on the Gear Icon and select “Format Partition.”
Choose the File System (e.g., FAT32. exFAT).
Start the Formatting Process by clicking “Format.”
Using the Command Line
For more advanced users, you can use the mkfs command to format the SD card. For example:
bash
sudo mkfs.exfat /dev/sdX
Replace /dev/sdX with the correct device identifier for your SD card. You can find the device identifier by running lsblk or fdisk -l.
6. Troubleshooting Common Formatting Issues
Sometimes, you might encounter issues while formatting an SD card. Here are a few common problems and their solutions:
SD Card Not Showing Up: Make sure the card is properly inserted into the reader. Try using a different card reader or USB port.
Write Protection: If the SD card is write-protected, you won’t be able to format it. Look for a small switch on the side of the SD card and slide it to the “unlocked” position.
Corruption or Errors: If the card has bad sectors or is severely corrupted, you might need to use specialized software to fix the issue. Programs like SD Card Formatter (by the SD Association) or CHKDSK (on Windows) can help.
About us and this blog
Panda Assistant is built on the latest data recovery algorithms, ensuring that no file is too damaged, too lost, or too corrupted to be recovered.
Request a free quote
We believe that data recovery shouldn’t be a daunting task. That’s why we’ve designed Panda Assistant to be as easy to use as it is powerful. With a few clicks, you can initiate a scan, preview recoverable files, and restore your data all within a matter of minutes.
Subscribe to our newsletter!
More from our blog
See all posts


Recent Posts
- Data recovery salt lake city utah 2025-04-18
- Data recovery sacramento 2025-04-18
- Data recovery miami 2025-04-18