 Try lt Free
 Recovery success rate of up to
Formatting an SSD for Windows 10 is an essential task for many computer users. Whether you’re upgrading to a new drive, reinstalling Windows, or just looking to start fresh, knowing how to properly format your SSD is crucial. Formatting ensures that your data is wiped, leaving the drive ready for use and free of any old data that may interfere with the installation of a new operating system or files.
1. SSDs and Their Importance in Windows 10
Before diving into the formatting process, let’s take a moment to understand what an SSD is and why it’s important when working with Windows 10.
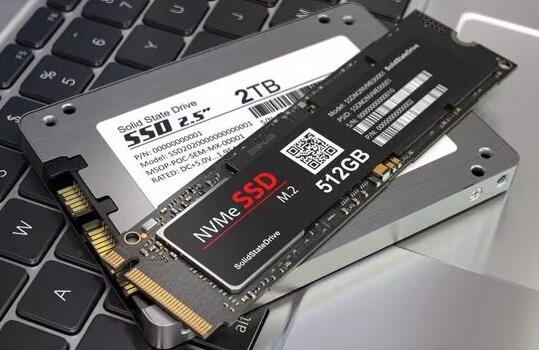
What Is an SSD?
A Solid-State Drive (SSD) is a type of storage device that uses flash memory to store data. Unlike traditional Hard Disk Drives (HDDs) that rely on spinning disks and mechanical parts to read and write data, SSDs have no moving parts, which makes them faster, more durable, and more energy-efficient.
SSD vs. HDD: Why Choose an SSD for Windows 10?
SSDs offer significant performance improvements over HDDs, especially when it comes to boot times, application loading speeds, and overall system responsiveness. Windows 10. in particular, benefits from the fast read and write speeds of SSDs, which results in a quicker and smoother user experience.
An SSD for your system drive (where Windows 10 is installed) can drastically reduce boot time, increase the speed of file transfers, and make software run more efficiently. For these reasons, many users opt to install Windows 10 on an SSD to take advantage of its superior speed.
The Importance of Proper Formatting
Formatting an SSD correctly is essential for optimal performance. If you don’t format your SSD, it could result in file system issues, slower speeds, or even drive failure. A proper format will ensure your SSD is ready for use and can run Windows 10 without any complications.
2. Preparation Before Formatting
Before you begin formatting your SSD, it’s essential to prepare to ensure that you don’t lose any important data and that the formatting process goes smoothly.
Backing Up Your Data
The first thing you should do before formatting any drive is to back up your data. Formatting an SSD will erase all existing data, and while you can reinstall software and recover some files, any personal documents, photos, or videos on the drive will be lost.
To avoid data loss, use an external drive, cloud storage, or a backup service to store copies of your files. Once you’ve secured your data, you can proceed with formatting the SSD.
Determining the SSD’s File System
When formatting an SSD, one of the key decisions you need to make is which file system to use. The file system determines how files are organized and accessed on the drive. Common file systems used for SSDs in Windows 10 include:
NTFS (New Technology File System): Best for Windows systems. It supports file permissions, encryption, and large file sizes.
exFAT (Extended File Allocation Table): Suitable for large external drives and compatible with both Windows and macOS.
FAT32: Older file system, mostly used for smaller drives or external devices, but has file size limitations.
For most users, NTFS is the best choice for an SSD that will be used with Windows 10.
Requirements for Windows 10 Installation
If you plan to use the SSD to install Windows 10. you’ll need to ensure the drive is properly formatted and has the right partitions. These partitions are crucial for Windows to install and run efficiently. In particular, you need at least two partitions: one for the system reserved files and one for the OS itself.
3. Steps to Format an SSD Using Windows 10 Disk Management
Windows 10 has a built-in tool called Disk Management that allows users to format drives with ease. Here’s how to format your SSD using this tool:
Accessing Disk Management
Right-click on the Start menu and select Disk Management.
The Disk Management window will open, showing all the drives connected to your computer.
Choosing the Correct SSD
In the list of drives, locate the SSD you want to format. Be careful not to select the wrong drive, as formatting will erase all data on it.
Right-click on the SSD and select Delete Volume to remove any existing partitions.
Formatting the SSD in Disk Management
Once the volume has been deleted, you’ll see Unallocated Space. Right-click on this and select New Simple Volume.
The New Simple Volume Wizard will open. Follow the on-screen instructions to choose the size of the partition and assign a drive letter.
When asked for the file system, select NTFS and choose the Quick Format option.
Complete the wizard, and Windows will format your SSD.
4. Formatting the SSD Using Command Prompt
For advanced users, formatting an SSD using Command Prompt with the Diskpart utility offers more control over the process.
Introduction to Diskpart
Diskpart is a powerful disk partitioning tool built into Windows. It allows you to manage disks, partitions, and volumes directly from the command line.
Step-by-Step Instructions to Format with Diskpart
Open Command Prompt as Administrator (right-click Start > Command Prompt (Admin)).
Type diskpart and press Enter to launch the Diskpart tool.
Type list disk to see all the disks connected to your computer. Identify your SSD by its size.
Type select disk X (replace X with the number corresponding to your SSD) and press Enter.
Type clean and press Enter to delete all partitions on the SSD.
Now, type create partition primary and press Enter to create a new partition.
Type format fs=ntfs quick and press Enter to quickly format the partition using the NTFS file system.
After the formatting process is complete, type exit to exit Diskpart.
5. Formatting the SSD Using Third-Party Tools
While Windows built-in tools are effective, there are also third-party tools that provide additional features like optimization, secure erasing, and easier partition management.
Tools for SSD Optimization and Formatting
MiniTool Partition Wizard: A comprehensive tool for partition management, including easy SSD formatting.
EaseUS Partition Master: Another popular choice for partitioning and formatting SSDs.
Samsung Magician: If you’re using a Samsung SSD, this tool offers specialized features for formatting and optimizing your drive.
Recommended Third-Party Formatting Tools
These tools often include a more intuitive interface than Disk Management and can help you manage your SSD more effectively.
6. Best Practices When Formatting SSDs
Once your SSD is formatted, it’s important to ensure that you’ve done everything correctly to get the most performance and longevity out of your drive.
Choosing the Correct File System
For Windows 10. NTFS is generally the best choice for internal drives, as it supports large file sizes and offers file permissions.
Aligning the SSD to Improve Performance
Proper alignment of the SSD partitions can improve performance, especially on older SSDs. This alignment ensures that data is written in blocks that match the physical structure of the SSD, reducing unnecessary wear and improving read/write speeds.
Optimizing SSD Longevity
Use tools like TRIM to optimize the SSD’s longevity. TRIM helps the drive manage unused space, preventing unnecessary writes that can wear down the drive.
7. Potential Issues and How to Resolve Them
While formatting an SSD is generally straightforward, some issues may arise.
SSD Not Showing Up After Formatting
If your SSD doesn’t show up after formatting, check the cables and connections. You can also use Disk Management to see if the SSD is listed as “unallocated” and reformat it.
Formatting Errors and Fixes
If you encounter errors during the formatting process, make sure that no partitions are actively in use. You can use Diskpart to clean the drive and start over.
About us and this blog
Panda Assistant is built on the latest data recovery algorithms, ensuring that no file is too damaged, too lost, or too corrupted to be recovered.
Request a free quote
We believe that data recovery shouldn’t be a daunting task. That’s why we’ve designed Panda Assistant to be as easy to use as it is powerful. With a few clicks, you can initiate a scan, preview recoverable files, and restore your data all within a matter of minutes.
Subscribe to our newsletter!
More from our blog
See all posts


