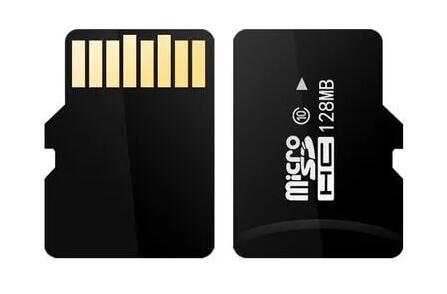
Formatting an SD card for a trail camera is a crucial step to ensure optimal performance and data management. Whether you’re preparing for a hunting trip, wildlife observation, or security surveillance, understanding the formatting process is essential.
1. SD Card Formatting
Formatting an SD card involves preparing the storage device for use by creating a file system that the device can recognize. This process deletes all existing data and structures the card to enable efficient data storage.
Why Format Your SD Card?
Remove Old Data: Over time, SD cards can accumulate unwanted files. Formatting clears this clutter.
Improve Performance: A freshly formatted card can help maintain speed and reliability, ensuring that your trail camera captures images and videos without lag.

Ensure Compatibility: Different devices may require specific file systems. Formatting ensures that the card is compatible with your trail camera.
2. Types of SD Cards
SD vs. SDHC vs. SDXC
Understanding the different types of SD cards is essential for choosing the right one for your trail camera:
SD (Secure Digital): Typically holds up to 2GB of data.
SDHC (Secure Digital High Capacity): Ranges from 2GB to 32GB, ideal for most trail cameras.
SDXC (Secure Digital Extended Capacity): Supports 32GB to 2TB, suitable for high-resolution images and videos.
Choosing the Right SD Card for Your Trail Camera
When selecting an SD card, consider the following factors:
Capacity: Choose a card with sufficient storage for your intended use.
Speed Class: Look for cards with a speed class of UHS-I or higher for optimal performance.
Brand Reliability: Opt for reputable brands to ensure durability and data integrity.
3. Preparing to Format Your SD Card
Backing Up Data
Before formatting, ensure that you back up any important files on your SD card, as formatting will erase all data. Transfer files to your computer or another storage device.
Tools You Will Need
Computer: A Windows or Mac system for formatting the SD card.
Card Reader: If your computer doesn’t have a built-in card slot, a USB card reader will be necessary.
Trail Camera: Some models allow formatting directly through their interface.
4. Formatting on Different Devices
Formatting on Windows
Insert the SD Card: Use a card reader to connect the SD card to your computer.
Open File Explorer: Navigate to ‘This PC’ to locate the SD card.
Right-Click on the SD Card: Select ‘Format’ from the context menu.
Choose File System:
For most trail cameras, select FAT32 for SD and SDHC cards, and exFAT for SDXC cards.
Format Options:
Quick Format: Check this box for a faster process that doesn’t scan for bad sectors.
Start Formatting: Click ‘Start’ and confirm your choice. Wait for the process to complete.
Formatting on Mac
Insert the SD Card: Use a card reader if necessary.
Open Disk Utility: Go to ‘Applications’ > ‘Utilities’ > ‘Disk Utility.’
Select the SD Card: Click on the SD card from the list of drives.
Erase the SD Card:
Click the ‘Erase’ button at the top.
Choose Format:
Select MS-DOS (FAT) for SD and SDHC cards, and ExFAT for SDXC cards.
Erase: Click ‘Erase’ to format the card.
Formatting on a Trail Camera
Insert the SD Card: Place the card into the camera’s slot.
Power On the Camera: Turn on the trail camera.
Access the Menu: Navigate to the settings menu (refer to the user manual for specific instructions).
Select Format SD Card: Follow the prompts to confirm formatting.
5. Post-Formatting Tips
Checking for Errors
After formatting, it’s wise to check the card for any errors:
Windows: Right-click on the SD card > Properties > Tools > Check.
Mac: Use Disk Utility to verify the card.
Setting Up Your Trail Camera
Insert the Formatted SD Card: Place the SD card back into the trail camera.
Adjust Camera Settings: Configure settings like resolution, photo interval, and time-lapse as per your requirements.
Test the Camera: Take a few test shots to ensure everything is functioning correctly.
6. Common Issues and Troubleshooting
Card Not Recognized: Ensure the card is properly inserted. Try a different card reader or port.
Formatting Errors: If the formatting fails, try a different file system or use a dedicated formatting tool like SD Card Formatter.
Camera Not Taking Photos: Double-check the settings and ensure there is sufficient battery power.
Formatting your SD card for a trail camera is a straightforward process that enhances performance and reliability. By following this guide, you can ensure that your trail camera captures stunning images and videos of wildlife or monitors your property without interruptions.
7. Frequently Asked Questions (FAQs)
Q1: How often should I format my SD card?
It’s good practice to format your SD card every few uses, especially before major trips or after transferring files.
Q2: Can I recover data after formatting?
Data recovery is possible using specialized software, but it’s not guaranteed. Always back up important files before formatting.
Q3: What if my trail camera doesn’t support the SD card I formatted?
Check the camera’s specifications and ensure you are using a compatible format (FAT32 or exFAT).
Q4: Is there a difference between quick format and full format?
A quick format deletes files but doesn’t scan for errors, while a full format checks for bad sectors.
About us and this blog
Panda Assistant is built on the latest data recovery algorithms, ensuring that no file is too damaged, too lost, or too corrupted to be recovered.
Request a free quote
We believe that data recovery shouldn’t be a daunting task. That’s why we’ve designed Panda Assistant to be as easy to use as it is powerful. With a few clicks, you can initiate a scan, preview recoverable files, and restore your data all within a matter of minutes.
Subscribe to our newsletter!
More from our blog
See all postsRecent Posts
- Dell backup and recovery windows 11 2025-04-21
- Dell os recovery tool keeps crashing 2025-04-21
- Raw hdd data recovery 2025-04-21

 Try lt Free
 Recovery success rate of up to


