Formatting a microSD card is often necessary when you want to use it in a new device, or you may need to resolve performance issues or file corruption.
1. Why Format a microSD Card?
Reasons for Formatting
A microSD card may require formatting for a variety of reasons, including:
Switching between devices: Some devices (like cameras, phones, or gaming consoles) use specific file systems. If you’re moving a card from one device to another, formatting it to the compatible file system may be necessary.
File system corruption: Over time, microSD cards may develop corrupt files or bad sectors, which can make it difficult to read or write data. Formatting can help fix these issues.
Freeing up space: Sometimes, microSD cards can fill up with unnecessary files or data you no longer need. Formatting clears the card, returning it to a blank state.
Virus or malware removal: If your microSD card is infected with a virus or malicious software, formatting the card is often the easiest way to clear it.
When to Format vs. When Not to Format
When to format: If the card is giving you problems like slow performance, file corruption, or is no longer being recognized by your device, it might be time to format.
When not to format: Avoid formatting when you haven’t backed up your data or if the card is still functioning well for its intended purpose. Formatting erases everything on the card, so it should only be done when absolutely necessary.
2. Types of Formatting Options
Quick Format vs. Full Format
When you format a microSD card, you’ll typically be presented with two options: quick format or full format. Here’s the difference:
Quick Format: This option deletes the files from the microSD card but doesn’t thoroughly erase the data. It’s faster but doesn’t necessarily clean up the file system completely. This option is useful if you’re not concerned with recovering the data later.
Full Format: A full format erases all the data on the card and checks for bad sectors, making it more thorough than a quick format. It takes longer but is a better option when preparing the card for a new device or trying to solve performance issues.
3. Back Up Your Data First
Before formatting your microSD card, backing up your data is essential. This is crucial to prevent data loss, especially if you are using the card for important files like photos, videos, documents, or music.
How to Back Up Files from Your microSD Card
On Windows: Insert the microSD card into your computer’s card reader. Open File Explorer and navigate to your card’s drive. Select all the files, copy them, and paste them into a folder on your computer.
On macOS: Insert the card into your Mac’s card reader. Open Finder and locate the microSD card under “Devices.” Select the files you wish to back up and drag them to a folder on your computer.
On Android: You can back up your files directly from your phone by connecting it to a computer via USB or using a cloud service like Google Drive. You can also use a file manager app to copy your files to the device’s internal storage or to cloud storage.
Choosing the Right Backup Method
External Hard Drive or Computer: If you’re worried about data loss, backing up to an external hard drive is a safe bet. This way, you can ensure that the data is preserved.
Cloud Storage: For convenience, you may choose to use cloud storage like Google Drive, iCloud, or Dropbox. This way, you can access your files from multiple devices.
Backup Software: There are various software options (like EaseUS Todo Backup or Acronis True Image) that can help automate the process and ensure that everything is safely copied.
4. How to Safely Format a microSD Card
Once your data is backed up, you can proceed to format the microSD card.
Formatting on Windows
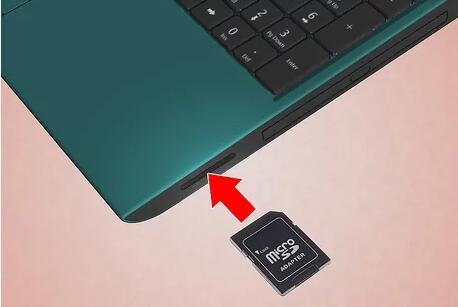
Insert the Card: Insert the microSD card into your computer using a card reader or an integrated card slot.
Open File Explorer: Open “This PC” (or “Computer” in older versions of Windows).
Right-click the microSD Card: Right-click the microSD card drive, and select Format.
Choose the Format Settings:
File System: Select a file system. For larger capacity cards (32GB or higher), choose exFAT. For smaller cards (under 32GB), choose FAT32.
Quick Format: You can choose Quick Format for a faster process or uncheck it for a full format.
Start Formatting: Click Start, and a warning will appear about erasing all data. Click OK to proceed.
Complete: Once done, you’ll have a clean, formatted microSD card.
Formatting on macOS
Insert the Card: Insert the microSD card into your Mac’s card reader.
Open Disk Utility: Go to Applications > Utilities > Disk Utility.
Select the microSD Card: In the left sidebar, select the microSD card.
Erase the Card: Click the Erase button at the top of the window.
Choose the Format:
Select exFAT for larger cards or MS-DOS (FAT) for smaller ones.
Start the Erase Process: Click Erase to begin the formatting process. Your microSD card will be wiped clean.
Formatting on Android
Insert the Card: Ensure that your microSD card is inserted into your Android device.
Go to Settings: Open the Settings app on your Android device.
Navigate to Storage: Go to Storage & USB or Device Care > Storage.
Select Your microSD Card: Tap on your microSD card listed under storage options.
Format the Card: Tap Format and confirm the action. This will erase all data on the card and prepare it for use.
Using Third-Party Software for Formatting
If you’re facing issues with your microSD card or need additional formatting options, third-party tools like SD Formatter (available for Windows and macOS) can be a great option. These tools are designed to handle SD cards and microSD cards specifically and often provide more advanced options for formatting.
5. Troubleshooting Formatting Issues
During the formatting process, you might encounter certain errors or warning messages. Below are some common issues and solutions:
Errors and Warning Messages
Card is Write-Protected: This means the physical switch on the card (if present) is set to “lock.” Slide the switch to the “unlock” position and try again.
Card is Corrupted: If you cannot format the card due to corruption, you can try using a third-party tool like SD Formatter or Chkdsk (Windows) to repair the card.
Windows Cannot Format: If Windows cannot format the card, the issue could be with the card’s file system. Try formatting it in a different device or using a specialized tool.
6. How to Recover Data If You Lose Files During Formatting
Panda Assistant is a powerful, user-friendly data recovery software designed to help individuals and businesses recover lost, deleted, or corrupted files. Whether you’ve accidentally deleted important documents, suffered from a system crash, or experienced data loss due to a faulty drive, Panda Assistant offers a simple and efficient solution to retrieve your precious data.
With its intuitive interface, Panda Assistant allows users of all skill levels to recover files without hassle. It supports a wide variety of file types, including photos, videos, documents, and more, making it versatile enough to handle different types of data recovery scenarios. The software works on both hard drives and external storage devices, such as USB flash drives, memory cards, and even SD cards, giving users the flexibility to recover data from multiple devices.
7. Best Practices for Maintaining microSD Card Health
To ensure that your microSD card lasts as long as possible and doesn’t encounter data loss in the future, follow these best practices:
Regular Backups: Always keep backups of important files, either on your computer or in cloud storage.
Safely Eject the Card: Always eject the microSD card properly before removing it from your device to prevent data corruption.
Avoid Physical Damage: Protect the card from extreme temperatures, moisture, and physical stress.
Format Regularly: If you use the card frequently, consider formatting it periodically to keep it in good working order and clear out unnecessary files.
About us and this blog
Panda Assistant is built on the latest data recovery algorithms, ensuring that no file is too damaged, too lost, or too corrupted to be recovered.
Request a free quote
We believe that data recovery shouldn’t be a daunting task. That’s why we’ve designed Panda Assistant to be as easy to use as it is powerful. With a few clicks, you can initiate a scan, preview recoverable files, and restore your data all within a matter of minutes.
Subscribe to our newsletter!
More from our blog
See all posts


Recent Posts
- How to recover a deleted file from sharepoint? 2025-02-21
- How to recover a autocad file? 2025-02-21
- How to recover overwritten files? 2025-02-21