 Try lt Free
 Recovery success rate of up to
Using a USB drive seems simple: plug it into your computer, copy files, eject, and you’re done. But when someone talks about putting files into the “root folder” of a USB drive, it can cause confusion, especially if you’re not deeply familiar with file system terminology.
Finding the root folder is essential when you’re following certain instructions like updating firmware, setting up bootable drives, transferring special software packages, or troubleshooting device errors. Often, instructions will clearly say, “Place the file in the root of the USB drive.” But what exactly does that mean, and how do you find it?
Let’s dive in!
1. What Is the Root Folder?
At its simplest, the root folder is the topmost directory on a storage device.
It’s the first and highest level of the file system hierarchy.
On a USB drive:
The root folder is what you see immediately after you open the drive.
It’s not inside any other folders.
It contains all files and folders located directly on the drive itself.
Think of the USB drive like a house:
The USB drive is the house.
The root folder is the entryway — the first space you step into.
Any other folders you create inside it (like Documents, Music, or Backups) are like rooms off of the entryway.
Root Folder Naming
The root itself usually doesn’t have a visible name.
The drive might be called USB Drive (E:) or SanDisk Ultra, but the root is simply the top.
Files placed at the root are not inside any subfolders.
2. Why Is the Root Folder Important?
You might be asked to place files directly into the root folder when:
Creating a bootable USB for Windows installation or Linux distribution.
Updating firmware for devices (like routers, cameras, 3D printers).
Installing certain game files (like for mods or emulators).
Setting up encrypted drives or special security software.
If the required files are not placed correctly at the root level:
Devices might not recognize the file.
Installations might fail.
Software may not function properly.
Following instructions carefully and ensuring you place files in the right spot is crucial for success.
3. How to Find the Root Folder on a USB Drive
Let’s walk through how you can easily locate the root folder depending on your operating system.
3.1 On Windows (Windows 10/11/8/7)
Step-by-Step Guide:
Insert your USB drive into a USB port on your computer.
Wait a moment; Windows will detect the drive.
Open File Explorer (shortcut: Windows Key + E).
Look on the left-hand sidebar under This PC.
Find and click your USB drive (example: D:, E:, F: — it depends on your computer setup).
When you click the drive name, you are in the root folder.
You should see all the existing folders or files placed directly on the USB.
If it’s a new USB or freshly formatted, it might appear empty.
Important:
Do not open any folders. If you click into a folder, you’re no longer in the root.
Place files right there, alongside any existing items.
Example:
You insert a USB called “KINGSTON (E:)”.
You open it and see:
Documents/
Photos/
config.txt
setup.exe
Both config.txt and setup.exe are sitting at the root.
3.2 On macOS
Step-by-Step Guide:
Insert your USB drive into a USB port.
Wait for macOS to detect it — it will appear on the Desktop and in Finder under Locations.
Click the USB drive name (like Untitled, Lexar, SanDisk).
You are now at the root folder.
Important:
If you double-click into another folder inside the drive, you’re no longer at the root.
Drag and drop files directly into the USB drive window for root placement.
3.3 On Linux (Ubuntu, Fedora, Debian, etc.)
Step-by-Step Guide:
Plug in your USB drive.
Linux automatically mounts it under /media/ or /run/media/yourusername/.
Open your file manager (like Nautilus or Dolphin).
Click on the USB drive name.
You are now viewing the root of the USB drive.
In a terminal, you could also type:
bash
cd /media/yourusername/USBDriveName/ ls
You’ll see files listed — if you’re in the correct directory, these are the root contents.
4. How to Place Files in the Root Folder
Simple Method:
Drag and drop files from your computer directly into the open USB drive window.
Or
Use Copy (Ctrl + C) and Paste (Ctrl + V).
Make sure not to drag them into any subfolders unless explicitly instructed.
5. Common Mistakes to Avoid
Mistake #1: Placing files inside a new folder instead of the root.
Example:
If you copy the firmware file into USB Drive/Firmware Update/ instead of directly into USB Drive/, the device looking for the firmware may not find it.
Mistake #2: Renaming critical files or folders.
Example:
Sometimes devices require files to have a specific name like update.bin. Changing it to update (1).bin might cause problems.
Mistake #3: Leaving zip archives unextracted.
Example:
If you’re instructed to place files in the root, but you simply copy a .zip file without extracting it, it may not work. Always extract first unless told otherwise.
6. Advanced Topics
6.1 How to Check If You’re in the Root
Ask yourself:
Is the address bar showing just the drive letter (Windows)? Example: E:\
Is the Finder window showing the drive name directly (macOS)?
Am I seeing files like .iso, .exe, .bin without entering any folders?
If yes, you’re in the root.
6.2 How File Systems Affect Root Behavior
Most USB drives are formatted as:
FAT32: Universal, works with almost anything.
exFAT: Good for large files, compatible with Windows and macOS.
NTFS: Windows-native, may cause issues on non-Windows systems.
Root folder behavior is consistent across formats, but permission errors (especially on NTFS) might prevent copying files.
7. Troubleshooting: Can’t Find or Access Root Folder?
Problem: USB Not Recognized
Try another USB port.
Restart your computer.
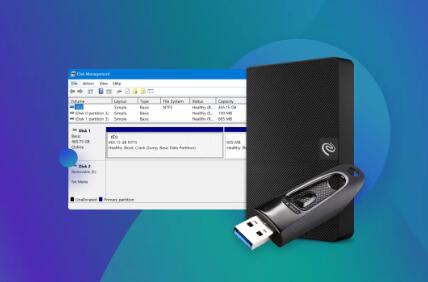
Check Disk Management (Windows) or Disk Utility (macOS) to see if the drive needs repair.
Problem: Access Denied
On Windows, you might need Administrator permissions.
Right-click the USB drive > Properties > Security > Edit permissions.
Problem: Files Don’t Appear After Copying
Make sure you eject safely.
Wait for transfers to complete.
Use refresh (F5) in File Explorer.
8. Practical Examples
Example 1: Creating a Bootable USB (Windows ISO)
Open Rufus or another tool.
Select your USB.
Choose Windows ISO.
Rufus will format the USB and put boot files at the root.
Example 2: Updating Router Firmware
Download firmware file.
Copy it directly into the root of a freshly formatted USB.
Plug into router for upgrade.
Example 3: Adding Games to Emulator (RetroArch)
Copy ROM files directly to the USB root (if instructed), or into specified folders.
9. Best Practices for Managing Your USB Root Folder
Keep It Clean: Only place necessary files at the root.
Organize: If storing long-term, use folders for clarity.
Backup: Always back up before formatting or major changes.
Label Drives: Name your USB drives clearly for easy identification.
Safely Remove: Always eject properly to avoid data corruption.
About us and this blog
Panda Assistant is built on the latest data recovery algorithms, ensuring that no file is too damaged, too lost, or too corrupted to be recovered.
Request a free quote
We believe that data recovery shouldn’t be a daunting task. That’s why we’ve designed Panda Assistant to be as easy to use as it is powerful. With a few clicks, you can initiate a scan, preview recoverable files, and restore your data all within a matter of minutes.
Subscribe to our newsletter!
More from our blog
See all posts


