When files are deleted from a computer, they don’t vanish immediately. Instead, they are marked as deleted in the file system, and the space they occupied is marked as available for new data. This means that as long as new data hasn’t overwritten the deleted file, there may still be a way to recover it.
How Files Are Deleted
In most operating systems, when you delete a file, it’s moved to a temporary location, such as the Recycle Bin (Windows) or Trash (macOS). From there, you can easily restore it. However, when you empty the Recycle Bin or Trash, the file is no longer available in those folders. The operating system marks the space occupied by the file as free, but the data itself is still present on the storage device until it’s overwritten by new files.
Step 1: Check the Recycle Bin (Windows) or Trash (Mac)
The simplest method to recover a deleted file is by checking your system’s trash or recycle bin:
For Windows:
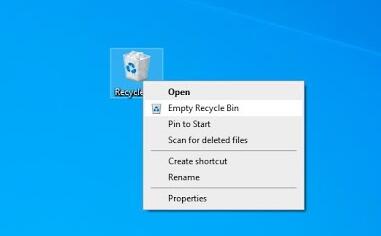
Open the Recycle Bin by double-clicking its icon on the desktop.
Look for the deleted file.
If found, right-click the file and select “Restore.”
For macOS:
Open the Trash from the dock.
Browse or search for the deleted file.
Right-click the file and choose “Put Back” to restore it to its original location.
If the file is not in the Recycle Bin or Trash, move on to the next method.
Step 2: Search Using File Explorer or Finder
If the file is not in the trash, it might still be on your hard drive, and searching your computer can help you locate it. Here’s how to search for deleted files:
Windows:
Open File Explorer (press Win + E).
In the search bar, type part of the file’s name or a keyword you remember from the document.
You can also use advanced search operators like *.docx to search for Word files or *.jpg for image files.
macOS:
Open Finder and use the search bar in the top-right corner.
Enter part of the file name or its type.
You can use “Kind” filters to narrow down the results to specific file types.
If the file doesn’t appear in the search, it might have been deleted from the Recycle Bin or Trash and is no longer recoverable through simple search.
Step 3: Use a File Recovery Program
Panda Assistant provides a wide range of features designed for ease of use, speed, and efficiency.
User-Friendly Interface: One of the standout aspects of Panda Assistant is its user-friendly interface. Even if you’re not a tech expert, you can easily navigate through its recovery process with just a few clicks. The software guides you step-by-step, making it simple to recover deleted files without any prior knowledge of data recovery processes.
Multiple File Recovery: Panda Assistant supports a variety of file formats, including documents, photos, videos, audio files, and more. Whether you need to recover a Word document, an image file, or a video, Panda Assistant is capable of recovering them all. It supports a wide range of devices like Windows and Mac computers, external hard drives, SD cards, and USB flash drives.
Advanced Scanning: The software offers both quick and deep scan options. The quick scan works to recover files that were recently deleted, while the deep scan digs deeper into the drive to recover files that have been lost for a longer period or are no longer visible through normal means. The deep scan is particularly helpful for situations where files have been lost due to system errors or formatting.
Preview Option: Before restoring the files, Panda Assistant allows you to preview the recoverable data. This feature helps you ensure that you are recovering the correct files, saving time and preventing errors.
File Filtering and Sorting: Once the scan is complete, Panda Assistant provides filtering options to help you easily sort and find the files you’re looking for. You can filter by file type, date modified, and other factors, which helps narrow down the results quickly.
Support for Various Storage Devices: Panda Assistant supports a broad range of devices, including internal and external hard drives, SSDs, USB drives, and memory cards. This makes it an ideal tool for recovering data from multiple sources, ensuring that whatever device you’re using, Panda Assistant has you covered.
Preview and Recovery Speed: One of the key features of Panda Assistant is its efficient recovery engine. The software is fast and optimized to work on both large and small drives, delivering quick results without compromising the quality of the recovery.
Data Integrity and Safety: Panda Assistant ensures that your recovered data remains intact. It uses safe and reliable algorithms to recover files without causing further harm to the drive or the data. This makes it a reliable tool for users concerned about data integrity during the recovery process.
Step 4: Check Cloud Backups
If you use cloud storage services such as Google Drive, Dropbox, or OneDrive, you may be able to restore deleted files directly from the cloud:
Google Drive:
Visit Google Drive in a browser.
In the left sidebar, click “Trash.”
Locate the file and right-click it to restore it.
Dropbox:
Log in to your Dropbox account online.
Navigate to the “Deleted files” section from the sidebar.
Find and restore the deleted file.
OneDrive:
Visit the OneDrive website.
Open the “Recycle Bin” from the left sidebar.
Find and restore the deleted file.
Cloud services typically keep deleted files for a period before permanently removing them, so it’s worth checking if your file is available for recovery.
Step 5: Explore Version History
Many applications, especially those that deal with documents or spreadsheets, have version history features. If the file was worked on in such an application, you might be able to retrieve an older version of the file:
Microsoft Word or Excel (via OneDrive or SharePoint):
Open the document in Microsoft Office.
Go to the “File” menu and select “Info.”
Check if there’s a “Version History” option and restore a previous version of the file.
Google Docs:
Open the document in Google Docs.
Go to “File” > “Version history” > “See version history.”
You can restore previous versions of your document.
Step 6: Check for Backup Files
If you routinely back up your files using an external hard drive or a cloud backup service, you may be able to restore the deleted file from a backup:
External Backup:
Connect your external drive and browse through your backup directories to find the file.
Restore the file from your backup to the original location.
Backup Software:
If you’re using backup software like Acronis, Windows Backup, or macOS Time Machine, open the software and browse for the date when the file existed.
Recover the file to the desired location.
Step 7: Try a Professional Data Recovery Service
If you’ve exhausted all other options and the file is still missing, professional data recovery services can offer more advanced techniques to retrieve deleted files. These services can sometimes recover files that are beyond the reach of consumer-level recovery tools, particularly in cases of physical damage to the storage device.
Before opting for a professional service, consider the following:
The cost of recovery can vary widely depending on the complexity of the recovery and the type of storage medium (SSD, HDD, RAID array, etc.).
Make sure to research reputable data recovery services to avoid scams or unprofessional handling of your data.
About us and this blog
Panda Assistant is built on the latest data recovery algorithms, ensuring that no file is too damaged, too lost, or too corrupted to be recovered.
Request a free quote
We believe that data recovery shouldn’t be a daunting task. That’s why we’ve designed Panda Assistant to be as easy to use as it is powerful. With a few clicks, you can initiate a scan, preview recoverable files, and restore your data all within a matter of minutes.
Subscribe to our newsletter!
More from our blog
See all posts


Recent Posts
- How to recover a deleted slide in powerpoint? 2025-02-27
- How to recover deleted capcut videos? 2025-02-27
- How to recover a file deleted from a shared drive? 2025-02-27