Deleting pictures from an SD card on a computer is a straightforward process, but it requires some caution to avoid accidental deletion of important files.
1. SD Cards and Computers
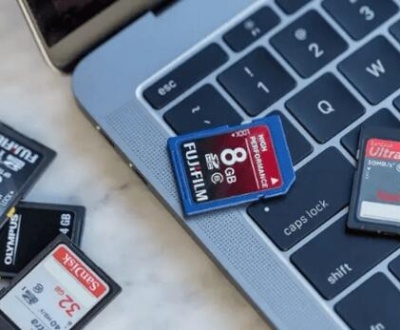
SD (Secure Digital) cards are commonly used in cameras, smartphones, and other portable devices for storing pictures, videos, and other types of files. When it comes to managing the content on an SD card, connecting it to a computer allows you to easily delete, organize, or back up files.
To delete pictures from your SD card on a computer, you need to:
Insert the SD card into the computer’s card reader.
Locate the card on your file system (Windows Explorer or Finder on Mac).
Select and delete the photos.
While these are the basic steps, let’s go into more detail about the methods available on both Windows and macOS operating systems.
2. Deleting Pictures on a Windows Computer
2.1. Connecting the SD Card
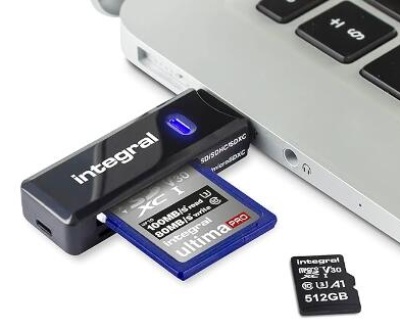
Insert the SD card: First, you’ll need to insert your SD card into the computer. Many laptops have built-in SD card readers, but if your device doesn’t, you may need an external USB SD card reader.
Open File Explorer: On Windows, you can access your SD card through File Explorer. You can open it by clicking the folder icon on the taskbar or pressing Windows + E on your keyboard.
Locate the SD Card: Your SD card should appear as a removable drive, often labeled by its brand name or simply “Removable Disk.” It will be listed under “This PC” or “My Computer.”
2.2. Selecting and Deleting Photos
Once you’ve opened your SD card in File Explorer, follow these steps:
Browse the card: Navigate to the folder where the pictures are stored. Typically, on an SD card used in a camera, images will be stored in a folder labeled “DCIM.”
Select files: To select multiple photos, you can:
Click and drag your mouse over the images.
Hold Ctrl and click individual files to select them one by one.
Press Ctrl + A to select all files in the folder.
Delete photos: Once the desired photos are selected, you can delete them by:
Right-clicking on one of the selected files and choosing “Delete” from the context menu.
Pressing the Delete key on your keyboard.
Empty Recycle Bin: Deleting photos from your SD card may send them to the Recycle Bin, depending on your system’s settings. To permanently delete the pictures, you will need to empty the Recycle Bin. Right-click the Recycle Bin on your desktop and choose “Empty Recycle Bin.”
2.3. Formatting the SD Card (Advanced Option)
If you want to delete all files on the SD card quickly or prepare it for use in another device, formatting is a good option. Here’s how:
Right-click on the SD card: In File Explorer, right-click on the SD card’s drive icon.
Select “Format”: Choose the “Format” option from the dropdown menu.
Choose file system: Select a file system format, such as FAT32 or exFAT, depending on your needs. Typically, exFAT is preferred for larger files.
Start the format: Click “Start” to format the SD card. Note that formatting will erase all data on the card, not just photos.
3. Deleting Pictures on a Mac
3.1. Connecting the SD Card
Insert the SD card: Insert your SD card into the SD card reader slot on your Mac. If your Mac doesn’t have a built-in reader, use an external USB SD card reader.
Open Finder: The SD card will appear on your desktop or in the Finder sidebar under “Devices.”
3.2. Selecting and Deleting Photos
Browse the SD card: In Finder, locate your SD card, which will likely appear under the name of the card brand or something like “NO NAME.” Open the card to access the folder where your pictures are stored, often labeled “DCIM.”
Select photos: Select multiple photos by:
Clicking and dragging over the files.
Holding Command and clicking individual files.
Pressing Command + A to select all files in the folder.
Delete photos: To delete the selected photos, either:
Right-click and choose “Move to Trash.”
Press Command + Delete to move the selected files to the Trash.
Empty the Trash: To permanently remove the photos from your SD card, empty the Trash. Right-click the Trash icon in your dock and select “Empty Trash.”
3.3. Formatting the SD Card
On a Mac, you can also format your SD card to delete all data. Here’s how:
Open Disk Utility: Search for Disk Utility via Spotlight (Command + Space).
Select the SD card: In Disk Utility, locate your SD card in the left-hand panel and select it.
Click “Erase”: At the top of the Disk Utility window, click the “Erase” button.
Choose format: Select a format like exFAT for larger file support or MS-DOS (FAT) for smaller file compatibility.
Erase: Click “Erase” to begin formatting, which will remove all data from the SD card.
4. Precautions and Backup Strategies
4.1. Double-Check Before Deleting
Before you delete any photos, take a moment to double-check the files you’ve selected. Accidental deletion can be frustrating, especially if it involves important memories or work.
4.2. Backup Your Files
To avoid data loss, it’s always a good idea to back up your photos before deleting them. You can transfer the files to an external hard drive, a cloud storage service like Google Drive or Dropbox, or even a dedicated photo management program like Google Photos or Apple Photos.
4.3. Avoid Deleting Photos Directly from a Camera
If you’re using your SD card in a camera, avoid deleting photos directly from the camera’s interface. Doing so repeatedly can cause file system errors, potentially leading to data corruption on the SD card. It’s safer to delete files from the SD card when it’s connected to a computer.
5. Troubleshooting Common Issues
5.1. SD Card is Write-Protected
Some SD cards come with a physical lock switch on the side. If this switch is in the locked position, you won’t be able to delete or modify any files on the card. To resolve this:
Move the switch: Slide the switch on the SD card away from the “Lock” position.
5.2. Files Won’t Delete
If you’re unable to delete files from the SD card, you might be dealing with a corrupted file system or bad sectors on the card. Here are some ways to fix this:
Run a disk check: On Windows, you can use the chkdsk utility to check for file system errors. Right-click on the SD card in File Explorer, choose “Properties,” then go to the “Tools” tab and click “Check” under Error Checking.
Format the card: If the file system is corrupted and can’t be fixed, formatting the card might be the best option.
5.3. Data Recovery
If you accidentally delete pictures that you later want to recover, data recovery software may help. Tools like Panda Assistant’s data recovery software, Recuva (for Windows), or Disk Drill (for Mac) can scan your SD card for deleted files and attempt to recover them.
Make sure to avoid writing new data to the card after accidental deletion, as this can overwrite the deleted files and make recovery impossible.
Deleting pictures from an SD card on a computer is a simple but important task that can free up space and help keep your digital life organized. Whether you’re using a Windows PC or a Mac, the steps are straightforward: connect your card, select the files, and delete them.
About us and this blog
Panda Assistant is built on the latest data recovery algorithms, ensuring that no file is too damaged, too lost, or too corrupted to be recovered.
Request a free quote
We believe that data recovery shouldn’t be a daunting task. That’s why we’ve designed Panda Assistant to be as easy to use as it is powerful. With a few clicks, you can initiate a scan, preview recoverable files, and restore your data all within a matter of minutes.
Subscribe to our newsletter!
More from our blog
See all postsRecent Posts
- How to fix usb not recognised 2025-05-14
- How to fix unrecognized usb device 2025-05-14
- How can i fix my usb flash drive? 2025-05-14

 Try lt Free
 Recovery success rate of up to


