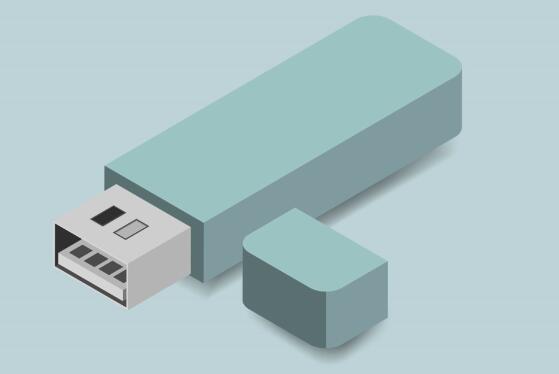
Creating a partition on a USB flash drive can be a useful way to manage and organize your data. Whether you’re looking to separate personal files from work documents, or need to set up different file systems for compatibility, partitioning can help.
Partitioning a USB flash drive involves dividing the drive into distinct sections, each of which acts like a separate drive. Each partition can have its own file system, size, and label. This guide will walk you through the process using Windows, macOS, and Linux.
Why Partition a USB Flash Drive?
Organize Data: Keep personal and work files separate.
Multiple File Systems: Use different file systems for different purposes (e.g., NTFS for Windows, FAT32 for cross-platform compatibility).
Backup and Recovery: Create a dedicated partition for backups or system recovery tools.
1. Partitioning on Windows
Using Disk Management
Insert the USB Flash Drive: Plug your USB flash drive into a USB port on your computer.
Open Disk Management:
Right-click on the Start button and select Disk Management.
Alternatively, press Windows Key + X and select Disk Management.
Locate the USB Drive: Find your USB flash drive in the list of drives. It’s usually labeled as “Removable” or similar.
Delete Existing Partitions (if needed):
Right-click on the USB drive’s partition(s) and select Delete Volume. This will erase all data on the partition.
Confirm the deletion.
Create a New Partition:
Right-click on the unallocated space on your USB drive and select New Simple Volume.
Follow the wizard to specify the size of the new partition. You can use the entire space or a portion of it.
Assign a drive letter and choose a file system (NTFS, FAT32. or exFAT).
Format the partition and assign a volume label.
Finish: Click Finish to complete the partition creation. Your new partition should now appear in File Explorer.
Using Command Prompt
Open Command Prompt:
Search for cmd in the Start menu, right-click on Command Prompt, and select Run as administrator.
Start Diskpart:
Type diskpart and press Enter.
List Disks:
Type list disk and press Enter to see a list of disks.
Identify your USB drive based on its size.
Select Disk:
Type select disk X (replace X with the number corresponding to your USB drive) and press Enter.
Clean the Drive:
Type clean and press Enter. This removes all partitions on the drive.
Create Partition:
Type create partition primary size=XXXXX (replace XXXXX with the size in MB) and press Enter.
Type format fs=ntfs quick (or fs=fat32 if you prefer) and press Enter.
Type assign letter=X (replace X with the desired drive letter) and press Enter.
Exit:
Type exit and press Enter to close Diskpart.

2. Partitioning on macOS
Using Disk Utility
Insert the USB Flash Drive: Connect your USB flash drive to your Mac.
Open Disk Utility:
Go to Applications > Utilities > Disk Utility.
Select the USB Drive: Click on your USB flash drive in the sidebar.
Erase the Drive (if needed):
Click Erase to remove existing partitions. Choose a format (APFS, Mac OS Extended, or ExFAT) and confirm.
Partition the Drive:
Click on the Partition button.
Click the + button to add a new partition.
Set the size and format for the new partition.
Name the partition and click Apply.
Finish: The drive will be partitioned, and you should see it in Finder with the new partition.
3. Partitioning on Linux
Using GParted
Install GParted:
Open a terminal and run sudo apt-get install gparted (for Debian-based systems) or use the appropriate command for your distribution.
Open GParted:
Run sudo gparted from the terminal.
Select the USB Drive: Use the drop-down menu in the top-right corner to select your USB drive.
Unallocate Existing Partitions (if necessary):
Right-click on the existing partition(s) and select Delete.
Apply changes by clicking the green checkmark button.
Create a New Partition:
Right-click on the unallocated space and select New.
Set the size, file system (ext4. ntfs, fat32), and partition label.
Click Add and then Apply the changes.
Finish: Your new partition will be created and visible.
Partitioning a USB flash drive can enhance data organization and compatibility across different systems. Whether you’re using Windows, macOS, or Linux, each operating system has its own tools and methods for creating and managing partitions. Always ensure to back up important data before partitioning, as the process can lead to data loss if not done correctly. By following these steps, you should be able to successfully partition your USB flash drive to meet your specific needs.
About us and this blog
Panda Assistant is built on the latest data recovery algorithms, ensuring that no file is too damaged, too lost, or too corrupted to be recovered.
Request a free quote
We believe that data recovery shouldn’t be a daunting task. That’s why we’ve designed Panda Assistant to be as easy to use as it is powerful. With a few clicks, you can initiate a scan, preview recoverable files, and restore your data all within a matter of minutes.
Subscribe to our newsletter!
More from our blog
See all postsRecent Posts
- Reformat external hard drive from mac to pc 2025-01-20
- i can’t see my secopnd hard drive on my mac 2025-01-20
- How to reformat external hard drive for mac and pc? 2025-01-20


