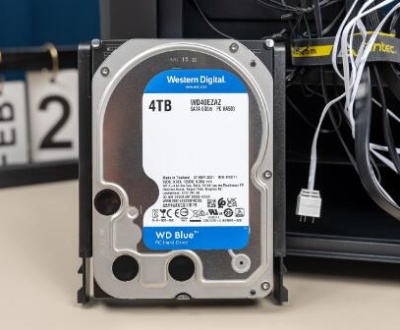
1. Combining partitions
Combining partitions on a hard drive can help you reclaim space, streamline your file organization, or simplify your storage structure.
2. Hard Drive Partitions
What are Partitions?
Partitions are divisions of a hard drive that allow different file systems to exist on the same physical disk. Each partition can function independently, storing separate data or operating systems.
Reasons for Combining Partitions
Reclaiming Space: Merging partitions can increase the available storage in one large volume.
Simplifying Management: Fewer partitions can make it easier to manage files and data.
Organizational Changes: Streamlining your data storage for efficiency.

3. Backing Up Your Data
Importance of Backup
Before making any changes to your partitions, it’s crucial to back up your data to prevent any potential loss.
Backup Methods
Manual Backup: Copy important files to another hard drive, cloud storage, or an external device.
Backup Software: Use tools like Acronis True Image or Windows Backup and Restore for comprehensive backups.
4. Tools Needed
Windows Disk Management
Windows includes a built-in Disk Management tool that can manage disks and partitions effectively.
macOS Disk Utility
Mac users can utilize the Disk Utility application to manage partitions.
Third-Party Software
Tools like EaseUS Partition Master and MiniTool Partition Wizard offer advanced options for merging partitions.
5. Combining Partitions on Windows
Step-by-Step Guide
Connect the Hard Drive: Ensure your hard drive is connected to your computer.
Open Disk Management:
Right-click on the Start button and select “Disk Management.”
Locate the Partitions: Identify the partitions you want to combine.
Delete the Partition to Merge:
Right-click the partition adjacent to the one you want to keep and select “Delete Volume.”
Note: This will erase all data on this partition, so ensure it is backed up.
Combine the Partitions:
Right-click the remaining partition and select “Extend Volume.”
Follow the wizard to combine the unallocated space into the remaining partition.
Completion: The partitions are now merged into a single volume.
6. Combining Partitions on macOS
Step-by-Step Guide
Connect the Hard Drive: Ensure the hard drive is connected to your Mac.
Open Disk Utility:
Go to Applications > Utilities > Disk Utility.
Select the External Hard Drive: Click on your external hard drive in the sidebar.
Select the Partition to Remove:
Click on the partition you want to delete and select it.
Click the Minus Sign (-): This will remove the selected partition.
Resize the Remaining Partition:
Click on the remaining partition and drag its edge to use the unallocated space or click “Resize.”
Apply Changes: Click “Apply” to confirm the changes.
7. Post-Combination Steps
Reformatting and Resizing
After merging partitions, you may want to ensure the new partition is formatted properly.
Reformat if Necessary: If you encounter issues with file system compatibility, reformat the partition.
Resize to Optimize Space: Ensure the partition is using all available space.
8. Troubleshooting Common Issues
Partition Not Deleting: Ensure the partition is not in use. Close any applications accessing it.
Drive Not Recognized: Check the connection and ensure the drive is powered on.
Data Loss Concerns: Always verify that backups are complete before making changes.
Combining partitions on a hard drive can enhance data management and reclaim valuable space. By following the steps outlined in this guide, you can merge your partitions safely and efficiently. Always remember to back up your data and use the appropriate tools for your operating system.
About us and this blog
Panda Assistant is built on the latest data recovery algorithms, ensuring that no file is too damaged, too lost, or too corrupted to be recovered.
Request a free quote
We believe that data recovery shouldn’t be a daunting task. That’s why we’ve designed Panda Assistant to be as easy to use as it is powerful. With a few clicks, you can initiate a scan, preview recoverable files, and restore your data all within a matter of minutes.
Subscribe to our newsletter!
More from our blog
See all postsRecent Posts
- How to recover deleted voicemail samsung? 2025-04-22
- Samsung portable ssd t5 online recovery 2025-04-22
- Fix western digital external hard drive 2025-04-22

 Try lt Free
 Recovery success rate of up to


