Formatting a camera memory card is a crucial step for ensuring the optimal performance of your device, as well as preserving your files and avoiding potential data corruption. While it might seem like a simple task, understanding how to properly format your memory card can help extend its lifespan and ensure that it continues to function properly.
1. Why Format Your Camera Memory Card?
Memory cards, like SD (Secure Digital) cards, MicroSD, and CF (CompactFlash) cards, act as the primary storage for your camera. Formatting your camera memory card regularly is essential for several reasons:
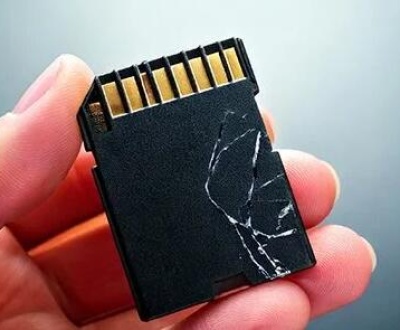
Clearing Corrupted Data: Over time, data may become corrupted, particularly after accidental interruptions such as sudden power loss during a write process or removing the card before it’s safely unmounted.

Preventing Fragmentation: Fragmentation can occur over time as files are deleted and written to the card. This can slow down your camera’s performance. Regular formatting can help reduce this.
Optimizing Space: If your memory card has accumulated many old, unwanted files or has been used in multiple devices, formatting ensures that all previous data is completely removed, allowing you to start fresh with optimal storage capacity.
Ensuring Compatibility: Different cameras and devices may require different file systems (such as FAT32. exFAT, or NTFS). Formatting your card in the appropriate file system ensures compatibility across devices.
2. Types of Camera Memory Cards
There are several types of memory cards used in cameras, and the steps for formatting may vary slightly depending on the type. The most common camera memory cards include:
SD (Secure Digital): The most widely used memory card type in cameras, available in various sizes (SD, SDHC, SDXC).
MicroSD: A smaller version of the SD card, commonly used in action cameras, drones, and mobile devices.
CF (CompactFlash): A larger, more robust card often used in professional DSLRs and high-end cameras.
XQD and CFexpress: High-speed memory cards used in advanced cameras, often for 4K video recording or high-burst rate photography.
Memory Stick: Used in older Sony devices.
It’s important to know which type of memory card your camera uses to follow the correct procedure for formatting.
3. When Should You Format Your Memory Card?
Here are some situations where you should format your memory card:
After Deleting Files: If you’ve deleted files from the card, it’s a good idea to format it to avoid any residual data being left behind, especially if you plan to use the card for important photos or videos.
After Switching Cameras or Devices: If you’re moving the card between different devices (e.g., from a DSLR to a drone), formatting the card in the new device ensures that it is configured to the correct file system.
After Experiencing Data Corruption: If your camera shows error messages or if files aren’t saving properly, formatting the card may resolve the issue.
When Preparing the Card for Sale or Reuse: If you no longer need the files on the card and plan to sell or repurpose it, formatting the card will ensure that all data is erased.
4. How to Format a Camera Memory Card: A Step-by-Step Guide
Formatting through the Camera’s Menu
This is the most straightforward method for formatting a camera memory card, and it ensures the card is formatted in a way that’s optimized for your specific camera. Here’s how to do it:
Insert the Memory Card: Insert the memory card into your camera.
Power on the Camera: Turn on your camera and navigate to the camera settings or menu options.
Locate the Format Option: Most cameras will have a dedicated “Format” option in their settings or menu. Depending on the model, this can be found under the general settings or storage settings. It may be listed as “Format Memory Card” or simply “Format.”
Select Format: Select the format option, and the camera will prompt you to confirm. The camera will usually display a warning that formatting will erase all data on the card.
Confirm and Format: Once you confirm, the camera will proceed with the formatting process. This typically takes a few seconds, after which the memory card is ready for use.
Check the Card: After formatting, the camera should show a “Ready” or “Empty” status for the memory card. If there are still files visible, the formatting may not have been successful, and you may need to try again.
Formatting through a Computer
You can also format your camera memory card via a computer. This method is useful if you want to choose the file system or if your camera is not recognizing the card.
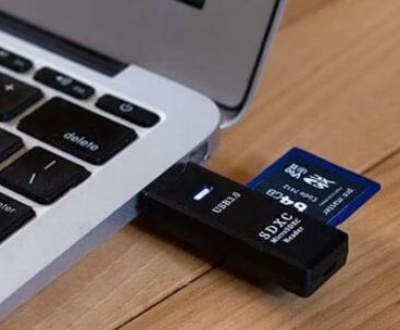
Insert the Memory Card into a Card Reader: Use an external card reader or your computer’s built-in reader if available. Ensure that the memory card is properly inserted into the reader.
Open File Explorer (Windows) or Finder (Mac): On a Windows PC, open “File Explorer.” On a Mac, open “Finder.” Look for your memory card under “Devices” or “Locations.”
Right-Click on the Memory Card: On Windows, right-click on the memory card icon and select “Format.” On a Mac, right-click (or control-click) and select “Erase.”
Choose the File System: For most cameras, you’ll want to select the FAT32 or exFAT file system. FAT32 is typically used for cards under 32GB, while exFAT is better for larger cards. You can also choose the “Quick Format” option if you want to speed up the process.
Start the Formatting Process: Click “Start” (on Windows) or “Erase” (on Mac) to begin the formatting. This process will delete all data on the card, so be sure to back up any files you want to keep before proceeding.
Eject the Card: Once the process is complete, safely eject the card from the computer before reinserting it into your camera.
5. Things to Consider Before Formatting
Backing Up Data
Before formatting your camera memory card, it is essential to back up any important files. Once you format the card, all data on it will be erased. You can back up files by copying them to your computer, an external hard drive, or a cloud storage service.
Choosing the Right File System
When formatting, you must choose the correct file system. Here are the most common options:
FAT32: Best for cards under 32GB. Compatible with most devices.
exFAT: Better for larger cards (over 32GB) and supports files larger than 4GB, which is important for high-resolution video or large image files.
NTFS: Primarily used for Windows systems. Not recommended for cameras, as many do not support it.
Check your camera’s manual or specifications to see which file system is recommended.
6. Common Formatting Errors and How to Troubleshoot Them
Sometimes formatting a memory card can run into issues. Here are some common errors and their solutions:
Error: “Card Cannot Be Formatted”
Solution: This could indicate a physical issue with the card. Try using a different card reader or formatting through a computer. If the error persists, the card may be damaged and need to be replaced.
Error: “Card Not Recognized”
Solution: Try cleaning the metal contacts on the card gently with a soft cloth. If the issue persists, test the card in another camera or device to rule out a camera-related issue.
Error: “Card Locked”
Solution: Some memory cards come with a physical switch that locks the card to prevent writing. Make sure the lock switch on the side of the card is in the “unlocked” position.
7. Best Practices for Maintaining Your Camera Memory Card
To keep your memory card in good working condition, follow these best practices:
Avoid Removing the Card While Writing: Always wait for the camera to finish writing to the card before removing it.
Format Regularly: Format your card every time you use it to keep it free of fragmented or corrupted files.
Store Cards Properly: Keep your memory cards in a case when not in use to protect them from physical damage.
Avoid Overusing a Single Card: While modern SD cards are quite durable, overusing the same card for too long can lead to wear and tear. It’s advisable to rotate between a couple of cards.
About us and this blog
Panda Assistant is built on the latest data recovery algorithms, ensuring that no file is too damaged, too lost, or too corrupted to be recovered.
Request a free quote
We believe that data recovery shouldn’t be a daunting task. That’s why we’ve designed Panda Assistant to be as easy to use as it is powerful. With a few clicks, you can initiate a scan, preview recoverable files, and restore your data all within a matter of minutes.
Subscribe to our newsletter!
More from our blog
See all postsRecent Posts
- How to recover damaged sd card 2025-05-08
- Recover files from damaged sd card 2025-05-08
- Toshiba hard drive not working 2025-05-08

 Try lt Free
 Recovery success rate of up to

