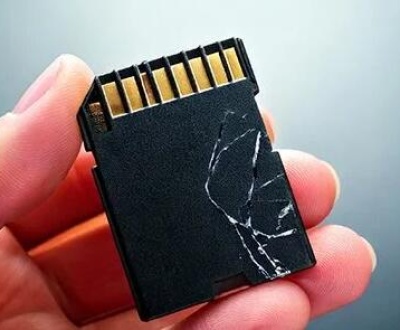
Moving photos to an SD card is a common practice for people who want to free up storage on their device or back up important memories. The process can be done across different platforms, such as smartphones, cameras, and computers.
1. SD Cards
An SD card (Secure Digital card) is a small, portable storage device that is widely used to store and transfer data, particularly photos and videos. SD cards come in different sizes and storage capacities, making them a versatile choice for smartphones, digital cameras, computers, and even gaming consoles. They are typically used as external storage to expand a device’s storage capacity or as a backup solution for important files.

2. Types of SD Cards and Their Capacities
Before you begin transferring your photos, it’s important to understand the different types of SD cards available. SD cards come in various formats, including:
SD (Secure Digital): The original format, with capacities ranging from 128 MB to 2 GB.
SDHC (Secure Digital High Capacity): Offers larger storage options, from 4 GB to 32 GB.
SDXC (Secure Digital eXtended Capacity): Provides even larger storage capacities, ranging from 64 GB to 2 TB.
microSD Cards: These are smaller versions of SD cards, typically used in smartphones, drones, and other portable devices. They come in various capacities and types like microSDHC and microSDXC.
When choosing an SD card for transferring photos, it’s important to consider the storage capacity and speed class. Higher storage capacities allow you to store more photos, while a higher speed class ensures faster data transfer rates.
3. Why Move Photos to an SD Card?
There are several reasons why moving photos to an SD card is a good idea:
Free Up Device Storage: Many smartphones and digital cameras have limited internal storage. By moving photos to an SD card, you can free up space for other apps, games, or documents.
Backup Solution: Storing your photos on an SD card ensures that your memories are backed up in case something happens to your device, such as accidental deletion or data corruption.
Easier File Management: An SD card makes it easy to organize and move large groups of photos between different devices, especially when you need to transfer them to a computer or another phone.
4. Precautions Before Transferring Photos
Before moving photos to your SD card, there are a few precautions to keep in mind:
Check SD Card Formatting: Ensure that your SD card is properly formatted and compatible with the device you’re transferring photos from. Most devices require the SD card to be formatted in FAT32. exFAT, or NTFS file systems.
Create Backup Copies: While moving your photos to an SD card, it’s always a good idea to back them up on another storage device, such as an external hard drive or cloud storage service, to prevent accidental data loss.
Scan for Viruses: If you’re using an SD card that has been previously used in another device, scan it for viruses or malware to ensure that the photos remain secure during the transfer.
5. How to Move Photos to an SD Card on Smartphones
Android Phones
Moving photos to an SD card on an Android phone is a straightforward process:
Insert the SD Card: Ensure the SD card is inserted into the phone’s SD card slot. If it’s your first time inserting the card, the phone will prompt you to format it. Follow the on-screen instructions to format the card if necessary.
Access the Files App: Open the Files app (or My Files, depending on your device). You should see a list of your internal storage and the SD card.
Select Photos: Go to the folder where your photos are stored, typically in the DCIM folder. Tap and hold on a photo to select it. You can select multiple photos at once.
Move Photos: Tap the three-dot menu (usually in the top-right corner) and select Move or Copy. Choose the SD card as the destination.
Confirm Transfer: Wait for the transfer to complete. Depending on the number of photos and the size of the files, it may take a few minutes.
iPhones
Moving photos to an SD card on an iPhone requires a bit more effort because iPhones don’t natively support SD card expansion. However, you can transfer photos via the following methods:
Using a Lightning-to-SD Card Reader: Apple offers a Lightning to SD Card Camera Reader that allows you to transfer photos directly from your iPhone to an SD card.
Using a Computer as an Intermediary: The easiest way to transfer photos from an iPhone to an SD card is by using a computer.
Connect the iPhone to your computer using a USB cable.
Open the Photos app (on Mac) or File Explorer (on Windows).
Copy the photos from your iPhone to your computer.
Insert the SD card into your computer’s SD card reader, and then move the photos from the computer to the SD card.
6. How to Move Photos to an SD Card on Digital Cameras
Digital cameras typically use SD cards to store photos. To move your photos to an SD card from the camera:
Insert SD Card: If you’re moving photos to a new SD card, insert the SD card into the camera’s SD card slot.
Access Menu Options: Power on the camera and navigate to the Menu or Settings section.
Select “Copy” Option: Many cameras have an option to copy files from internal memory to the SD card. Select this option.
Confirm Transfer: Once selected, the camera will begin transferring photos to the SD card. Wait for the transfer to complete, and make sure the process is not interrupted.
7. How to Move Photos to an SD Card on a Computer
Windows PCs
Insert SD Card into Card Reader: Insert the SD card into your computer’s SD card reader. If your computer doesn’t have a built-in SD card reader, use an external USB card reader.
Access the SD Card: Open File Explorer and locate the SD card, usually under This PC or Devices and Drives.
Locate Photos: Navigate to the folder where your photos are stored on your PC. Common folders include Pictures, Downloads, or Documents.
Copy or Move Photos: Select the photos you want to transfer, right-click, and choose Copy or Cut. Then, open the SD card folder and paste the photos into it.
Safely Eject the SD Card: Once the transfer is complete, safely eject the SD card from your computer to avoid any data corruption.
Mac Computers
Insert SD Card: Insert the SD card into your Mac’s SD card slot. If you don’t have a slot, use a USB card reader.
Open Finder: Open the Finder app and locate the SD card under Devices.
Locate Photos: Navigate to the folder where your photos are stored, such as the Pictures folder.
Transfer Photos: Drag and drop the photos from your Mac to the SD card folder.
Eject the SD Card: Once the transfer is complete, right-click the SD card and select Eject.
8. Managing Photos on an SD Card
Once your photos are on the SD card, you can manage them by creating folders to organize your images. For example, you can create folders for specific events, such as Vacation, Birthday, or Wedding. Additionally, if you’re using the SD card for long-term storage, it’s a good idea to occasionally back it up to another device to prevent data loss.
9. Troubleshooting Common Problems
While transferring photos to an SD card is usually straightforward, there are a few common issues that you may encounter:
SD Card Not Recognized: Make sure the SD card is properly inserted into the device. If it’s still not recognized, try reformatting the card or testing it in a different device.
Corrupted SD Card: If your SD card becomes corrupted, you may need to format it. Formatting will erase all data on the card, so make sure to back up important files before proceeding.
Insufficient Space: If the SD card runs out of space, you will need to delete unnecessary files or use a higher-capacity card.
About us and this blog
Panda Assistant is built on the latest data recovery algorithms, ensuring that no file is too damaged, too lost, or too corrupted to be recovered.
Request a free quote
We believe that data recovery shouldn’t be a daunting task. That’s why we’ve designed Panda Assistant to be as easy to use as it is powerful. With a few clicks, you can initiate a scan, preview recoverable files, and restore your data all within a matter of minutes.
Subscribe to our newsletter!
More from our blog
See all postsRecent Posts
- How to search folder in file explorer 2025-05-09
- How to search for duplicates in file explorer 2025-05-09
- Finder search not finding files 2025-05-09

 Try lt Free
 Recovery success rate of up to


