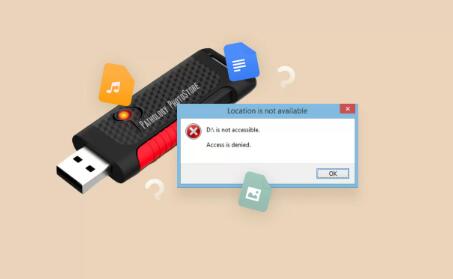
Formatting a USB drive is a common task that helps in preparing the drive for new data, fixing file system errors, or changing the file system to be compatible with different devices.
Why Format a USB Drive?
Before diving into the how-to, it’s essential to understand why you might need to format a USB drive:
Clearing Data: Formatting erases all data on the USB drive, which is useful if you want to start fresh or if the drive is being repurposed.
Fixing Errors: Sometimes, USB drives develop errors or become corrupt. Formatting can fix these issues by resetting the file system.
Changing File Systems: Different devices and operating systems use different file systems. Formatting can change the file system to one that is compatible with your needs (e.g., FAT32. NTFS, exFAT).

Choosing the Right File System
When formatting a USB drive, you need to choose the appropriate file system based on how you intend to use the drive:
FAT32: This file system is widely compatible with most operating systems and devices but has a file size limit of 4GB and a volume size limit of 8TB.
NTFS: Commonly used in Windows environments, NTFS supports larger files and volumes but may not be compatible with some non-Windows devices.
exFAT: This file system is a good choice for large files and cross-platform compatibility, working well with both Windows and macOS.
Formatting a USB Drive on Windows
Step 1: Connect the USB Drive
Insert the USB drive into an available USB port on your computer.
Step 2: Open File Explorer
Press Win + E to open File Explorer.
Locate the USB drive under “This PC” or “Computer”.
Step 3: Right-Click and Format
Right-click on the USB drive.
Select “Format” from the context menu.
Step 4: Choose Format Options
File System: Select the desired file system (FAT32. NTFS, exFAT).
Allocation Unit Size: You can leave this as default unless you have specific requirements.
Volume Label: Enter a name for the USB drive if desired.
Quick Format: Check this option for a faster format that does not scan for bad sectors. Uncheck if you want a thorough format.
Step 5: Start Formatting
Click “Start” to begin the formatting process. A warning will appear indicating that all data on the drive will be erased. Click “OK” to proceed.
Step 6: Completion
Once the format is complete, a notification will appear. Click “OK” and then close the format window. Your USB drive is now formatted and ready for use.
Formatting a USB Drive on macOS
Step 1: Connect the USB Drive
Plug the USB drive into your Mac.
Step 2: Open Disk Utility
Go to “Applications” > “Utilities” > “Disk Utility”.
Select the USB drive from the list on the left.
Step 3: Erase the Drive
Click the “Erase” button at the top of the Disk Utility window.
Choose the following options:
Name: Enter a name for the USB drive.
Format: Select the desired file system (MS-DOS (FAT) for FAT32. Mac OS Extended (Journaled) for HFS+, exFAT for cross-platform compatibility).
Scheme: Choose “GUID Partition Map” for newer Macs or “Master Boot Record” for older systems and cross-platform compatibility.
Step 4: Confirm Erasure
Click “Erase” to start the formatting process. A warning will appear indicating that all data will be lost. Click “Erase” again to confirm.
Step 5: Completion
Once the formatting is complete, click “Done”. You can now close Disk Utility and use your USB drive.
Formatting a USB Drive on Linux
Step 1: Connect the USB Drive
Insert the USB drive into a USB port on your computer.
Step 2: Open a Terminal
Press Ctrl + Alt + T to open a Terminal window.
Type lsblk to list all block devices and identify your USB drive (usually /dev/sdX, where X is a letter).
Step 3: Unmount the Drive
If the drive is mounted, unmount it using the command:
sudo umount /dev/sdX1
Replace sdX1 with the appropriate partition identifier.
Step 4: Format the Drive
To format the drive as FAT32. use the following command:
sudo mkfs.vfat -F 32 /dev/sdX1
For NTFS:
sudo mkfs.ntfs /dev/sdX1
For exFAT:
sudo mkfs.exfat /dev/sdX1
Replace sdX1 with the appropriate partition identifier.
Step 5: Completion
After the command completes, your USB drive is formatted and ready to use.
Troubleshooting Common Issues
1. Format Not Supported
If you encounter a “format not supported” error, check the following:
Ensure the file system you are trying to use is supported by your operating system and the device you are using the USB drive with.
Try using a different USB port or cable.
2. Drive Not Recognized
If the USB drive is not recognized:
Ensure the USB drive is properly connected.
Check for physical damage to the USB drive or port.
Restart your computer and try again.
3. Unable to Format Due to Write Protection
If you receive an error related to write protection:
Check for a physical write protection switch on the USB drive.
Use the command-line tool diskpart (on Windows) to clear write protection:
diskpart list disk select disk X attributes disk clear readonly.
About us and this blog
Panda Assistant is built on the latest data recovery algorithms, ensuring that no file is too damaged, too lost, or too corrupted to be recovered.
Request a free quote
We believe that data recovery shouldn’t be a daunting task. That’s why we’ve designed Panda Assistant to be as easy to use as it is powerful. With a few clicks, you can initiate a scan, preview recoverable files, and restore your data all within a matter of minutes.
Subscribe to our newsletter!
More from our blog
See all postsRecent Posts
- Hard drive recovery denver reddit 2025-02-28
- How to recover a deleted slide in powerpoint? 2025-02-27
- How to recover deleted capcut videos? 2025-02-27


