 Try lt Free
 Recovery success rate of up to
In Windows 10. when an image or any other file is replaced, deleted, or overwritten, the behavior of the system depends on several factors.
1. File Replacement in Windows 10
In Windows, files are commonly replaced in the following scenarios:
Saving a new file with the same name in the same directory.
Overwriting a file via file transfer or backup.
Editing and saving an image, depending on the application.
In each of these scenarios, the system’s handling of the replaced file can vary.
A. Saving a New File with the Same Name
When you attempt to save a file (like an image) with the same name in the same folder, Windows 10 will prompt you with a message asking if you wish to replace the existing file. If you choose to replace it, the new file overwrites the old one, and the original file is essentially removed from the directory.
Does the replaced image go to the Recycle Bin? No. When you overwrite a file by saving a new one with the same name, Windows does not send the previous version to the Recycle Bin. The original file is removed immediately from the system, and the only way to recover it would be through:
A file history backup (if enabled),
A system restore point (if one was created before the replacement),
Or specialized file recovery software.
B. Overwriting During File Transfer
In situations where you are transferring files (such as copying or moving images) from one location to another, Windows may notify you if a file with the same name already exists in the destination folder. It then gives you the option to:
Replace the file,
Keep both files (which typically renames one of them),
Or skip the transfer.
Does the replaced image go to the Recycle Bin? Again, the replaced file does not go to the Recycle Bin. Once the image is replaced, the original file is removed from the folder, and it’s not stored in the Recycle Bin. Recovery of such a file would require one of the same methods listed above, such as backup or recovery software.
C. Editing and Saving an Image
If you open an image file, make changes (using an editor like Photoshop or Paint), and save it again, the original version of the file is replaced with the edited one. This is because most image editing applications overwrite the existing file unless you explicitly use the “Save As” option to create a new version.
Does the replaced image go to the Recycle Bin? In this case, the original image also does not go to the Recycle Bin. The overwritten image is removed from the system, leaving only the modified version. Again, recovering the original would require backup or recovery tools.
2. What Happens to Deleted Files in Windows 10?
To understand why replaced files don’t go to the Recycle Bin, it’s important to understand how file deletion works in Windows 10.
The Recycle Bin in Windows 10 acts as a safety net for files that you delete. When you delete a file manually (for example, by pressing the Delete key or right-clicking and selecting Delete), Windows moves the file to the Recycle Bin rather than permanently removing it. This gives you a chance to recover the file if needed.
However, the Recycle Bin only works in specific situations:
Manual Deletion: When you delete files yourself.
Certain programs may move files to the Recycle Bin when they delete them.
Files from local drives (C: or other internal hard drives) go to the Recycle Bin. External drives, USB drives, or network locations often don’t send files to the Recycle Bin when deleted.
3. When Files Don’t Go to the Recycle Bin
There are scenarios where files, including images, do not go to the Recycle Bin even if deleted or replaced:
Files replaced during save/transfer: As mentioned, when you replace a file by saving or transferring, the old version is not moved to the Recycle Bin.
Shift + Delete: If you delete a file using Shift + Delete, Windows will bypass the Recycle Bin and permanently delete the file.
Files deleted from removable or network drives: In most cases, files deleted from external drives or network drives do not go to the Recycle Bin.
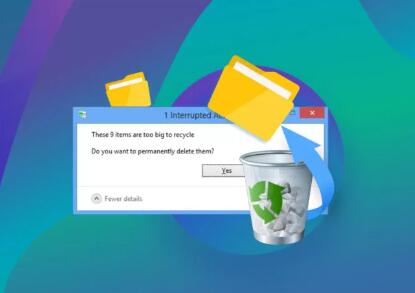
Files larger than the Recycle Bin’s capacity: If a file exceeds the storage limit of the Recycle Bin, Windows will delete it directly rather than storing it in the bin.
4. File History and Backup Systems
If you’re concerned about accidentally replacing or losing important images, Windows 10 offers built-in backup tools that can help recover replaced or deleted files:
A. File History
File History is a Windows 10 feature that allows you to back up versions of files in your libraries (Documents, Pictures, etc.) on a regular basis. If you accidentally replace an image, you can use File History to restore a previous version of the file.
To enable File History:
Go to Settings > Update & Security > Backup.
Click Add a drive and choose the external or network drive where you want to store the backups.
Turn on File History to start saving copies of your files.
To restore a replaced image, navigate to the folder where the image is stored, right-click it, and choose Restore previous versions. This option will show older versions saved by File History.
B. Backup and Restore (Windows 7)
Another option is the older Backup and Restore feature, originally introduced in Windows 7. This tool allows you to create full system backups, which you can use to restore replaced or deleted files.
C. OneDrive Version History
If you use OneDrive to store your images, Microsoft’s cloud service automatically saves version histories for files. If you replace an image stored in OneDrive, you can easily restore a previous version by right-clicking the file and selecting Version history.
5. Recovering Replaced Files Using Data Recovery Software
When an image file is replaced, it is not truly “deleted” from your hard drive right away. Instead, the space it occupies is marked as free, and the file remains intact until new data overwrites it. Data recovery software can be used to recover such files.
A. Panda Assistant Recovery Software
If you have replaced an important image, you might want to try Panda Assistant, which specializes in data recovery. It can scan your drive for replaced or deleted files and help you recover them, even if they aren’t in the Recycle Bin.
B. Third-Party Data Recovery Tools
Other tools like Recuva, EaseUS Data Recovery Wizard, or Disk Drill can scan your drive and recover replaced files, including images.
6. Preventing Accidental File Replacements
To avoid losing important images due to accidental replacement, here are some steps you can take:
Always use “Save As”: When working with important images, use the “Save As” option to create a new version instead of overwriting the original.
Enable File History or Backup: Regular backups ensure you can recover replaced files.
Cloud Storage: Using services like OneDrive or Google Drive allows you to restore previous file versions easily.
Be cautious with file transfers: When moving files, pay attention to Windows prompts to avoid accidental overwrites.
About us and this blog
Panda Assistant is built on the latest data recovery algorithms, ensuring that no file is too damaged, too lost, or too corrupted to be recovered.
Request a free quote
We believe that data recovery shouldn’t be a daunting task. That’s why we’ve designed Panda Assistant to be as easy to use as it is powerful. With a few clicks, you can initiate a scan, preview recoverable files, and restore your data all within a matter of minutes.
Subscribe to our newsletter!
More from our blog
See all posts


