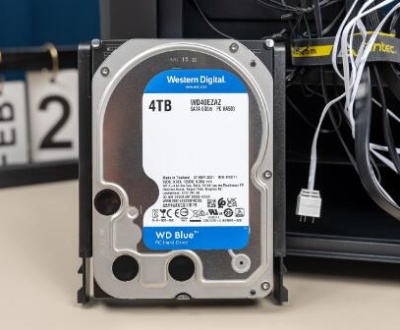
Disk Cleanup is a built-in Windows utility designed to free up space on your hard drive by removing unnecessary files, such as temporary files, system files, and more. However, many users have reported issues with Disk Cleanup not deleting temporary files.
Temporary Files
Temporary files are created by various applications and the operating system during normal operation. They serve purposes such as:
Storing session data.
Caching information for faster access.
Facilitating updates and installations.
While temporary files can enhance performance, they can accumulate over time, taking up valuable disk space. Regularly cleaning these files is essential for maintaining system performance.

Why Disk Cleanup May Not Delete Temporary Files
File Permissions Issues
Disk Cleanup may lack the necessary permissions to access or delete certain temporary files. This can happen if files are owned by a different user account or are in use by a running application.
Files in Use
If a temporary file is currently in use by an application, Disk Cleanup cannot delete it. This commonly occurs with files generated by browsers or other software that remains open during cleanup.
Corrupted System Files
Corrupted system files can interfere with Disk Cleanup’s ability to function correctly. This can lead to various issues, including failure to delete temporary files.
System Restore Points
Disk Cleanup can clean temporary files, but if there are system restore points created, it might prioritize keeping those, potentially leaving behind certain temporary files.
Windows Updates
Temporary files created during Windows updates may not be removed if the update process is incomplete or if Windows is in the process of updating.
Disk Cleanup Configuration
The configuration settings for Disk Cleanup might not include certain file types. If users don’t check the options carefully, they may inadvertently skip the deletion of some temporary files.
Alternative File Locations
Temporary files can reside in various locations. Disk Cleanup might not target all areas where these files are stored, especially if they’re in a non-standard directory.
Troubleshooting Steps
Step 1: Run Disk Cleanup as Administrator
Open Disk Cleanup:
Type “Disk Cleanup” in the Windows search bar and select it.
Run as Administrator:
Right-click on the Disk Cleanup icon and choose “Run as administrator.” This grants higher permissions to delete files that may otherwise be locked.
Step 2: Close Running Applications
Ensure all applications, especially browsers and file management tools, are closed before running Disk Cleanup. This prevents temporary files from being in use.
Step 3: Check Disk Cleanup Settings
Open Disk Cleanup:
Launch Disk Cleanup and select the drive you wish to clean (usually C:).
Check Options:
Click on “Clean up system files” and look for temporary file options. Ensure all relevant checkboxes are selected, particularly “Temporary files.”
Step 4: Use the Command Prompt
Sometimes, using the command prompt can clear stubborn temporary files:
Open Command Prompt:
Type “cmd” in the search bar, right-click, and select “Run as administrator.”
Type the Command:
Enter the following command and press Enter:
css
del /q/f/s %TEMP%\*
This command will force delete all files in the Temp directory.
Step 5: Use Disk Cleanup in Safe Mode
Running Disk Cleanup in Safe Mode can help bypass issues related to locked files:
Enter Safe Mode:
Restart your computer and press F8 (or Shift + F8) before the Windows logo appears.
Run Disk Cleanup:
Once in Safe Mode, open Disk Cleanup and perform the cleanup process again.
Step 6: Check for Disk Errors
Corrupted files on the disk can prevent Disk Cleanup from functioning properly:
Open Command Prompt as Administrator.
Run CHKDSK:
Type the following command and press Enter:
bash
chkdsk C: /f /r
This will check for errors on the disk and attempt to fix them.
Advanced Solutions
If the basic troubleshooting steps don’t resolve the issue, consider these advanced solutions:
Using Third-Party Cleanup Tools
Third-party tools like CCleaner or BleachBit can offer more thorough cleaning capabilities. These tools often include additional features, such as:
Customizable cleanup options.
More thorough scanning for temporary files.
Scheduled cleaning options.
Manually Deleting Temporary Files
You can manually delete temporary files as follows:
Open the Run dialog:
Press Windows + R.
Enter the Temp Location:
Type %TEMP% and press Enter. This opens the Temp folder.
Select and Delete Files:
Select all files and delete them manually.
Utilizing Storage Sense (Windows 10 and 11)
Storage Sense is a built-in feature that automatically cleans up temporary files:
Open Settings:
Go to Settings > System > Storage.
Enable Storage Sense:
Toggle on the Storage Sense feature and configure it to clean temporary files regularly.
Best Practices for Maintaining a Clean System
Regularly Use Disk Cleanup
Schedule regular Disk Cleanup sessions (monthly or quarterly) to keep your system tidy.
Manage Installed Applications
Regularly uninstall applications you no longer use to prevent unnecessary temporary file generation.
Clear Browser Cache
Clear your browser’s cache and temporary files frequently to free up space and improve performance.
Keep Windows Updated
Ensure your Windows operating system is up-to-date, as updates often include bug fixes for Disk Cleanup and other utilities.
Backup Important Files
Regularly back up important files to avoid data loss during cleanup processes.
About us and this blog
Panda Assistant is built on the latest data recovery algorithms, ensuring that no file is too damaged, too lost, or too corrupted to be recovered.
Request a free quote
We believe that data recovery shouldn’t be a daunting task. That’s why we’ve designed Panda Assistant to be as easy to use as it is powerful. With a few clicks, you can initiate a scan, preview recoverable files, and restore your data all within a matter of minutes.
Subscribe to our newsletter!
More from our blog
See all postsRecent Posts
- How to recover deleted voicemail samsung? 2025-04-22
- Samsung portable ssd t5 online recovery 2025-04-22
- Fix western digital external hard drive 2025-04-22

 Try lt Free
 Recovery success rate of up to


