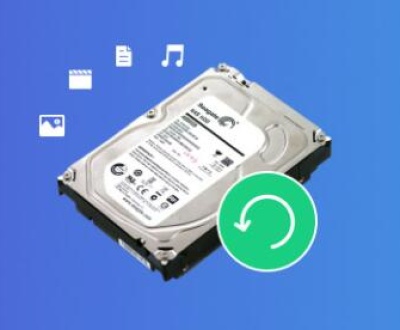
Creating a hard disk partition in Windows 11 is an essential task that can help you manage your storage more effectively. Whether you’re setting up a new computer, organizing your files, or preparing for dual-booting, partitioning your hard drive allows you to separate your data into different logical units, providing a more organized system and enhancing the security and performance of your computer.
1. What is Disk Partitioning?
Disk partitioning is the process of dividing a physical hard drive into multiple sections called partitions. Each partition behaves like a separate storage device, with its file system and structure. Essentially, partitioning allows you to divide your hard drive into manageable chunks, making it easier to organize and store data, and even install multiple operating systems.

A single hard disk can have multiple partitions. For example, you might have one partition for the operating system, another for your data, and perhaps even a third for a backup. Each partition can be formatted with its own file system, such as NTFS (New Technology File System), FAT32 (File Allocation Table), or exFAT (Extended File Allocation Table).
2. Benefits of Partitioning Your Hard Disk
Partitioning a hard disk provides several benefits, including:
Organization: You can create separate partitions for different types of data, such as a partition for your operating system, one for personal files, and another for backups. This can help you stay organized and make it easier to locate files.
Security: If one partition gets corrupted or affected by malware, other partitions may remain unaffected. By keeping system files and data separate, you reduce the risk of losing everything in case of a failure.
Multiple Operating Systems: Partitioning is essential if you want to run multiple operating systems on the same machine, such as Windows and Linux in a dual-boot configuration. Each operating system requires its own partition.
Improved Performance: By separating system files from data, you can reduce fragmentation and improve performance, especially if your system has limited storage space.
3. Understanding Different Partition Types
Before partitioning your hard drive, it’s important to understand the different partition types used in modern systems:
Primary Partition: This is a main partition on your hard drive that can be used to install an operating system or store files. In most cases, Windows uses the primary partition for the system installation.
Extended Partition: An extended partition is a special type of partition that allows you to create more than the four primary partitions that are allowed on an MBR (Master Boot Record) disk. An extended partition can contain logical partitions, which can be used to store files or install operating systems.
Logical Partition: Logical partitions are created within an extended partition. They allow you to bypass the limitation of four primary partitions, enabling you to create as many partitions as needed (subject to the disk’s size).
Dynamic Disks: Dynamic disks are a type of disk that allows you to create more advanced storage configurations, such as spanned volumes, striped volumes, mirrored volumes, and RAID arrays. This feature is useful for users who require more flexibility in managing their storage, but it’s typically not necessary for standard partitioning tasks.
GPT (GUID Partition Table): GPT is a modern partition scheme that allows for larger disk sizes and more partitions than MBR. It’s used in conjunction with UEFI (Unified Extensible Firmware Interface) systems, which replace the older BIOS system. GPT is recommended for modern systems with disks larger than 2TB.
MBR (Master Boot Record): MBR is the traditional partitioning scheme that has been in use for decades. It has limitations, such as only supporting disks up to 2TB and only allowing up to four primary partitions.
4. Preparing for Disk Partitioning
Before diving into the partitioning process, it’s important to prepare your system and the hard disk:
Back Up Your Data: Partitioning a disk can potentially lead to data loss if something goes wrong. It’s a good idea to back up your important files before starting.
Ensure You Have Enough Space: Make sure your disk has sufficient free space to create a new partition. If you plan to shrink an existing partition, ensure that there’s enough unallocated space for the new partition.
Check Disk Health: It’s important to check the health of your hard drive before partitioning. You can use Windows’ built-in tools like chkdsk to scan and repair any errors on your drive.
Understand Partition Limitations: If you’re using an MBR disk, remember that it can only support up to four primary partitions. If you need more partitions, you’ll have to create an extended partition and add logical partitions within it.
5. How to Partition a Hard Disk in Windows 11
Windows 11 provides a built-in utility called Disk Management that allows you to easily create, delete, format, and manage partitions on your hard drive. Here’s how to use it to partition a hard disk:
Step 1: Open Disk Management
Right-click on the Start menu and select Disk Management.
This will open the Disk Management window, where you’ll see a list of all the connected drives and their partitions.
Step 2: Select the Disk to Partition
In the Disk Management window, locate the disk you want to partition. It will be listed as “Disk 0.” “Disk 1.” etc.
Right-click on the unallocated space (or an existing partition you want to shrink) and choose New Simple Volume if you want to create a new partition.
Step 3: Create a New Partition
Follow the wizard that appears. The wizard will ask you to specify the size of the partition, assign a drive letter, and choose the file system (usually NTFS for Windows installations).
Once you finish the wizard, Windows will create the new partition.
Step 4: Format the Partition
After the partition is created, it will be displayed as a new volume in Disk Management. Right-click the volume and select Format.
Choose the desired file system (NTFS is recommended for most users) and complete the format.
6. How to Resize Partitions in Windows 11
Sometimes, you might need to adjust the size of an existing partition. Whether you need to shrink a partition to make room for a new one or expand an existing partition, you can do this using Windows 11’s Disk Management tool:
Step 1: Shrink a Partition
In Disk Management, right-click the partition you want to shrink and select Shrink Volume.
Enter the amount of space you want to shrink the partition by and click Shrink.
Step 2: Expand a Partition
To expand a partition, you must first ensure that there’s unallocated space adjacent to it.
Right-click the partition you want to expand and select Extend Volume.
Follow the wizard to add the unallocated space to the partition.
7. How to Format and Delete Partitions in Windows 11
If you no longer need a partition, you can easily delete or format it through Disk Management:
Step 1: Delete a Partition
Right-click the partition you want to delete and select Delete Volume.
Confirm that you want to delete the partition. Be aware that this will erase all data on the partition.
Step 2: Format a Partition
Right-click the partition you want to format and select Format.
Choose the file system (NTFS is recommended for most cases) and proceed with the format.
About us and this blog
Panda Assistant is built on the latest data recovery algorithms, ensuring that no file is too damaged, too lost, or too corrupted to be recovered.
Request a free quote
We believe that data recovery shouldn’t be a daunting task. That’s why we’ve designed Panda Assistant to be as easy to use as it is powerful. With a few clicks, you can initiate a scan, preview recoverable files, and restore your data all within a matter of minutes.
Subscribe to our newsletter!
More from our blog
See all postsRecent Posts
- How to save tiktok videos on computer 2025-04-30
- How to watch gopro videos on computer 2025-04-30
- How to save video from blink video doorbell to computer? 2025-04-30

 Try lt Free
 Recovery success rate of up to


