1. System Requirements and Compatibility
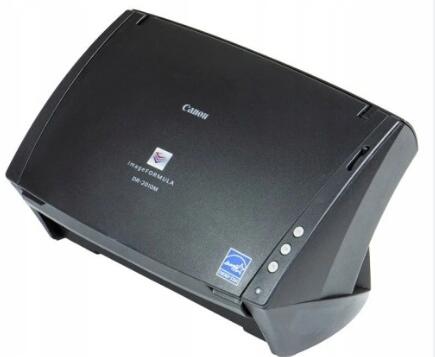
The Canon DR – 2010M is an older scanner model. While it was designed before Windows 11. there is a good chance it can still work with the right setup.
Ensure that your computer meets the minimum requirements for running Windows 11. This includes having a compatible processor, sufficient RAM (at least 4GB, though 8GB or more is recommended), and available storage space.

2. Driver Installation
Finding the Right Driver:
The first step is to obtain the correct scanner driver for Windows 11. You can visit the Canon official website. Navigate to the support section and search for the DR – 2010M model.
Canon usually provides a list of available drivers for different operating systems. Look for the Windows 11 – compatible driver version. If there is no specific Windows 11 driver, you may try the driver for a previous version of Windows (such as Windows 10) in compatibility mode.
Installing the Driver:
Once you have downloaded the driver file (it usually comes in an.exe format), double – click on it to start the installation process.
Follow the on – screen instructions provided by the driver installer. This may include agreeing to license agreements, choosing installation paths, and waiting for the installation to complete.
During the installation, you may be prompted to connect the scanner via USB. Make sure the scanner is powered on and properly connected to your computer’s USB port before proceeding with this step.
3. USB Connection and Configuration
USB Port Compatibility:
Windows 11 supports USB 2.0 and USB 3.0 ports. The Canon DR – 2010M likely uses a USB 2.0 connection. Make sure the USB port you are using is functioning properly. You can test it by connecting other USB devices to the same port.
Device Recognition:
After connecting the scanner via USB and installing the driver, Windows 11 should automatically detect the device. You can check this by going to the Device Manager.
To access the Device Manager, right – click on the Start menu and select “Device Manager”. In the Device Manager window, look for “Imaging Devices” or “Scanners and Cameras” category. The Canon DR – 2010M should be listed there if it has been recognized successfully.
If the device is not recognized or has a yellow exclamation mark next to it, it indicates a problem with the driver installation or a connection issue. You may need to reinstall the driver, update it, or check the USB connection.
4. Scanning with the Canon DR – 2010M
Scanning Software:
Canon usually provides its own scanning software with the scanner. After successful installation of the driver, you can launch this software.
The scanning software allows you to configure various scanning parameters such as resolution (e.g., 300dpi, 600dpi), color mode (color, grayscale, black and white), file format (PDF, JPEG, TIFF, etc.), and the destination folder where the scanned files will be saved.
Performing a Scan:
Place the document you want to scan on the scanner’s feeder or flatbed, depending on the type of document and your scanning needs.
Open the scanning software and select the appropriate scan settings. Then, click on the “Scan” button to start the scanning process. The scanner will feed the document (if using the feeder) and capture the image, and the scanned file will be saved to the specified location according to the settings you chose.
5. Troubleshooting
Driver – Related Issues:
If you encounter problems with the driver, such as the scanner not working after a Windows 11 update, you may need to reinstall or update the driver. Sometimes, Windows updates can cause compatibility issues with older drivers.
You can also try running the driver installer in compatibility mode. Right – click on the driver installation file, select “Properties”, and then go to the “Compatibility” tab. Check the box that says “Run this program in compatibility mode for” and choose an earlier version of Windows from the drop – down list.
USB Connection Problems:
If the scanner is not recognized due to a USB connection issue, try using a different USB cable. A faulty cable can cause communication problems between the scanner and the computer.
Also, make sure the USB ports on your computer are clean and free of debris. Sometimes, dust or other particles can interfere with the proper connection of USB devices.
About us and this blog
Panda Assistant is built on the latest data recovery algorithms, ensuring that no file is too damaged, too lost, or too corrupted to be recovered.
Request a free quote
We believe that data recovery shouldn’t be a daunting task. That’s why we’ve designed Panda Assistant to be as easy to use as it is powerful. With a few clicks, you can initiate a scan, preview recoverable files, and restore your data all within a matter of minutes.
Subscribe to our newsletter!
More from our blog
See all postsRecent Posts
- How to recover a deleted slide in powerpoint? 2025-02-27
- How to recover deleted capcut videos? 2025-02-27
- How to recover a file deleted from a shared drive? 2025-02-27


