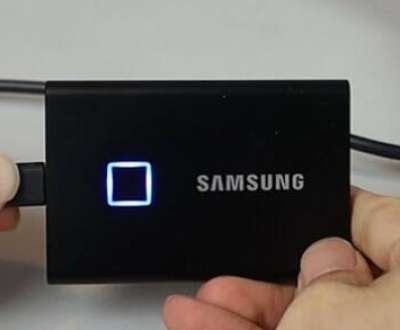
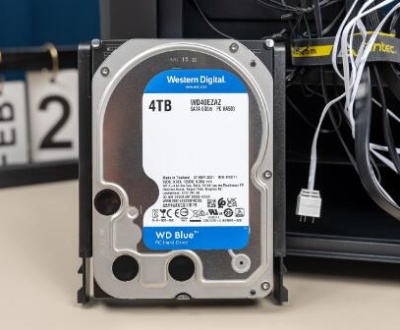
Seagate external hard drives are widely used for their durability, high storage capacity, and reliability. However, users occasionally encounter situations where the device behaves unexpectedly. One common issue is a blinking light on the Seagate external hard drive. This blinking indicator can range from a harmless sign of activity to a serious warning of hardware failure. When your drive is blinking but not being recognized by your computer, understanding the cause and knowing what to do next becomes crucial.
Part 1: Seagate’s LED Indicators
Seagate external drives include LED lights that serve as visual indicators of the drive’s status. Here’s what the different blinking patterns typically mean:

Solid Light: The drive is connected, powered, and idle.
Blinking Light (Slow/Pulsing): The drive is connected and actively reading or writing.
Rapid Blinking Light: The drive may be trying to establish a connection, or there’s a problem preventing access.
No Light: The drive is not receiving power.
While a blinking light often indicates normal activity, issues arise when the light blinks but the drive isn’t detected by the system or shows other abnormal behavior.
Part 2: Common Causes of a Blinking Light Issue
Several factors can contribute to this issue:
Faulty USB Cable or Port
A damaged USB cable or port can interrupt data or power transfer.
Insufficient Power Supply
Portable drives usually draw power via USB, and if underpowered, the light may blink without functionality.
Driver Conflicts or Outdated Software
A system may fail to recognize the drive due to driver issues.
Corrupt Partition or File System
Logical errors on the drive may prevent it from being accessed, even though it’s physically connected.
Hardware Failure
Internal damage, bad sectors, or mechanical failure can render a drive unreadable.
Incompatible File System
A drive formatted for one OS might not be readable by another without extra software.
Firmware Glitches
Occasionally, a drive’s firmware may be the cause of its misbehavior.
Part 3: Initial Checks and Basic Troubleshooting
Step 1: Verify the USB Connection
Try a different USB cable.
Use another USB port (preferably USB 3.0).
Avoid USB hubs; connect directly to the PC or Mac.
Step 2: Try a Different Computer
Plug the drive into another system to see if it is recognized.
This helps isolate whether the issue lies with the computer or the drive.
Step 3: Listen and Observe
Does the drive make spinning noises?
Is there any clicking or beeping?
Part 4: Diagnosing the Drive on Windows
Use Disk Management
Press Win + X > Choose “Disk Management.”
Look for your Seagate drive:
If it appears with no drive letter: Assign one.
If it appears as RAW or unallocated: The partition may be corrupted.
Update or Reinstall Drivers
Open Device Manager.
Locate “Disk drives” and right-click the Seagate drive.
Choose “Update driver” or uninstall and then reconnect the drive.
Run CHKDSK
Open Command Prompt as Administrator.
Type chkdsk X: /f /r (replace X with the drive letter).
Part 5: Diagnosing the Drive on macOS
Use Disk Utility
Go to Applications > Utilities > Disk Utility.
Check if the drive appears under External.
If it does:
Try mounting it manually.
Use First Aid to repair the disk.
Use Terminal
Open Terminal.
Run diskutil list to find the disk.
Mount it using: diskutil mountDisk /dev/diskX
Part 6: Firmware and Software Solutions
Update Firmware (If Applicable)
Visit Seagate’s official website and use SeaTools to check firmware updates.
Use SeaTools for Diagnosis
Download and install SeaTools.
Run the diagnostic tests (Short Drive Self Test, Long Generic Test).
Part 7: Recovering Data From a Blinking Seagate Drive
If the drive is still blinking and inaccessible, data recovery becomes a priority.
Use Recovery Software
Windows: EaseUS, Recuva, Stellar, Disk Drill
macOS: Disk Drill, Data Rescue, EaseUS for Mac
How to Use:
Download and install the software.
Select the Seagate drive (even if unmounted).
Perform a deep scan.
Preview and recover your important files.
Create a Disk Image (Advanced)
Use tools like DDRescue (Linux/macOS) to clone the drive and work on the image instead.
Part 8: Fixing File System or Partition Errors
Windows
Use third-party tools like MiniTool Partition Wizard or AOMEI Partition Assistant.
Rebuild the Master Boot Record (MBR).
macOS
Disk Utility > Erase the drive (if recovery is not needed).
Use Terminal for advanced partition operations.
Part 9: Power Supply Troubleshooting
Some Seagate drives, especially desktop models, require external power. If you have:
Portable Drive: Try using a Y-cable or powered USB hub.
Desktop Drive: Ensure the AC adapter is working.
Part 10: When the Light Blinks but Drive Doesn’t Spin
This could indicate a more severe hardware failure, possibly due to:
PCB damage
Motor failure
Firmware crash
In such cases, DIY recovery is risky. It’s better to consult professionals.
Part 11: When to Contact Seagate or Data Recovery Services
Reach out to Seagate Support or a data recovery company if:
The drive isn’t recognized on any device
The LED blinks rapidly with no sound
There’s a clicking or grinding noise
Software can’t access the drive
Recommended Recovery Services
Seagate Rescue Services
Ontrack
DriveSavers
Part 12: Preventing Future Issues
Safely Eject the Drive
Always use “Eject” before disconnecting to avoid corruption.
Avoid Physical Shock
External drives are sensitive to impact.
Keep Drivers Updated
Regularly check for firmware and driver updates.
Use a Surge Protector
Protects from power surges during use.
Backup Frequently
Never rely on one drive for irreplaceable data.
A blinking light on your Seagate external hard drive can be a sign of either routine activity or a serious issue. Diagnosing the problem requires checking the physical connection, the operating system’s disk tools, and the drive’s behavior. In many cases, software fixes and power troubleshooting resolve the issue. When they don’t, data recovery becomes critical, and professional help might be necessary.
About us and this blog
Panda Assistant is built on the latest data recovery algorithms, ensuring that no file is too damaged, too lost, or too corrupted to be recovered.
Request a free quote
We believe that data recovery shouldn’t be a daunting task. That’s why we’ve designed Panda Assistant to be as easy to use as it is powerful. With a few clicks, you can initiate a scan, preview recoverable files, and restore your data all within a matter of minutes.
Subscribe to our newsletter!
More from our blog
See all postsRecent Posts
- How to recover deleted voicemail samsung? 2025-04-22
- Samsung portable ssd t5 online recovery 2025-04-22
- Fix western digital external hard drive 2025-04-22

 Try lt Free
 Recovery success rate of up to


