 Try lt Free
 Recovery success rate of up to
Formatting an SSD (Solid State Drive) for Windows 10 involves several crucial steps to ensure that the drive is prepared for proper use with the operating system. Whether you’re setting up a new SSD or formatting an existing one, it’s important to understand the process and the reasons behind each action.
1. SSDs and Why Formatting is Necessary
What is an SSD?
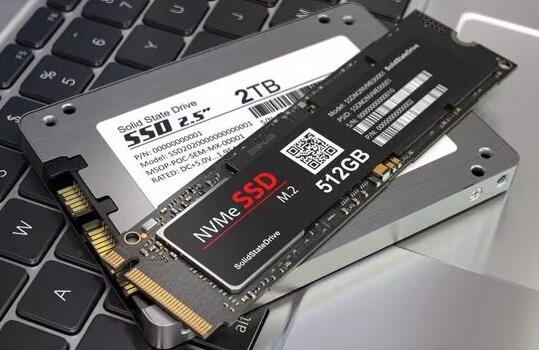
A Solid State Drive (SSD) is a type of storage device that uses NAND-based flash memory to store data, unlike traditional hard disk drives (HDDs) that use spinning disks. SSDs are faster, more durable, and consume less power than HDDs, making them a popular choice for operating systems, games, and high-performance computing tasks.
Why Format an SSD?
Formatting an SSD is necessary when you:
Install a new SSD and want to prepare it for use.
Set up a new operating system (like Windows 10) on the SSD.
Want to wipe the drive to erase data securely.
Are experiencing performance issues and want to clear up potential file system problems.
It is also a critical step if you’re upgrading to a larger SSD or simply want to clean up and optimize the drive for future use.
2. Preparation Steps Before Formatting
Before formatting your SSD, you should prepare by taking the following steps:
Backup Your Data
If the SSD contains important data that you want to keep, make sure to back it up before proceeding with the format. Once you format the drive, all the existing data will be erased permanently.
You can back up your data by:
Using an external hard drive or cloud storage.
Moving files to another storage device temporarily.
Check for Errors
If you’re formatting an existing SSD to resolve issues, it’s a good idea to check for disk errors first. Windows provides built-in tools to scan and fix disk problems before formatting.
You can run a disk check by:
Pressing Windows + E to open File Explorer.
Right-clicking on the SSD and selecting Properties.
Going to the Tools tab and clicking Check under Error Checking.
Ensure the Drive is Properly Connected
For internal SSDs, ensure that the drive is properly installed in your computer’s motherboard via a SATA or NVMe connection, depending on the type of SSD. For external SSDs, ensure the drive is properly connected via USB or Thunderbolt.
Download Drivers (if necessary)
If you are installing a new SSD or moving it to a new system, you may need to download specific drivers from the SSD manufacturer’s website for optimal performance.
3. Choosing the Right File System for Your SSD
The file system dictates how data is organized on the drive. When formatting an SSD for Windows 10. you should select a file system that works seamlessly with Windows.
File Systems in Windows 10
NTFS (New Technology File System): This is the default file system for most internal drives used with Windows 10. NTFS supports large file sizes, advanced file permissions, and other features such as journaling. It’s highly recommended for use with internal SSDs.
exFAT (Extended File Allocation Table): If you intend to use the SSD for external storage or plan on using it with both Windows and macOS, exFAT is a good option. It works well for larger file transfers and supports large drives, but it lacks some advanced features of NTFS.
FAT32: This file system is an older format that is not suitable for modern SSDs. It has a 4GB file size limit, so it is not recommended unless you need compatibility with very old systems.
For most users, NTFS is the best choice for internal SSDs on Windows 10.
4. Formatting Your SSD Using Windows 10 Tools
Windows 10 provides several built-in tools for formatting an SSD. You can use Disk Management, File Explorer, or Command Prompt to format your SSD. Let’s go over these methods in detail.
5. Formatting Through Disk Management
Disk Management is a powerful tool in Windows 10 that allows you to manage disks, partitions, and volumes.
Steps to Format Using Disk Management:
Open Disk Management: Press Windows + X and select Disk Management from the menu.
Locate the SSD: In the Disk Management window, you’ll see a list of all connected drives. Locate your SSD by its size or drive letter.
Right-click on the SSD: Right-click the partition or unallocated space on the SSD and select Format.
Select the File System: Choose NTFS (recommended for internal SSDs) or exFAT (for external SSDs).
Choose the Allocation Unit Size: You can leave this as the default, which is typically fine for most uses.
Assign a Volume Label: This is the name you want to assign to your drive (e.g., “My SSD”).
Perform the Format: Click OK to start the formatting process. The process may take a few moments depending on the size of the SSD.
6. Formatting Through File Explorer
If the SSD is already partitioned and formatted, you can use File Explorer to format it without going through Disk Management.
Steps to Format Using File Explorer:
Open File Explorer: Press Windows + E to open File Explorer.
Right-click on the SSD: Find your SSD in the list of drives under “This PC”. Right-click on the drive and select Format.
Choose the File System: Select NTFS or exFAT.
Quick Format: Check the Quick Format box for a faster format, or leave it unchecked for a thorough format.
Start Formatting: Click Start to begin formatting the SSD.
7. Formatting Through Command Prompt
For more advanced users or those who prefer the command line, Command Prompt offers another method to format an SSD.
Steps to Format Using Command Prompt:
Open Command Prompt: Press Windows + X and select Command Prompt (Admin).
Launch Diskpart: Type diskpart and press Enter.
List the Disks: Type list disk and press Enter to display all connected drives.
Select the SSD: Identify your SSD from the list and type select disk X (where X is the number of your SSD).
Clean the SSD: Type clean to remove any partitions and data from the drive.
Create a New Partition: Type create partition primary to create a new primary partition on the SSD.
Format the SSD: Type format fs=ntfs quick to format the SSD using NTFS. You can replace ntfs with exfat if desired.
Assign a Drive Letter: Type assign letter=X (where X is the drive letter you want to assign to the SSD).
8. Considerations for SSD Optimization and Health
After formatting your SSD, it’s important to optimize it for the best performance and ensure its longevity. Here are a few tips:
Enable TRIM
TRIM is a feature that helps manage unused data blocks in SSDs, improving performance over time. Windows 10 automatically enables TRIM on supported SSDs, but you can verify it by running the following command in Command Prompt:
shell
fsutil behavior query DisableDeleteNotify
If the result is 0. TRIM is enabled.
Keep SSD Firmware Up-to-Date
Manufacturers often release firmware updates to improve the performance and reliability of SSDs. Check the manufacturer’s website periodically for firmware updates and follow the instructions to update your SSD.
Avoid Overfilling the SSD
SSDs perform best when there’s a significant amount of free space. Try to leave at least 10-20% of your SSD’s capacity unused to avoid wear and maintain optimal performance.
Defragmentation
Unlike HDDs, SSDs do not require defragmentation to improve performance. In fact, defragmenting an SSD can unnecessarily wear out the drive. Windows 10 will handle this automatically by performing a Trim operation instead.
About us and this blog
Panda Assistant is built on the latest data recovery algorithms, ensuring that no file is too damaged, too lost, or too corrupted to be recovered.
Request a free quote
We believe that data recovery shouldn’t be a daunting task. That’s why we’ve designed Panda Assistant to be as easy to use as it is powerful. With a few clicks, you can initiate a scan, preview recoverable files, and restore your data all within a matter of minutes.
Subscribe to our newsletter!
More from our blog
See all posts


Recent Posts
- Data recovery salt lake city utah 2025-04-18
- Data recovery sacramento 2025-04-18
- Data recovery miami 2025-04-18