 Try lt Free
 Recovery success rate of up to
The Ender 3 is one of the most popular 3D printers, known for its affordability, ease of use, and robust community support. One of the key components that make it work seamlessly is the SD card, which holds the 3D models (typically in G-code format) that the printer uses to perform its tasks. For smooth operation, it’s essential to ensure that the SD card is formatted correctly before use.
1. Ender 3’s SD Card Requirements
Before jumping into the steps, it’s crucial to understand why the format type of your SD card matters for your Ender 3 printer. The Ender 3. like many other 3D printers, relies on a FAT32-formatted SD card to read and execute print jobs. This file system is chosen because it is compatible with the Ender 3’s hardware and ensures efficient read and write operations for your 3D print jobs.
Why FAT32?
FAT32 is an older file system, but it has broad compatibility with many devices and operating systems. It is reliable and supports relatively large file sizes for the 3D models you’ll print. The choice of FAT32 over more modern file systems (such as exFAT or NTFS) is mainly due to compatibility and simplicity. While FAT32 is limited to a maximum file size of 4 GB, this limitation is not typically an issue with 3D printing, as most models are well below this size.
2. Choosing the Right SD Card
Before formatting, it’s essential to ensure that you’re using a good-quality SD card. Here’s what to look for:
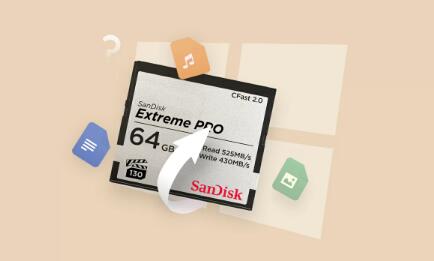
Storage Capacity: The Ender 3 supports SD cards of up to 32 GB in size, but cards larger than 8 GB tend to work best. Avoid going for extremely large cards (e.g., 64 GB or higher), as these may not be fully compatible.
Speed Class: For smooth operation, choose an SD card with a reasonable speed class. A Class 10 or UHS-I card is ideal for most 3D printing needs, as it provides fast read and write speeds.
Brand: Stick to reputable brands like SanDisk, Kingston, or Transcend. Low-quality, off-brand SD cards can cause unreliable performance or even corruption of your print files.
3. Preparing Your SD Card for Formatting
Before formatting your SD card, make sure to:
Backup Your Files: If the SD card already contains any files, be sure to back them up to your computer or cloud storage. Formatting the SD card will erase all the data on it.
Check the SD Card’s Condition: If you’re experiencing issues with the card (e.g., data corruption, slow read/write speeds), it might be a sign that the card is failing and may need to be replaced.
4. How to Format an SD Card for Use with the Ender 3
You can format your SD card using several methods, depending on the operating system you are using. We’ll cover how to do it on Windows, macOS, and Linux.
Formatting the SD Card on Windows
Insert the SD Card: Place the SD card into your computer’s SD card reader or USB card reader and insert it into a USB port on your PC.
Open ‘This PC’ or ‘File Explorer’: Navigate to the location where your SD card is displayed. It will appear as a removable drive under “This PC.”
Right-click the SD Card: Select “Format” from the context menu.
Choose File System: In the format window, ensure that the File system is set to FAT32 (it should be by default if the card is 32 GB or smaller). If you’re formatting a card larger than 32 GB, you might not see FAT32 as an option, and you will need to use a third-party tool to force the format to FAT32 (we’ll cover that later).
Set Allocation Unit Size: Leave the allocation unit size at the default setting (typically 4096 bytes).
Start the Format: Click “Start” to begin the process. A warning will appear that all data on the SD card will be erased.
Finish: Once the format is complete, click “OK” and safely eject the SD card.
Formatting the SD Card on macOS
Insert the SD Card: Plug the SD card into your Mac’s SD card slot or USB reader.
Open Disk Utility: Go to Applications > Utilities > Disk Utility.
Select the SD Card: In Disk Utility, select the SD card from the left sidebar.
Erase the Card: Click on the “Erase” button at the top of the window.
Choose Format: Set the format to MS-DOS (FAT). This is the Mac equivalent of FAT32.
Name the Card: You can give the SD card a name (optional).
Erase and Format: Click the “Erase” button to format the card.
Formatting the SD Card on Linux
Insert the SD Card: Insert the SD card into the card reader and connect it to your computer.
Open the Terminal: Press Ctrl + Alt + T to open a terminal window.
List the Disks: Type lsblk and press Enter. This will display a list of connected drives. Identify the SD card (usually labeled as /dev/sdX).
Unmount the Card: If the SD card is mounted, unmount it using sudo umount /dev/sdX (replace X with the correct letter for your SD card).
Format the Card to FAT32: Use the mkfs.fat command to format the card. For example:
bash
sudo mkfs.fat -F 32 /dev/sdX
Complete the Process: After the command finishes, your SD card is now formatted to FAT32 and ready for use.
5. What to Do If Your SD Card Is Larger Than 32 GB
As mentioned earlier, the Ender 3 requires an SD card formatted in FAT32. While cards up to 32 GB are supported natively, cards over 32 GB (especially 64 GB or higher) usually come pre-formatted as exFAT. Unfortunately, the Ender 3 does not support exFAT, and you’ll need to reformat it to FAT32. If your operating system does not allow you to format cards larger than 32 GB in FAT32. you can use third-party tools to force this format.
Using GUI Tools to Format Larger Cards
GUIFormat (Windows): A free tool that allows you to format larger SD cards (over 32 GB) in FAT32.
Download and install GUIFormat.
Run the tool and select the correct drive.
Choose the FAT32 format and click Start.
GParted (Linux): GParted is a powerful disk partitioning tool that can be used to format large SD cards to FAT32. Simply open GParted, select the SD card, and format it as FAT32.
Using Command-Line Tools on macOS or Linux
If you’re comfortable with the command line, both macOS and Linux support formatting large SD cards using FAT32. As mentioned earlier, the mkfs.fat command can be used on Linux, and macOS users can use diskutil in the terminal.
6. Checking the Format of Your SD Card
Once formatted, you’ll want to confirm that the SD card is indeed formatted as FAT32. Here’s how:
On Windows:
Right-click the SD card in File Explorer and select Properties.
Under the File system section, it should display FAT32.
On macOS:
Open Disk Utility and select the SD card.
The format should be listed as MS-DOS (FAT).
On Linux:
Run lsblk in the terminal and look for the FAT32 file system.
7. Using the SD Card with Your Ender 3
Once your SD card is properly formatted, you can load it into your Ender 3. Make sure the card contains the G-code files you want to print. Here are some additional tips for optimal performance:
Folder Structure: Create a clear folder structure on the SD card to keep everything organized. You might want to create folders for different projects or models.
File Names: Keep file names simple and avoid special characters. This helps avoid issues with file recognition on the printer.
Regular Backups: Regularly back up your SD card contents, especially if you’re working on important 3D models.
About us and this blog
Panda Assistant is built on the latest data recovery algorithms, ensuring that no file is too damaged, too lost, or too corrupted to be recovered.
Request a free quote
We believe that data recovery shouldn’t be a daunting task. That’s why we’ve designed Panda Assistant to be as easy to use as it is powerful. With a few clicks, you can initiate a scan, preview recoverable files, and restore your data all within a matter of minutes.
Subscribe to our newsletter!
More from our blog
See all posts


Recent Posts
- Data recovery salt lake city utah 2025-04-18
- Data recovery sacramento 2025-04-18
- Data recovery miami 2025-04-18