 Try lt Free
 Recovery success rate of up to
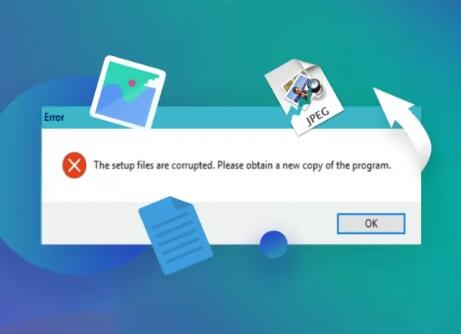
Part 1: Introduction to Windows 10 Corrupted Files
Windows 10 corrupted files can cause a variety of problems, such as system crashes, software malfunctions, and slow performance. Corrupted files can be caused by many factors, including sudden power outages, software conflicts, malware infections, and hard drive errors. Understanding the causes and symptoms of corrupted files is the first step in effectively dealing with this issue.
Part 2: Common Symptoms of Corrupted Files
System Crashes: The computer may suddenly freeze or reboot without warning. This can happen during normal use, while running specific programs, or even when the system is idle.
Blue Screen of Death (BSOD): A blue screen with an error message appears, indicating a serious system problem. The error messages often provide some clues about the cause of the issue, but they can be cryptic and difficult to understand for the average user.
Software Errors: Programs may fail to start, crash unexpectedly, or display error messages related to missing or corrupted files. For example, you might get an error message saying “The program cannot start because [filename].dll is missing or corrupted” when trying to launch an application.
Slow System Performance: The computer may become noticeably slower in responding to user commands, such as opening files, switching between programs, or loading web pages. This can be due to corrupted system files that affect the overall efficiency of the operating system.
File Access Issues: You may encounter problems when trying to open, save, or delete files. Files may appear to be missing, or you might get error messages like “Access is denied” or “The file or directory is corrupted and unreadable.”
Part 3: Methods to Fix Windows 10 Corrupted Files
Method 1: Use the System File Checker (SFC) Tool
The System File Checker is a built – in Windows utility that scans for corrupted system files and replaces them with cached copies.
To use it, open the Command Prompt as an administrator. You can do this by searching for “Command Prompt” in the Start menu, right – clicking on it, and selecting “Run as administrator.”
In the Command Prompt window, type “sfc /scannow” and press Enter. The tool will then start scanning your system for corrupted files. This process may take some time, depending on the size of your system and the number of files to be checked.
If the SFC tool finds any corrupted files, it will automatically replace them with the correct versions from the system cache. Once the scan is complete, you will receive a message indicating the results. If the scan detects and repairs corrupted files, it’s a good idea to restart your computer to ensure that the changes take effect.
Method 2: Use the Deployment Image Servicing and Management (DISM) Tool
The DISM tool is used to service Windows images and can also be used to repair corrupted system files. It works by restoring the health of the Windows image file that contains the operating system files.
Open the Command Prompt as an administrator, similar to how you did for the SFC tool.
First, you can try running the command “DISM /Online /Cleanup – Image /CheckHealth” to check the health of the Windows image. This will provide information about any issues with the image.
If problems are detected, you can then run the command “DISM /Online /Cleanup – Image /RestoreHealth” to repair the image. This process may take longer than the SFC scan, as it may need to download and replace missing or corrupted files from Windows Update.
After the DISM process is complete, it’s recommended to run the SFC tool again to ensure that all corrupted files have been fixed. This is because the DISM tool may have repaired some underlying issues that the SFC tool can then address more effectively.
Method 3: Restore from a System Restore Point
Windows 10 creates system restore points automatically at regular intervals and before major system changes, such as installing new software or drivers. These restore points can be used to revert the system to a previous state when it was working properly.
To access the System Restore feature, search for “System Restore” in the Start menu and select it from the results. This will open the System Properties window with the System Restore tab selected.
Click on the “System Restore” button to start the process. You will be presented with a list of available restore points. Select a restore point that was created before the issues with corrupted files started to occur. It’s a good idea to choose a point that is relatively recent but still predates the problem.
Follow the on – screen instructions to complete the restore process. Your computer will restart during the process, and it may take some time to restore the system to the selected restore point. After the restore is complete, check if the issues with corrupted files have been resolved. Keep in mind that restoring from a system restore point will undo any changes made to the system since that point was created, including the installation of new software and drivers. So, you may need to reinstall any necessary programs or update drivers after the restore.
Method 4: Use Windows Update
Windows Update can often fix corrupted files by providing updated and corrected versions of system files. Microsoft regularly releases updates that include bug fixes, security patches, and improvements to the operating system.
To check for updates, go to the Settings app in Windows 10. You can do this by clicking on the Start menu and selecting the gear – shaped icon.
In the Settings app, select “Update & Security.” Then, click on “Windows Update” in the left – hand menu.
Click the “Check for updates” button. Windows will then search for available updates and display them if any are found. Make sure to install all available updates, as they may include fixes for corrupted files. Some updates may require a restart of your computer, so save any open work and follow the on – screen instructions to complete the update process.
It’s a good practice to keep your Windows 10 system up to date regularly to prevent and fix various issues, including corrupted files. Windows can be set to automatically download and install updates, which helps ensure that your system is always running with the latest and most stable versions of the system files.
Method 5: Scan for Malware
Malware infections can cause file corruption by modifying or deleting system files. Therefore, it’s essential to scan your computer for malware using reliable antivirus software.
Most antivirus programs for Windows 10 offer a full – system scan option. Open your antivirus software and look for the option to perform a full – system scan. This type of scan will check all files and folders on your computer, including the operating system files, for any signs of malware.
Some popular antivirus programs for Windows 10 include Windows Defender (which comes built – in with Windows), McAfee, Norton, and Kaspersky. If you are using a third – party antivirus program, make sure it is up to date before running the scan, as updated virus definitions are necessary to detect the latest threats.
During the scan, the antivirus software will identify and quarantine or remove any malware it finds. Once the scan is complete, check if the issues with corrupted files have been resolved. If the antivirus software has removed any malware, it’s a good idea to run the SFC and DISM tools again to ensure that any damaged system files are repaired.
Method 6: Check and Repair Hard Drive Errors
Bad sectors on the hard drive can cause file corruption. You can use the built – in Windows tool called Chkdsk (Check Disk) to check for and repair hard drive errors.
To run Chkdsk, open the Command Prompt as an administrator.
In the Command Prompt, type “chkdsk C: /f” (assuming your Windows system is installed on the C drive). The “/f” parameter tells Chkdsk to fix any errors it finds. You may be prompted to schedule the disk check to occur the next time you restart your computer, especially if the drive is currently in use.
Agree to schedule the check and restart your computer. Chkdsk will then run during the boot process and check the hard drive for errors. It will repair any bad sectors and recover any readable information from damaged areas. This process can take some time, depending on the size of your hard drive and the number of errors found.
After the Chkdsk process is complete, your computer will boot into Windows as usual. Check if the issues with corrupted files have been resolved. If you continue to experience problems, it may be a sign of a more serious hard drive issue, and you may need to consider backing up your data and replacing the hard drive.
Method 7: Perform a Clean Boot
A clean boot helps to identify if any third – party software or services are causing conflicts that lead to file corruption. By starting Windows with only the essential services and drivers, you can determine if a particular program or service is the culprit.
To perform a clean boot, first open the System Configuration utility. You can do this by pressing the Windows key + R, typing “msconfig” in the Run dialog box, and pressing Enter.
In the System Configuration window, go to the “Services” tab. Check the box “Hide all Microsoft services” and then click the “Disable all” button. This will disable all non – Microsoft services.
Next, go to the “Startup” tab. Click on the “Open Task Manager” link. In the Task Manager, disable all startup items by right – clicking on each one and selecting “Disable.”
Close the Task Manager and go back to the System Configuration window. Click “OK” and restart your computer.
After the computer restarts, it will be in a clean boot state. Check if the issues with corrupted files persist. If the problem is resolved, it means that one of the disabled services or startup items was causing the issue. You can then gradually enable the services and startup items one by one to identify the specific culprit. Once you find the problematic item, you can either update the software, uninstall it, or look for a solution online.
Method 8: Reset Windows 10
If all else fails, you can consider resetting Windows 10. This option allows you to reinstall the operating system while keeping your personal files intact (if you choose the appropriate option). There are two types of resets: “Keep my files” and “Remove everything.”
To access the reset option, go to the Settings app and select “Update & Security.” Then, click on “Recovery” in the left – hand menu.
Under “Reset this PC,” click on the “Get started” button. You will be asked to choose between “Keep my files” and “Remove everything.” If you choose “Keep my files,” Windows will reinstall the operating system and preserve your personal files, such as documents, photos, and music. However, you will need to reinstall any software that was not pre – installed with Windows. If you choose “Remove everything,” all files and settings on your computer will be erased, and the system will be restored to its factory – default state.
Follow the on – screen instructions to complete the reset process. This may take some time, as Windows will need to download and install the necessary files. After the reset is complete, set up your computer as you did when you first installed Windows 10. Install any necessary software and updates, and check if the issues with corrupted files have been resolved.
Part 4: Preventing Future File Corruption
Regularly Back Up Your Data: Use external hard drives, cloud storage, or Windows’ built – in backup tools to regularly back up your important files. This way, if file corruption occurs, you can easily restore your data from the backup.
Keep Your System Updated: Enable automatic Windows updates to ensure that your system has the latest security patches and bug fixes. This helps prevent known issues that could lead to file corruption.
Use Reliable Software and Hardware: Only install software from trusted sources and use high – quality hardware components. Faulty hardware, such as a bad hard drive or insufficient RAM, can cause file corruption over time.
Avoid Sudden Power Loss: Use an uninterruptible power supply (UPS) to protect your computer from sudden power outages and surges. These can damage system files and cause corruption.
Run Regular System Maintenance: Perform regular disk clean – ups, defragment your hard drive (if it’s a traditional mechanical hard drive), and use the built – in Windows tools like SFC and DISM on a regular basis to keep your system in good health.
About us and this blog
Panda Assistant is built on the latest data recovery algorithms, ensuring that no file is too damaged, too lost, or too corrupted to be recovered.
Request a free quote
We believe that data recovery shouldn’t be a daunting task. That’s why we’ve designed Panda Assistant to be as easy to use as it is powerful. With a few clicks, you can initiate a scan, preview recoverable files, and restore your data all within a matter of minutes.
Subscribe to our newsletter!
More from our blog
See all posts


Recent Posts
- Data recovery salt lake city utah 2025-04-18
- Data recovery sacramento 2025-04-18
- Data recovery miami 2025-04-18