SD cards are widely used in various devices such as cameras, smartphones, tablets, and portable music players to store a vast amount of data, including precious photos, videos, important documents, and favorite music files. However, data loss from SD cards can happen due to a multitude of reasons. It could be accidental deletion, formatting of the card, corruption of the file system, or even physical damage to the SD card. The good news is that there are several ways to restore files from an SD card for free, and this article will explore those methods in detail.
Common Reasons for Data Loss from SD Cards
Accidental Deletion
One of the most common causes of data loss is accidental deletion. In a hurry or by misclicking, we might delete files that we later realize were important. For example, when trying to free up space on the SD card in a camera, we could accidentally select and delete a batch of photos that we had not yet transferred to a computer.
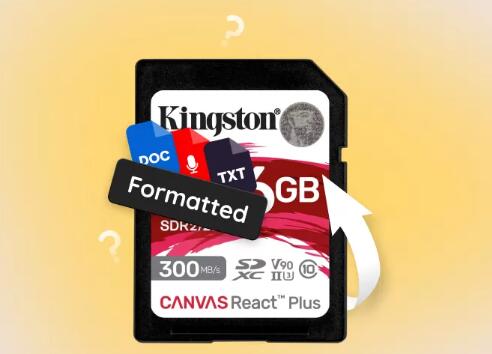
Formatting
Formatting an SD card is another frequent reason for data loss. Sometimes, we might accidentally format the card while trying to perform other operations on the device. In other cases, the device itself might prompt for a format due to issues like file system corruption. Formatting erases all the data on the SD card, but with the right tools, it is often possible to recover the lost files.
File System Corruption
The file system on an SD card can become corrupted. This can be caused by improper ejection of the SD card from a device, power outages during file transfers, or malware attacks. When the file system is corrupted, the device may not be able to access the files stored on the SD card, making them seem lost.
Physical Damage
Physical damage to the SD card can also lead to data loss. If the card is bent, scratched, or exposed to moisture, the internal components that store data can be damaged. However, even in some cases of physical damage, data recovery might still be possible.
Free Tools for Restoring Files from SD Cards
Recuva
Recuva is a popular free data recovery tool that can be used to restore files from SD cards.
Download and Installation: First, visit the official website of Recuva (usually piriform.com/recuva). Download the free version of the software. The download process is straightforward, and once the download is complete, run the installer. Follow the on – screen instructions to install Recuva on your computer.
Selecting the SD Card: After launching Recuva, it will present you with a wizard – like interface. In the first step, you need to select the location from which you want to recover files. Since we are dealing with an SD card, choose the drive letter associated with your SD card. This drive letter can usually be found in the Windows Explorer (in the “This PC” section).
File Type Selection: Next, Recuva will ask you to select the type of files you want to recover. You can choose from a wide range of file types such as photos, videos, documents, music, etc. If you are not sure which files you lost, you can select “All files” to perform a comprehensive scan.
Performing the Scan: Click “Next” to start the scan. Recuva will then start scanning the SD card for lost files. The scan time can vary depending on the size of the SD card and the amount of data stored on it. During the scan, Recuva will display the progress, and as it finds potential recoverable files, it will list them in the results window.
Previewing and Recovering Files: Once the scan is complete, you can preview the files in the results list. For example, if you are looking for photos, you can click on a photo thumbnail to see a larger preview. Select the files you want to recover and click the “Recover” button. Choose a destination on your computer where you want to save the recovered files. Make sure not to save them back to the SD card, as this could overwrite the data you are trying to recover.
PhotoRec
PhotoRec is another powerful free data recovery tool, especially useful for recovering photos, videos, and other media files from SD cards.
Download: PhotoRec can be downloaded from the official website of its developer, CGSecurity (usually cgsecurity.org/wiki/PhotoRec_Download). It is available for Windows, Linux, and macOS. Download the appropriate version for your operating system.
Extracting and Running: After downloading, extract the downloaded file. On Windows, you can use a tool like 7 – Zip to extract the files. For Linux and macOS, the extraction process may vary depending on the file format. Once extracted, locate the executable file. On Windows, it will be named “photorec_win.exe”, on Linux, it might be “photorec”, and on macOS, “photorec_osx”. Run the program.
Selecting the Device: PhotoRec will present you with a list of available devices. Select the SD card from the list. It will show the device name and its capacity. Make sure to select the correct device to avoid scanning the wrong drive.
Selecting the Partition Table: Next, PhotoRec will ask you to select the partition table type. In most cases, for SD cards, you can choose the default option, which is usually “None” if the card has been formatted or if the file system is severely corrupted. If the card has a recognized partition table, you can select the appropriate option.
File Type Selection: PhotoRec allows you to select the types of files you want to recover. It has a comprehensive list of file types, including various image formats (JPEG, PNG, etc.), video formats (MP4. AVI, etc.), and audio formats (MP3. WAV, etc.). You can select the specific file types relevant to your data loss situation.
Performing the Scan and Recovery: Click “Search” to start the scan. PhotoRec will start scanning the SD card for lost files. Similar to Recuva, the scan time depends on the size of the SD card. As it finds files, it will list them in the recovery window. You can then choose to save the recovered files to a location on your computer.
Precautions to Take During the Recovery Process
Avoid Using the SD Card Further
Once you realize that you have lost data from your SD card, it is crucial to stop using the card immediately. Continuing to use the card, such as taking more photos or recording videos, increases the risk of overwriting the lost data. When new data is written to the SD card, it may use the same storage space where the lost files were located, making it impossible to recover those files.
Use a Card Reader
When connecting the SD card to your computer for data recovery, it is advisable to use a card reader. Many computers have built – in card readers, but if yours doesn’t, you can purchase an external USB card reader. Using a card reader reduces the risk of issues related to the device’s internal SD card slot. It also ensures a more stable connection, which is important for the data recovery process.
Check for Malware
Before attempting to recover files from the SD card, make sure your computer is free of malware. Malware can interfere with the data recovery process and may even cause further damage to the SD card or the recovered files. Run a full – system antivirus scan using a reliable antivirus program to ensure the safety of your computer and the data recovery process.
About us and this blog
Panda Assistant is built on the latest data recovery algorithms, ensuring that no file is too damaged, too lost, or too corrupted to be recovered.
Request a free quote
We believe that data recovery shouldn’t be a daunting task. That’s why we’ve designed Panda Assistant to be as easy to use as it is powerful. With a few clicks, you can initiate a scan, preview recoverable files, and restore your data all within a matter of minutes.
Subscribe to our newsletter!
More from our blog
See all posts


Recent Posts
- How to recover unsaved microsoft project file? 2025-03-19
- How to recover unsaved pdf file? 2025-03-19
- Recover unsaved corel draw file 2025-03-19