Here are several methods to remove write protection from a micro SD card, along with detailed steps and considerations:
Method 1: Check and Adjust the Physical Switch
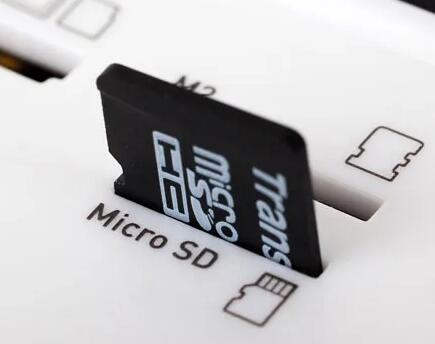
Locate the Switch: Most micro SD cards come with an SD adapter for use in devices like card readers. Examine the side of the SD adapter; there should be a small physical switch. This switch is usually used to set the write protection status of the card.
Switch Position: If the switch is in the “lock” position, move it to the opposite position to unlock the card. This should remove the write protection at a basic level. Ensure that the switch is firmly in the unlocked position and not in a halfway or loose state, as this could still cause issues with writing to the card.

Method 2: Use Disk Management in Windows
Open Disk Management: Press the Windows key + R on your keyboard to open the Run dialog box. Type “diskmgmt.msc” and press Enter. This will open the Disk Management utility.
Locate the Micro SD Card: In the Disk Management window, look for your micro SD card. It will usually be listed with a drive letter and a label indicating the storage capacity and type of the card.
Check for Write Protection Settings: Right-click on the micro SD card partition and select “Properties”. In the Properties window, go to the “Security” tab. Check if there are any restrictions or write protection settings enabled for the user or group that you are logged in as. If so, you may need to adjust the permissions to allow writing to the card.
Format the Card (Optional): If the above steps do not work, and you are sure that there is no important data on the card, you can try formatting the card. Right-click on the micro SD card partition in Disk Management and select “Format”. Follow the on-screen instructions to complete the formatting process. This will erase all data on the card and may remove any write protection that is caused by file system errors or other issues.
Method 3: Use Terminal Commands in Linux
Check the SD Card Device Name: Plug in the micro SD card to your Linux device. Open a terminal and use the command lsblk to list all the block devices. Look for the device that corresponds to your micro SD card. It will usually be something like /dev/sdb or /dev/mmcblk0.
Unmount the SD Card: Before making any changes, it’s important to unmount the SD card to ensure that no processes are accessing it. Use the command umount /dev/sdX (replace sdX with the actual device name of your micro SD card).
Check and Remove Write Protection: You can use tools like hdparm to check and remove write protection. For example, to check the write protection status, use the command hdparm -I /dev/sdX | grep WP. If the card is write-protected, you can try to remove the write protection using the command hdparm -r0 /dev/sdX. This command sets the read-only flag to 0. which should remove the write protection.
Remount the SD Card: After removing the write protection, you can remount the SD card using the command mount /dev/sdX /mnt (replace /mnt with the actual mount point where you want to access the card).
Method 4: Use Disk Utility on Mac
Open Disk Utility: You can find Disk Utility in the Applications > Utilities folder on your Mac. Alternatively, you can use Spotlight Search by pressing Command + Space and typing “Disk Utility” to open it.
Select the Micro SD Card: In Disk Utility, locate your micro SD card in the list of devices on the left side. It should be labeled with the name and capacity of the card.
Check for Write Protection and Permissions: Click on the “First Aid” button to check for any disk errors or issues that may be causing the write protection. If there are no errors reported, click on the “Info” button to view the details of the card. Check if there are any restrictions or write protection settings enabled.
Erase the Card (Optional): If the above steps do not work, and you are willing to erase all the data on the card, you can click on the “Erase” button in Disk Utility. This will format the card and may remove any write protection.
Method 5: Update or Reinstall SD Card Drivers
On Windows:
Open Device Manager: Press the Windows key + X and select “Device Manager” from the menu.
Locate the SD Card Reader: In the Device Manager, expand the “Disk drives” or “Universal Serial Bus controllers” section (depending on how your SD card reader is connected). Look for the entry that corresponds to your SD card reader or the micro SD card itself.
Update the Driver: Right-click on the SD card reader or the card device and select “Update driver”. Follow the on-screen instructions to search for and install the latest driver updates. Windows will try to find the appropriate drivers online and install them automatically.
Reinstall the Driver: If updating the driver does not work, you can try uninstalling the driver and then reinstalling it. Right-click on the device and select “Uninstall device”. After uninstalling, unplug the SD card reader (if it’s external) and then plug it back in. Windows should automatically detect the device and install the default drivers.
On Mac:
Check for Software Updates: Click on the Apple menu and select “System Preferences”. Then click on “Software Update” to check if there are any available updates for your Mac’s operating system and drivers. Install any updates that are related to the SD card reader or storage devices.
Reset the SMC (Optional): If the above step does not work, you can try resetting the System Management Controller (SMC) on your Mac. The process to reset the SMC varies depending on the type of Mac you have. For example, on a MacBook with a removable battery, you would shut down the computer, remove the battery, hold down the power button for 5 seconds, and then reinsert the battery and turn on the computer. Consult Apple’s support documentation for the specific steps for your Mac model.
Method 6: Use Third-Party Software
Panda Assistant is an intuitive and efficient software designed to help users recover lost, deleted, or corrupted data. Whether you’ve accidentally deleted an important file, experienced a system crash, or faced issues with damaged storage devices, Panda Assistant offers a reliable solution for retrieving lost data from various file systems. With its user-friendly interface, Panda Assistant ensures that even beginners can perform data recovery without needing technical expertise.
One of the standout features of Panda Assistant is its support for a wide range of file types, including documents, photos, videos, and more. The software works across multiple platforms, allowing users to recover files from hard drives, SSDs, USB drives, memory cards, and other storage devices. It also supports recovery from RAID arrays, making it an ideal solution for both personal and professional use.
About us and this blog
Panda Assistant is built on the latest data recovery algorithms, ensuring that no file is too damaged, too lost, or too corrupted to be recovered.
Request a free quote
We believe that data recovery shouldn’t be a daunting task. That’s why we’ve designed Panda Assistant to be as easy to use as it is powerful. With a few clicks, you can initiate a scan, preview recoverable files, and restore your data all within a matter of minutes.
Subscribe to our newsletter!
More from our blog
See all postsRecent Posts
- How to repair usb flash? 2025-05-09
- How to repair a broken usb port 2025-05-09
- How to repair my usb flash drive 2025-05-09

 Try lt Free
 Recovery success rate of up to


