Hard drives are fundamental components of a computer system, allowing for the storage of everything from operating systems and applications to personal data and media. The SATA (Serial Advanced Technology Attachment) interface has become the industry standard for connecting hard drives to computers, offering faster data transfer speeds than its predecessor, PATA (Parallel ATA). However, when an old SATA hard drive fails to populate or show up in Windows File Explorer, it can be a frustrating issue to resolve.
1. Check Basic Hardware Connections
The first step in troubleshooting any hard drive-related issue is to confirm that all physical connections are secure. Sometimes, a loose cable or improperly seated connection can prevent the drive from being recognized by the computer.
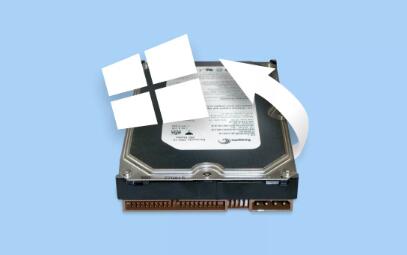
1.1 Inspect the SATA Cable and Power Cable
SATA Data Cable: Ensure the SATA data cable is properly connected to both the motherboard and the hard drive. If the cable is damaged, bent, or improperly connected, it may cause the drive to fail to show up in File Explorer.
SATA Power Cable: Check the power cable that connects to the hard drive. If the drive is an internal one, ensure the power supply is firmly connected to both the power supply unit (PSU) and the drive.
If the cables seem to be in good condition and securely connected, consider replacing them with known working cables to eliminate the possibility of a faulty cable.
1.2 Verify the Drive is Powered
If you’re using an external SATA drive, ensure the external enclosure is connected to a power source. Some enclosures require external power to run properly, especially for larger desktop hard drives.
2. Check BIOS/UEFI Settings
If the drive is not visible in Windows File Explorer but is still spinning or receiving power, the issue may lie within the BIOS or UEFI settings. The BIOS (Basic Input/Output System) or UEFI (Unified Extensible Firmware Interface) is responsible for detecting hardware components during the boot-up process.
2.1 Enter BIOS/UEFI
To check if the SATA hard drive is being detected by your computer’s BIOS/UEFI:
Reboot your computer.
During the boot process, press the BIOS access key (typically F2. DEL, or ESC depending on the manufacturer).
Once in the BIOS/UEFI interface, navigate to the Boot or Storage settings.
Look for the SATA device in the list of connected drives. If it is not listed, this indicates a hardware or connection issue.
2.2 Enable SATA Ports
If the SATA port to which the drive is connected is disabled in BIOS/UEFI, Windows will not detect it. Look for an option like SATA Configuration or SATA Mode, and make sure it is set to AHCI (Advanced Host Controller Interface), which is the most common configuration for modern systems.
3. Check Disk Management
Sometimes, Windows can detect a drive, but it may not assign a letter or make it visible in File Explorer. In such cases, the drive may appear in Disk Management but without a drive letter or partition.
3.1 Open Disk Management
To access Disk Management:
Press Win + X and select Disk Management from the menu.
Look for your SATA hard drive in the list of drives. It may show up as Disk 1. Disk 2. etc., depending on the number of drives connected to your system.
3.2 Assign a Drive Letter
If the drive is listed but does not have a letter assigned to it, right-click on the unallocated or unassigned partition and choose Change Drive Letter and Paths. Click Add and assign a drive letter, such as D:, E:, etc.
3.3 Format the Drive
In cases where the hard drive appears as Unallocated, it may require formatting. To do this:
Right-click the Unallocated space.
Select New Simple Volume and follow the wizard to format the drive.
Note: Formatting the drive will erase all data, so only do this if the data is not important, or you have already tried data recovery.
4. Update or Reinstall the Drivers
Outdated or corrupt drivers can cause Windows to fail in recognizing a connected SATA hard drive. To ensure your drivers are up-to-date:
4.1 Update Drivers
Press Win + X and select Device Manager.
Expand the Disk Drives section.
Right-click on the hard drive and select Update Driver.
Choose Search automatically for updated driver software to let Windows search for any new drivers.
4.2 Uninstall and Reinstall Drivers
If updating doesn’t work, uninstalling and reinstalling the device may help:
Right-click on the SATA hard drive in Device Manager.
Select Uninstall device.
Restart your computer, and Windows should automatically reinstall the driver for the hard drive.
5. Check for Drive Errors Using CHKDSK
If the drive is recognized by Windows but fails to show up in File Explorer, it may have corrupted data or file system errors. Windows has a built-in tool called CHKDSK that can help fix file system errors on hard drives.
5.1 Run CHKDSK
To run CHKDSK:
Press Win + X and select Command Prompt (Admin).
Type the following command and press Enter:
bash
chkdsk X: /f
Replace X: with the letter of your affected drive. If the drive is listed but not accessible, this command may help resolve the issue by fixing any file system corruption.
5.2 Use “Repair Volume” in Disk Management
If you’re unable to access the drive through File Explorer, you can also attempt to repair the drive via Disk Management.
Right-click the drive partition in Disk Management and choose Properties.
Go to the Tools tab and click on Check under the Error Checking section.
6. Use Third-Party Software
If none of the above methods resolve the issue, third-party software may be able to help. These programs are designed to scan, repair, and recover data from problematic drives.
6.1 Data Recovery Software
If the drive is not showing up due to severe corruption or physical damage, data recovery software like EaseUS Data Recovery, Recuva, or MiniTool Power Data Recovery can be used to recover data. These programs can scan the drive for lost partitions or corrupted files and recover them to a safe location.
6.2 Disk Repair Tools
There are also disk repair tools that are specifically designed to fix bad sectors, recover lost partitions, and repair damaged drives. Some popular options include HDD Regenerator and DiskInternals Partition Recovery.
7. Check for Physical Damage
If the hard drive is still not appearing in Windows after all of the above steps, the issue could be physical. Hard drives can fail due to mechanical issues, such as a malfunctioning read/write head, a failing motor, or damage to the drive’s printed circuit board (PCB).
7.1 Inspect the Drive for Physical Damage
Check for unusual noises like clicking, grinding, or beeping, which often indicate mechanical failure.
If the drive is making strange noises, it’s best to stop using it immediately to avoid further damage.
7.2 Consult a Professional Data Recovery Service
If the drive is physically damaged and contains critical data, consider contacting a professional data recovery service. These services have specialized equipment and expertise to recover data from failed hard drives, but they can be expensive.
When an old SATA hard drive doesn’t populate in Windows File Explorer, it can be due to a variety of issues, ranging from simple connection problems to more complex hardware or software failures. By following the troubleshooting steps outlined above, you can diagnose the root cause and apply the appropriate fix.
Remember that if the drive shows up in BIOS/UEFI but not in File Explorer, it’s often a matter of partitioning, formatting, or assigning a drive letter. However, if the issue lies in the hardware or data corruption, you may need to use third-party recovery tools or even consult a professional.
About us and this blog
Panda Assistant is built on the latest data recovery algorithms, ensuring that no file is too damaged, too lost, or too corrupted to be recovered.
Request a free quote
We believe that data recovery shouldn’t be a daunting task. That’s why we’ve designed Panda Assistant to be as easy to use as it is powerful. With a few clicks, you can initiate a scan, preview recoverable files, and restore your data all within a matter of minutes.
Subscribe to our newsletter!
More from our blog
See all postsRecent Posts
- How to search folder in file explorer 2025-05-09
- How to search for duplicates in file explorer 2025-05-09
- Finder search not finding files 2025-05-09

 Try lt Free
 Recovery success rate of up to

