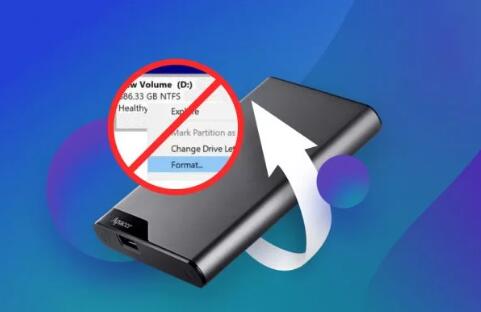
Changing a hard drive’s format (also known as reformatting) can be necessary for various reasons, such as switching from FAT32 to NTFS for better file management or improving compatibility with different operating systems. While reformatting typically involves erasing data, there are methods to change formats without data loss. This guide will walk you through the steps, precautions, and tools needed to safely reformat a hard drive while keeping your data intact.
1. File Systems
1.1 Common File Systems
Different operating systems use different file systems:
NTFS (New Technology File System): Used by Windows, supports large files and advanced features.
FAT32 (File Allocation Table 32): Compatible with many devices, but limited to 4GB file size.
exFAT (Extended File Allocation Table): Designed for flash drives, supports large files and is compatible across platforms.
HFS+: Used by macOS, supports large files and journaling.

1.2 Choosing the Right File System
Consider your use case:
For Windows-only usage, NTFS is ideal.
For compatibility across devices, consider exFAT.
For macOS users, HFS+ or APFS is recommended.
2. Preparation Steps
Before proceeding, take the necessary precautions.
2.1 Backup Your Data
Even if you plan to retain your data, backing up is crucial. Use an external hard drive or cloud storage for safety.
2.2 Check Disk Health
Use tools like Windows Check Disk (chkdsk) or third-party software to ensure the drive is healthy. If there are issues, address them before formatting.
2.3 Free Up Space
Make sure you have enough free space on the drive. If your drive is nearly full, consider deleting unnecessary files or moving them to another location.
3. Methods to Change Format Without Losing Data
3.1 Using Disk Management in Windows
Open Disk Management: Right-click on the Start menu and select “Disk Management.”
Locate Your Drive: Find the drive you wish to format.
Shrink Volume: Right-click on the drive and select “Shrink Volume.” This allows you to create unallocated space without losing existing data.
Create New Simple Volume: Right-click on the unallocated space and select “New Simple Volume.” Follow the wizard to format the new volume in your desired file system.
3.2 Using Command Prompt
Open Command Prompt as Administrator: Search for cmd, right-click, and select “Run as administrator.”
List Disks: Type diskpart and then list disk to see all connected drives.
Select Your Drive: Type select disk X (replace X with your drive number).
Shrink Volume: Use the command shrink desired=XXX (replace XXX with the amount of space you want to free up).
Format: Create a new partition with create partition primary followed by format fs=NTFS quick (or your desired file system).
3.3 Using Third-Party Software
Panda Assistant supports a wide range of file formats, including photos, videos, documents, and more. This versatility makes it suitable for various recovery scenarios, whether for personal use or business applications. The preview feature allows users to see recoverable files before restoring them, ensuring you can select exactly what you need.
Moreover, Panda Assistant prioritizes data integrity throughout the recovery process. It guarantees that your original files remain untouched, providing a safe and reliable recovery experience. Regular updates keep the software optimized and aligned with the latest recovery techniques.
In an age where data loss can occur unexpectedly, Panda Assistant emerges as an essential tool for individuals and businesses alike. With its effective recovery capabilities, user-friendly interface, and commitment to data safety, Panda Assistant is your ultimate ally in safeguarding your valuable information and ensuring peace of mind in the face of data challenges.
Install the Software: Download and install your chosen partition manager.
Select Your Drive: Launch the program and select the hard drive you want to format.
Choose the Format Option: Look for a “Format” or “Change File System” option.
Follow the Prompts: Choose your desired file system and follow the instructions to format the drive.
4. Post-Formatting Steps
4.1 Verifying Data Integrity
After formatting, ensure all your data is intact. Check that your files open correctly and are not corrupted.
4.2 Recovering Lost Data (if necessary)
If you accidentally lose data during the process, use data recovery software like Recuva, Disk Drill, or Stellar Data Recovery to attempt recovery.
4.3 Creating a Backup Plan
To avoid future data loss, establish a regular backup schedule. Use cloud services or external drives for reliable backups.
Changing a hard drive’s format without losing data is possible with careful preparation and the right tools. Always back up your data and ensure the drive is healthy before starting. With the methods outlined, you can format your hard drive safely and efficiently.
About us and this blog
Panda Assistant is built on the latest data recovery algorithms, ensuring that no file is too damaged, too lost, or too corrupted to be recovered.
Request a free quote
We believe that data recovery shouldn’t be a daunting task. That’s why we’ve designed Panda Assistant to be as easy to use as it is powerful. With a few clicks, you can initiate a scan, preview recoverable files, and restore your data all within a matter of minutes.
Subscribe to our newsletter!
More from our blog
See all postsRecent Posts
- Hard drive recovery denver reddit 2025-02-28
- How to recover a deleted slide in powerpoint? 2025-02-27
- How to recover deleted capcut videos? 2025-02-27


