 Try lt Free
 Recovery success rate of up to
Transferring photos from your Canon camera to your computer is essential for backing up your images, editing, and sharing them.
1. Your Canon Camera
Before uploading photos, familiarize yourself with your specific Canon camera model. Canon cameras typically feature different connectivity options, including USB ports and wireless capabilities. Check your camera’s user manual for specifics.
2. Preparing for Transfer
a. Ensure Battery Life
Make sure your camera’s battery is charged. A low battery can interrupt the transfer process and may lead to data loss.
b. Gather Necessary Equipment
You will need:
A USB cable (usually provided with the camera).
A memory card reader (if you’re using this method).
Your computer.
3. Uploading via USB Cable
Step 1: Connect the Camera
Turn off your camera.
Use the USB cable to connect your camera to the computer. Plug one end into the camera and the other into a USB port on your computer.
Step 2: Turn On the Camera
Power on your camera. Your computer should recognize the device automatically.
Step 3: Importing Photos
Windows: Open the File Explorer. Your camera will appear as a new drive. Navigate to the DCIM folder to find your photos. You can drag and drop them to your desired location on your computer.
Mac: Open the Photos app. It should automatically detect your camera. Select the photos you want to import and click the “Import” button.
Step 4: Eject the Camera
Once the transfer is complete, safely eject your camera from the computer. This prevents data corruption.
4. Uploading via Memory Card Reader
Using a memory card reader is often quicker and can save battery life on your camera.
Step 1: Remove the Memory Card
Turn off your camera and remove the memory card. Ensure you’re handling it carefully to avoid data loss.
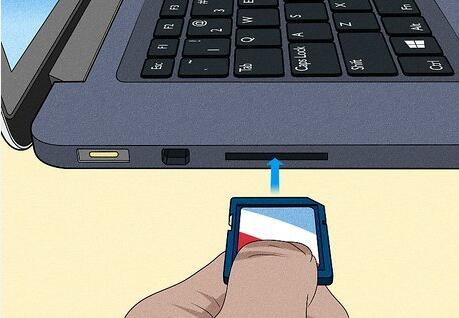
Step 2: Insert the Memory Card into the Reader
Insert the memory card into the card reader and connect the reader to your computer.
Step 3: Accessing the Photos
Your computer will recognize the memory card as an external drive.
Navigate to the DCIM folder to locate your photos. Copy and paste or drag and drop them to your computer.
Step 4: Safely Eject the Card
Once the transfer is complete, eject the memory card from the computer and return it to your camera.
5. Wireless Uploading (Wi-Fi/NFC)
Many Canon cameras feature built-in Wi-Fi or NFC (Near Field Communication) capabilities, allowing for wireless transfers.
Step 1: Enable Wi-Fi on Your Camera
Go to the camera’s settings menu and enable Wi-Fi. Consult your user manual for specific instructions as the process can vary by model.
Step 2: Install Canon Software
Download and install Canon’s software, such as Canon Camera Connect, on your computer. This software can facilitate wireless transfers.
Step 3: Connect to Wi-Fi
Connect your computer to the same Wi-Fi network as your camera. You may need to enter a password or follow on-screen instructions.
Step 4: Transfer Photos
Open Canon Camera Connect on your computer. Select the photos you want to transfer. The software will guide you through the process.
6. Using Image Editing Software
If you plan to edit your photos after transferring, consider using software like Adobe Lightroom, Canon Digital Photo Professional, or other image editing tools. These programs often allow for direct import from your camera or memory card.
7. Troubleshooting Common Issues
a. Camera Not Recognized
Ensure the USB cable is functioning and properly connected.
Check for updates for your operating system or camera firmware.
b. Import Errors
If import fails, check your camera settings and ensure that the photos are stored in the correct format.
c. Slow Transfers
Large files can slow down transfers. Consider transferring smaller batches of photos.
8. Best Practices for Photo Management
Organize Your Photos: Create folders based on dates, events, or themes for easier access.
Backup Regularly: Use external hard drives or cloud storage services to back up your photos.
Format Your Memory Card: After transferring, consider formatting your memory card in the camera to prepare it for future use. This helps prevent data corruption.
About us and this blog
Panda Assistant is built on the latest data recovery algorithms, ensuring that no file is too damaged, too lost, or too corrupted to be recovered.
Request a free quote
We believe that data recovery shouldn’t be a daunting task. That’s why we’ve designed Panda Assistant to be as easy to use as it is powerful. With a few clicks, you can initiate a scan, preview recoverable files, and restore your data all within a matter of minutes.
Subscribe to our newsletter!
More from our blog
See all posts


Recent Posts
- Data recovery salt lake city utah 2025-04-18
- Data recovery sacramento 2025-04-18
- Data recovery miami 2025-04-18