 Try lt Free
 Recovery success rate of up to
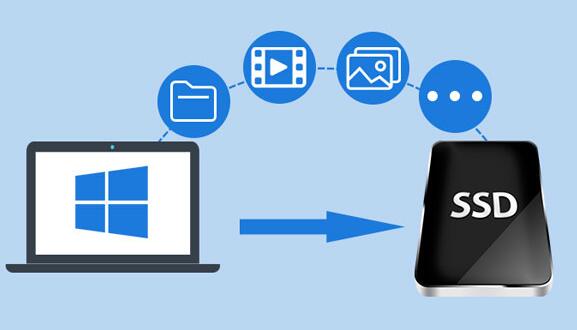
Moving your C drive (the drive where your operating system is installed) to a new SSD involves a process called cloning, which is a direct copy of your entire drive, including all system files, programs, and settings.
SSDs (Solid State Drives) offer several advantages over traditional HDDs (Hard Disk Drives):
Faster boot times: SSDs are significantly faster than HDDs, reducing the time it takes for your computer to start up.
Improved application load times: Programs and games load much quicker on SSDs.
Increased reliability: SSDs have no moving parts, so they are less likely to fail due to physical damage.
Better multitasking performance: SSDs can handle multiple tasks faster, improving overall system performance.
What You’ll Need
New SSD: Ensure it has enough storage capacity to hold all the data from your current C drive.
SATA-to-USB cable or SSD enclosure: This is for connecting the SSD to your computer if it’s a laptop or if you don’t have an extra slot.
Cloning software: Several software options are available for cloning your C drive to an SSD, including:
Macrium Reflect (free version available)
EaseUS Todo Backup
Acronis True Image
Samsung Data Migration (if you’re using a Samsung SSD)
Screwdriver: If you are installing the SSD internally, especially for desktop PCs.
Step-by-Step Guide to Moving Your C Drive to a New SSD
1. Backup Your Data
Before making any changes to your system drive, it’s important to back up your data. This includes:
Personal files, documents, and media
Critical system settings
Application data
You can back up to an external hard drive, cloud storage, or another location on your PC.
2. Check Your SSD Size
Make sure the SSD has enough capacity to hold all the data from your C drive. If your current C drive has a lot of unused space, you can free up space by:
Deleting unneeded files.
Moving large files (such as videos or unused programs) to an external drive.
To check the size of your C drive:
Open File Explorer and navigate to This PC.
Look at the properties of your C drive to see how much space you are currently using.
3. Connect the SSD to Your Computer
For desktops:
Open your PC case using a screwdriver.
Connect the SSD to an available SATA port using a SATA cable and connect the power supply.
For laptops:
Use a SATA-to-USB adapter to connect the SSD externally, or if your laptop has a second drive bay, you can install the SSD directly.
4. Download and Install Cloning Software
Choose cloning software based on your preference or the SSD manufacturer. For example, if you’re using a Samsung SSD, Samsung Data Migration software is an excellent choice. Otherwise, Macrium Reflect or EaseUS Todo Backup are well-regarded for their reliability and ease of use.
Macrium Reflect:
Download and install the software.
Open the program and select the option to clone a disk.
Select your source disk (the current C drive) and destination disk (the new SSD).
Click “Next” and follow the prompts to begin the cloning process.
5. Cloning the C Drive
Once the software is installed, follow these general steps to clone your C drive:
Open the cloning software and select the option to clone a disk.
Choose your current C drive as the source disk.
Select your SSD as the destination disk.
If necessary, you can resize the partitions on the new SSD to ensure they fit properly. This is especially useful if you’re moving to an SSD with less capacity than your current HDD.
Start the cloning process. Depending on the size of your C drive and the speed of your connection (SATA, USB), this process can take anywhere from 30 minutes to a few hours.
Make sure the SSD is correctly formatted as NTFS (New Technology File System) if you’re using it as a system drive in Windows.
6. Verifying the Cloning Process
Once the cloning process is complete, you can check the SSD to ensure all your files and data have been successfully copied. Open File Explorer, and you should see the new SSD with the same partitions and files as your original C drive.
7. Replace Your Old Drive (Optional)
If you want to replace your old drive with the new SSD internally, follow these steps:
Power off your computer and unplug it.
Remove the old HDD or current C drive if necessary.
Install the new SSD into the same slot.
Reconnect the SATA and power cables.
8. Set the SSD as the Boot Drive in BIOS
Once the SSD is installed, you’ll need to configure your BIOS (Basic Input/Output System) to boot from the SSD. To do this:
Restart your computer and enter the BIOS by pressing the designated key during startup (usually F2. F12. DEL, or ESC).
Navigate to the Boot Menu or Boot Order settings.
Select the new SSD as the primary boot device.
Save the changes and exit the BIOS.
Your computer will now boot from the SSD, significantly improving boot times and overall performance.
9. Optimize Your New SSD (Optional but Recommended)
After cloning and booting from your new SSD, you may want to optimize it for better performance and longevity:
Enable TRIM: TRIM helps improve the performance and longevity of your SSD by allowing the operating system to inform the SSD which blocks of data are no longer in use.
To check if TRIM is enabled, open Command Prompt and type: fsutil behavior query DisableDeleteNotify. If it returns “0”, TRIM is enabled.
Disable disk defragmentation: SSDs do not benefit from defragmentation, and running it can reduce the lifespan of your SSD.
To disable, search for “Defragment and Optimize Drives” in Windows, then turn off scheduled optimization for the SSD.
Move temporary files to a secondary drive: You can move large files and directories such as page files and system restore points to another drive if you want to free up space on your SSD.
10. Test Your New SSD and Dispose of Your Old Drive
Once your new SSD is set up and running smoothly, test the system for a few days to ensure everything is working correctly. You may want to perform speed tests to verify that you are getting the expected performance improvement. Several free utilities like CrystalDiskMark can help you benchmark the read and write speeds of your SSD.
Finally, if you plan to dispose of or repurpose your old HDD:
Wipe the drive using a secure method to prevent recovery of sensitive data.
Reformat the drive for additional storage, or convert it to an external drive using an HDD enclosure.
Cloning and moving your C drive to a new SSD is a relatively straightforward process that yields significant performance gains. SSDs can vastly improve system responsiveness, reducing load times for both your operating system and applications. Following the steps outlined above, you can safely and effectively move your C drive, ensuring minimal downtime and preserving your data.
About us and this blog
Panda Assistant is built on the latest data recovery algorithms, ensuring that no file is too damaged, too lost, or too corrupted to be recovered.
Request a free quote
We believe that data recovery shouldn’t be a daunting task. That’s why we’ve designed Panda Assistant to be as easy to use as it is powerful. With a few clicks, you can initiate a scan, preview recoverable files, and restore your data all within a matter of minutes.
Subscribe to our newsletter!
More from our blog
See all posts


Recent Posts
- Data recovery salt lake city utah 2025-04-18
- Data recovery sacramento 2025-04-18
- Data recovery miami 2025-04-18